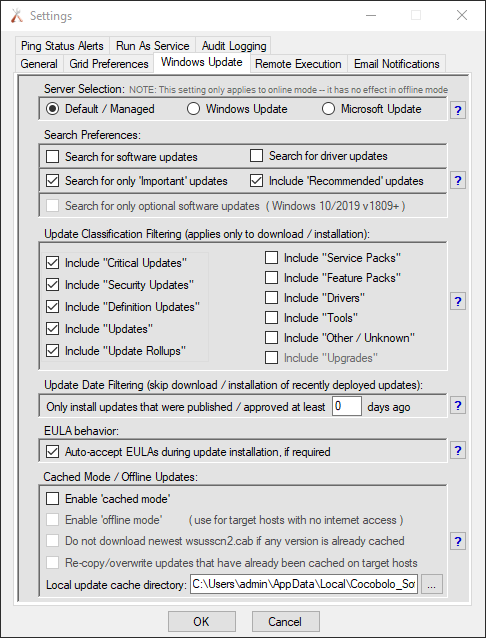
Currently BatchPatch provides you with three different options to choose from for ‘Server Selection’ in the BatchPatch settings window (‘Tools > Settings > Windows Update > Server Selection’)
- Default / Managed
- Windows Update
- Microsoft Update
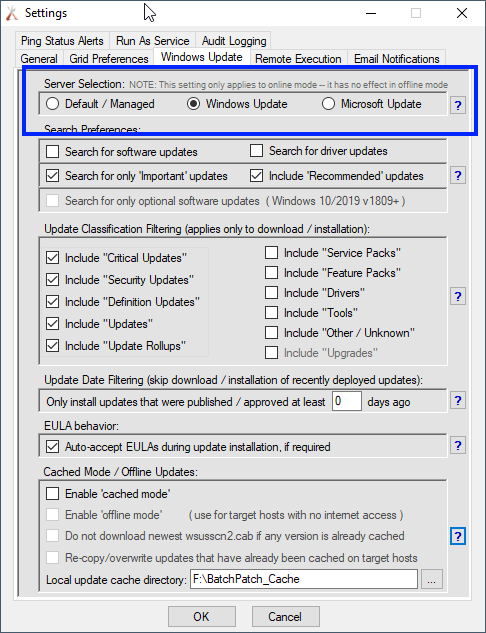
The ‘Server Selection’ field enables you to select which Windows Update source server target computers will use to perform their Windows Update searches and downloads.
Default / Managed: Uses the target computer’s existing configuration to determine where to search for updates.
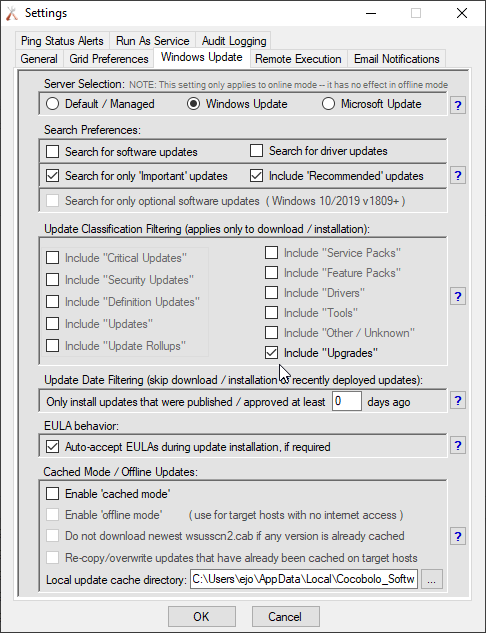
Windows Update: Bypasses the target computer’s configuration and searches for updates on Microsoft’s public server. Includes only Windows updates.
Microsoft Update: Bypasses the target computer’s configuration and searches for updates on Microsoft’s public server. Includes Windows updates AND updates for other Microsoft products. Before using Microsoft Update, target servers must be opted-in to the service. See ‘Actions > Windows Updates > Opt-in…’
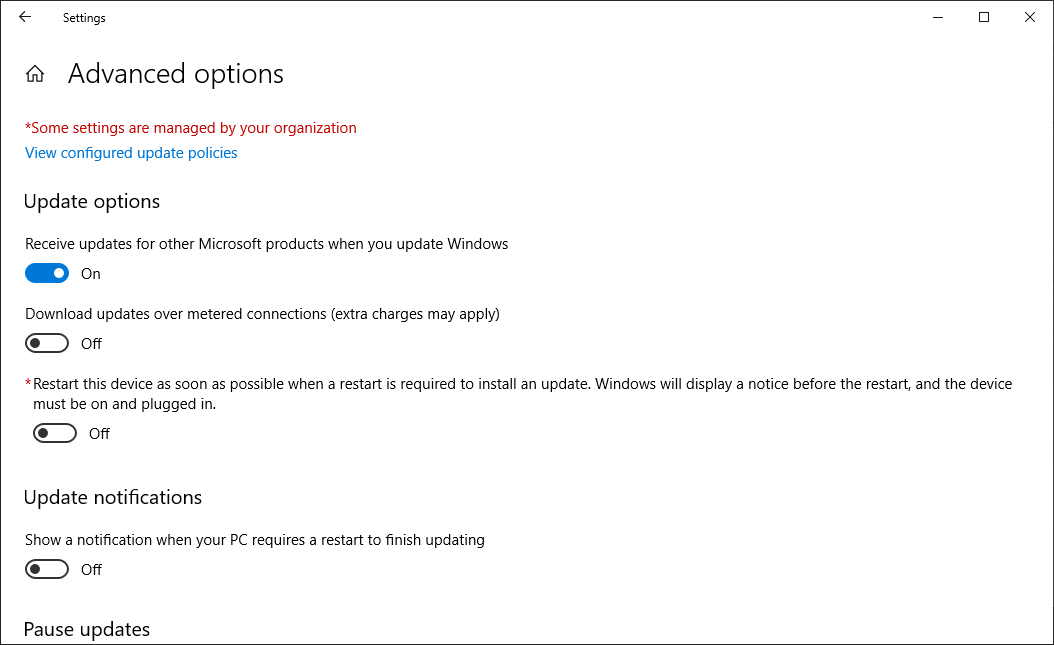
In general, Windows stores the Windows Update configuration in the registry. When you first install a fresh copy of Windows, the default behavior is for it to use ‘Windows Update’ to check for updates. As an end-user on a given computer, in the Windows Update control panel you are also provided with an option to ‘Receive updates for other Microsoft Products when you update Windows‘. This option is equivalent to using ‘Microsoft Update’ in BatchPatch. An example of this settings dialog is below:

WSUS, Group Policy, and Underlying Registry Values
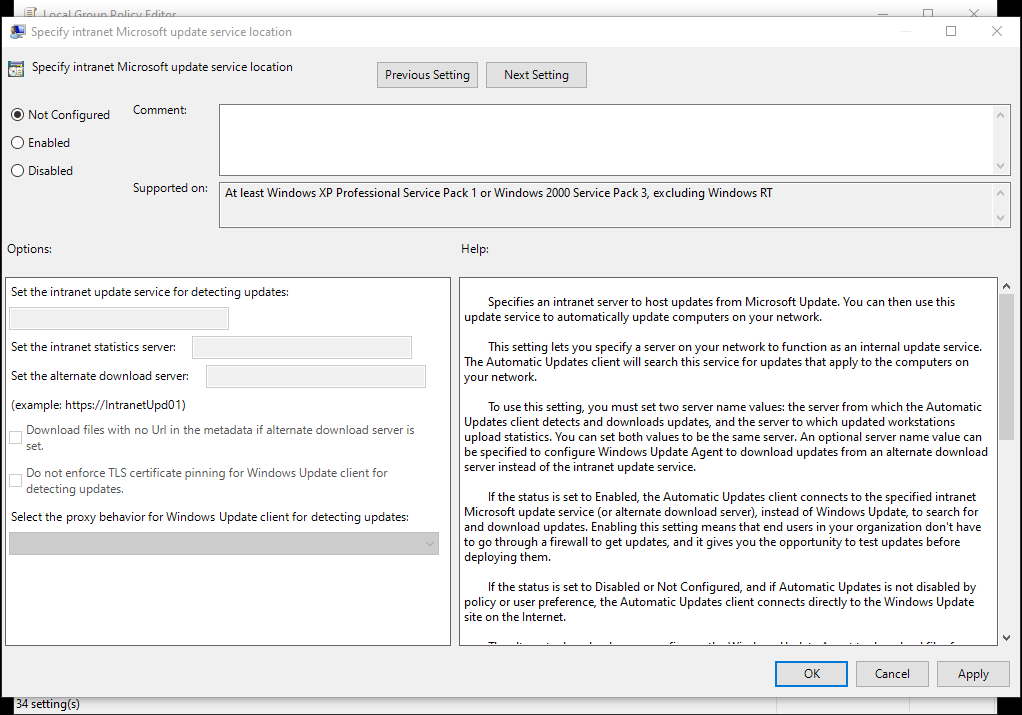
If you are using a local WSUS server in your environment, then you will have previously configured Group Policy settings on your domain, instructing target computers to utilize the local WSUS server. Note, Group Policy (or Local Policy, or its corresponding registry modifications) is actually the only mechanism that Windows provides for specifying your own update server. The Windows Update control panel GUI only lets you choose ‘Windows Update’ or ‘Microsoft Update’, so any time a local WSUS server is being used, Group Policy will have to be used to configure target computers to point to that particular WSUS. That said, it’s important to understand that Group Policy itself is really just a mechanism for controlling registry keys/values on target computers. That is, any time you create a Group Policy in your domain, any computer that receives the Group Policy settings will get certain registry keys/values created or modified. It’s those underlying registry values that actually affect/control the behavior of the particular computer. So, to be clear, Group Policy is a mechanism for managing all kinds of settings in Windows computers that are joined to a domain. The actual settings themselves are constructed of registry keys and values. Every Group Policy setting has one or more underlying registry values that it controls. So if you create or change a domain Group Policy, various registry keys/values are created or modified on computers that receive the Group Policy, and consequently the behavior of Windows is controlled/affected by which registry keys and values exist on a given computer. Therefore it’s actually possible to effectively modify the behavior of a given computer by directly editing the registry without touching Group Policy. However, it’s very important to recognize that if you modify a registry value that is being controlled by Group Policy, whatever changes you make to that registry value will get overwritten as soon as the Group Policy settings are refreshed on that computer.
BatchPatch, SCCM, and WSUS
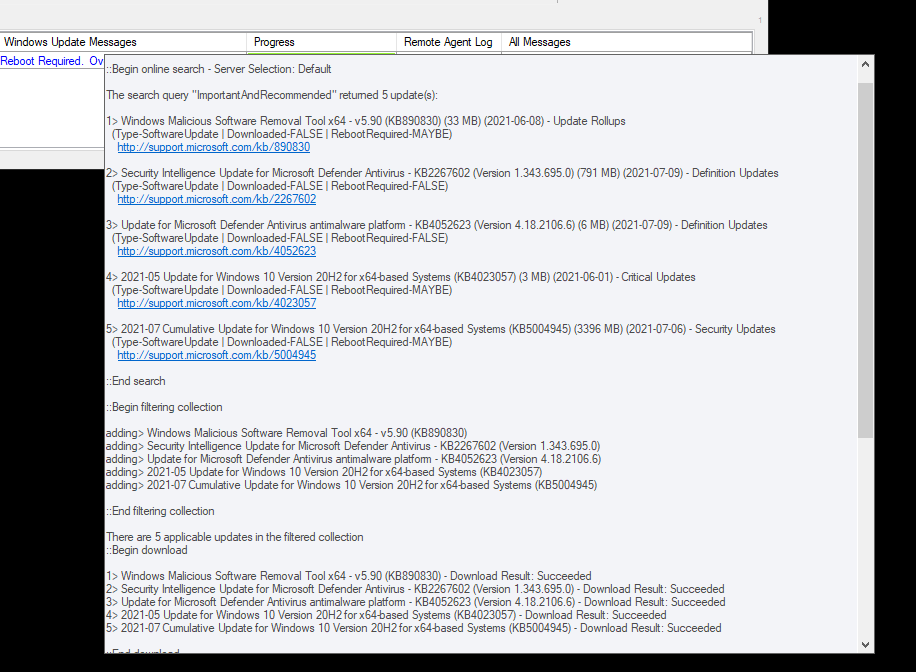
The most common case where some of our users need or want to have BatchPatch use a different WSUS that is separate from the primary WSUS in a given environment, is when their existing WSUS is an SCCM-controlled WSUS. For users who currently have their machines getting updates through SCCM, their SCCM infrastructure will include a WSUS server. Target computers will have a Group Policy setting that point them to the SCCM WSUS server, and this is how they’ll receive their updates. The problem for using third-party Windows Update tools like BatchPatch is that once a WSUS server has been configured as part of an SCCM deployment, that WSUS server will no longer be usable for any non-SCCM update mechanisms. You’ll notice that if you have BatchPatch set to ‘Default / Managed’, and you then use BatchPatch to perform a check for available updates on a target computer that is configured (via Group Policy, local policy, or direct registry edits) to use the SCCM-WSUS, BatchPatch will always return that there are no available updates, even if the SCCM console is actually showing that there are updates available.
Therefore, if you want to use BatchPatch in an existing SCCM environment, then your options are to either set the BatchPatch server selection to ‘Windows Update’ or ‘Microsoft Update’, OR you could configure a separate local WSUS server that is *not* attached to the SCCM infrastructure in any way. Then if you want BatchPatch to use a specific WSUS server that is *different* from your standard/default WSUS server as configured in your Group Policy settings for the domain, then you need to either update the Group Policy settings for target computers to point to the separate WSUS server, or you can directly modify the registry of target computers, temporarily, in order to point them to the separate WSUS server for the time that you are using BatchPatch.
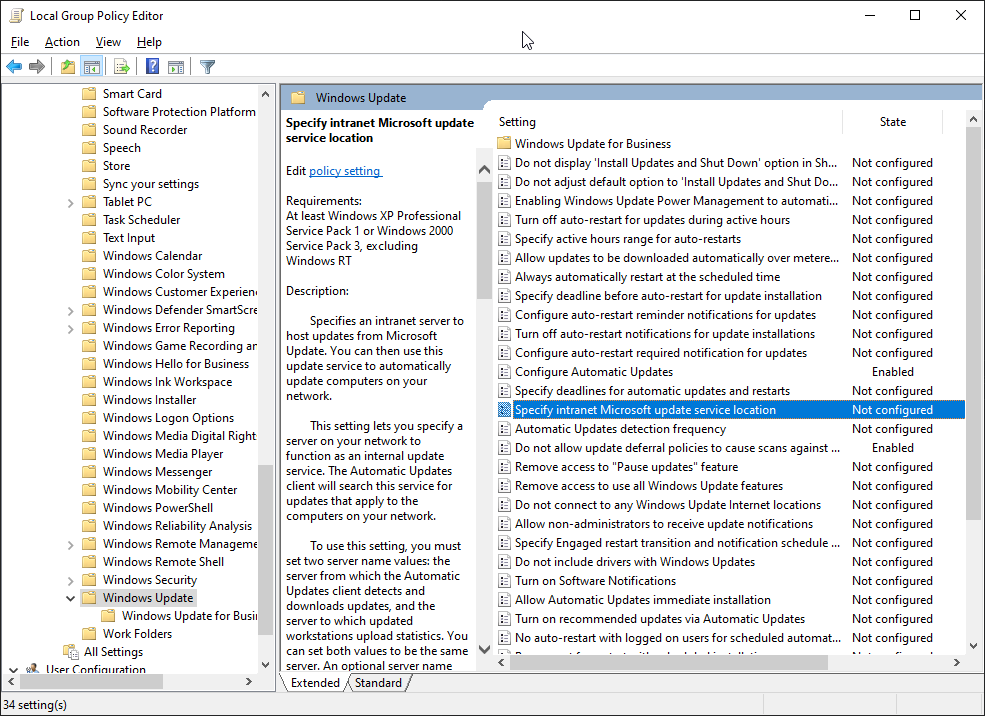
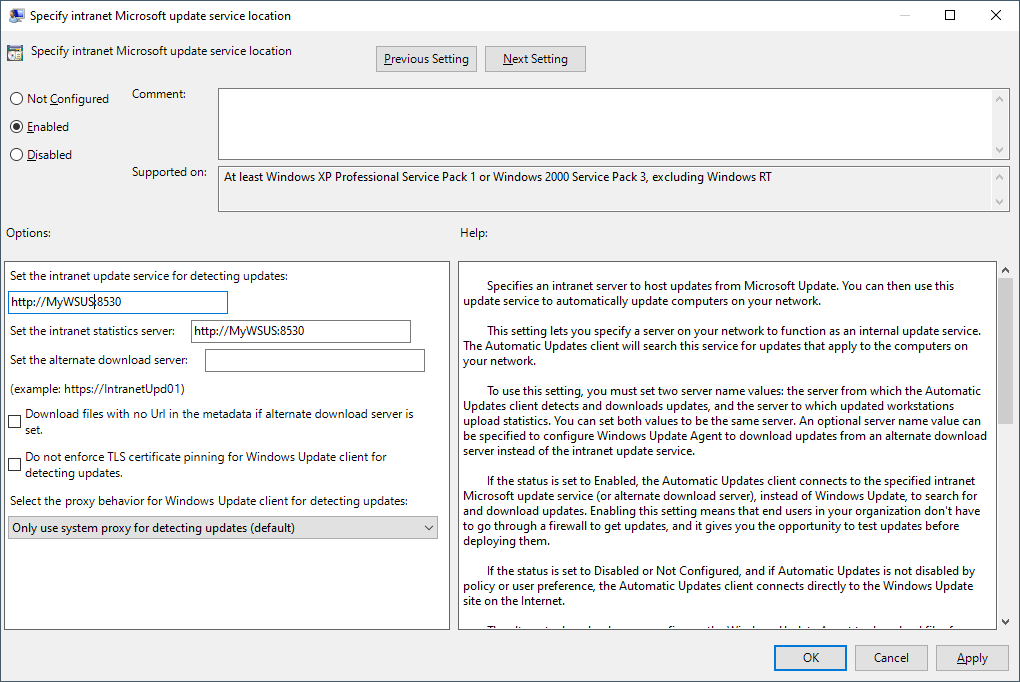
The particular Group Policy setting that needs to be modified is ‘Specify intranet Microsoft update service location‘ under ‘Computer Configuration > Administrative Templates > Windows Components > Windows Update‘. A typical configuration is shown in my screenshot below, where MyWSUS is the name of my WSUS server. 8530 is the default http port for WSUS versions 6.2 (Windows Server 2012) and newer.

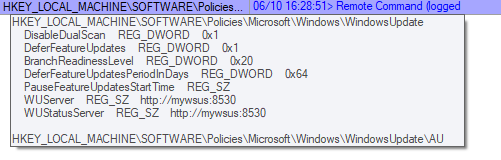
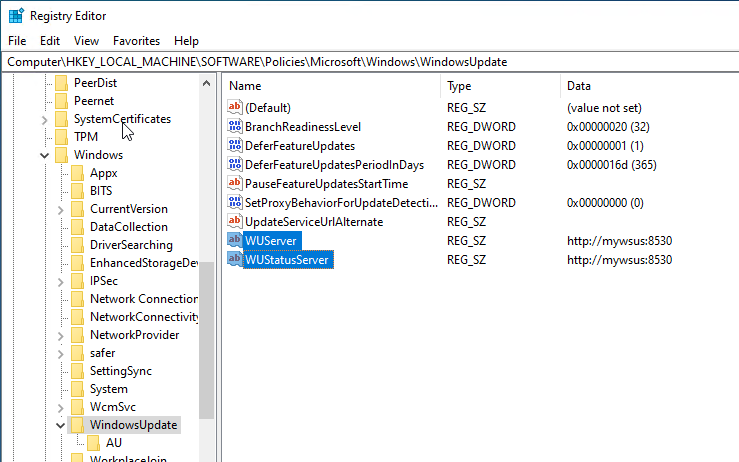
The registry values that correspond to the “intranet update service” (WUServer) and “intranet statistics server” (WUStatusServer) are highlighted in the screenshot below. They will be found in the registry of computers that have the ‘Specify intranet Microsoft update service location‘ Group Policy setting applied. The registry location is HKEY_LOCAL_MACHINE\SOFTWARE\Policies\Microsoft\Windows\WindowsUpdate:
Specifying a separate WSUS just for BatchPatch Actions
Realistically, if your goal is to use BatchPatch in an existing SCCM environment, and for whatever reason you can’t or don’t want to have BatchPatch point to ‘Windows Update’ or ‘Microsoft Update’, you would have to then create a new/separate WSUS server that is just for use by BatchPatch (and any other non-SCCM update tools). While you could then manually update Group Policy, temporarily, on certain servers, in practice this could be difficult or annoying for various reasons. It makes more sense to just manually update the Windows Update registry settings on desired target computers to point those computers to the alternate WSUS, then perform your BatchPatch actions, and then reset the registry values or just wait for Group Policy to refresh on its own (it will refresh automatically after reboot, after logon, or at 90 minute intervals throughout the day without a reboot).
One way to do accomplish this from BatchPatch is to use BatchPatch to execute a “pre” and “post” command to update the WUServer and WUStatusServer registry values before and after using BatchPatch to check for or download/install updates.
Caveats: Really there is just a single potential issue to keep in mind, which is that you won’t know when Group Policy on a given target computer could automatically refresh. If you update the WUServer registry value to point to an alternate WSUS server, and then you start using BatchPatch on a given target computer, it’s conceivable that the registry value could be auto-updated back to the original setting by a Group Policy refresh while you are still using BatchPatch. This shouldn’t be an issue if it occurs while a BatchPatch action is executing, but if the setting gets reverted without you realizing, and then you perform some other BatchPatch action, the target WSUS server would be different than you think for that subsequent BatchPatch action. I’d say that overall the “risk” here is not significant. The Group Policy refresh isn’t going to be happening constantly, but according to Microsoft can occur in regular intervals of 90 minutes by default. The best way to ensure that this does not become an issue for you is to simply execute your “pre” task before each BatchPatch Windows Update action/command that you perform on target computers.
BatchPatch “Pre” Command to Update WUServer and WUStatusServer Registry Values on Target Computers
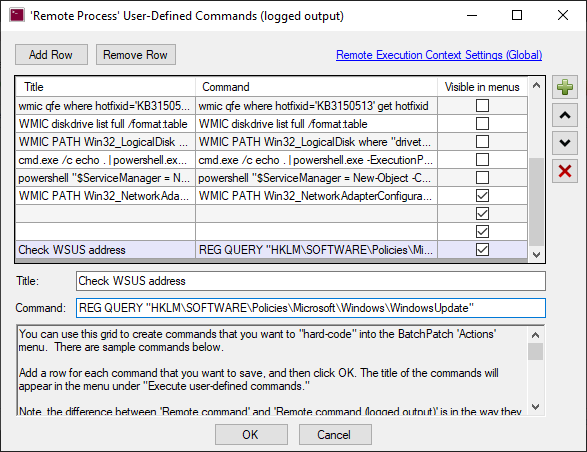
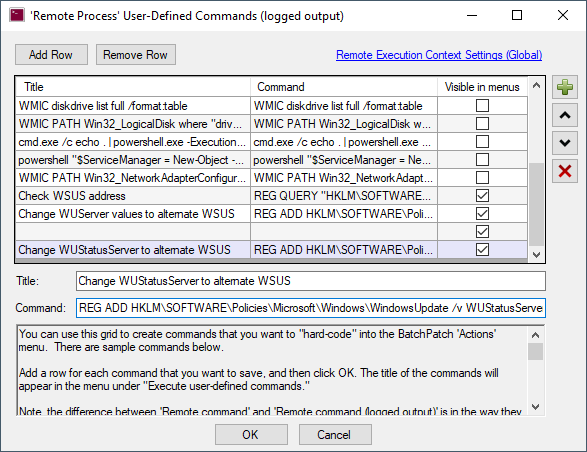
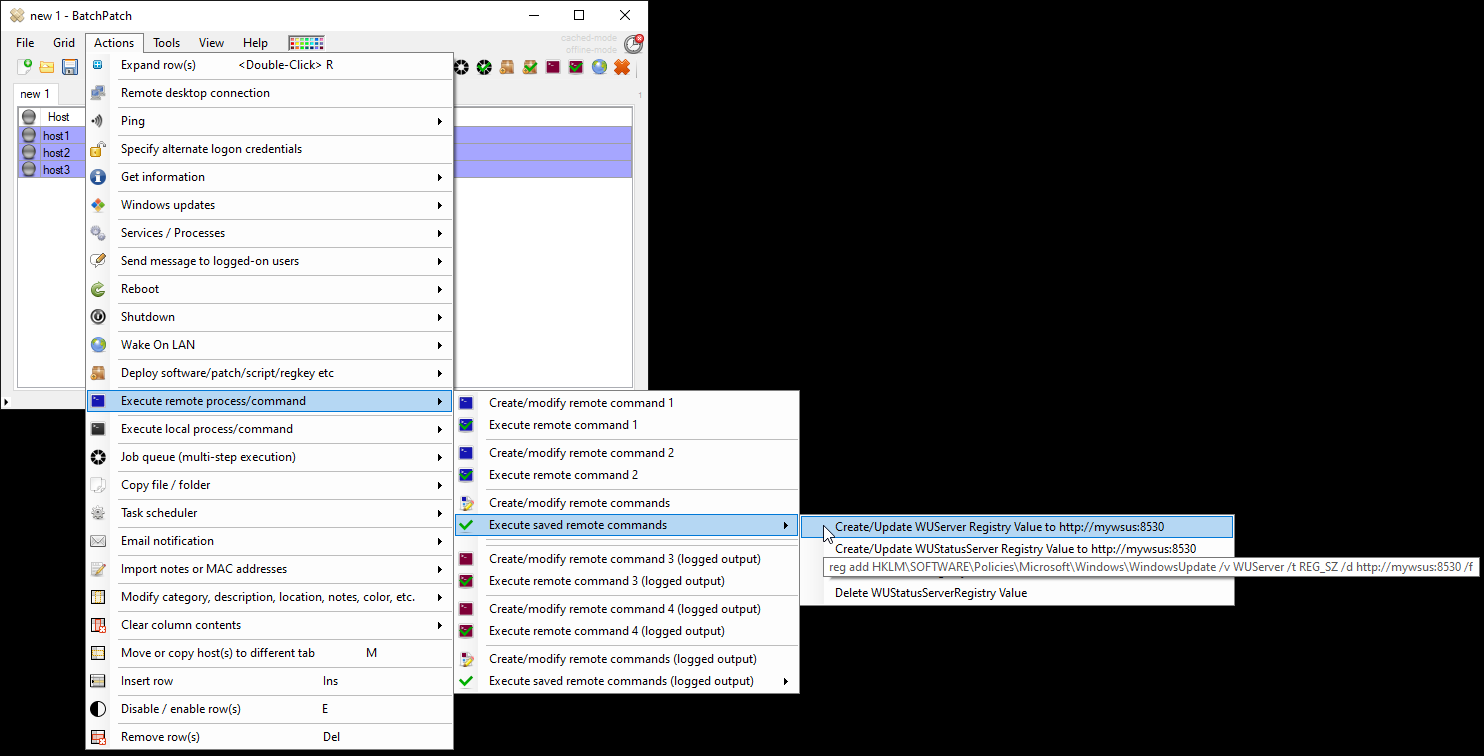
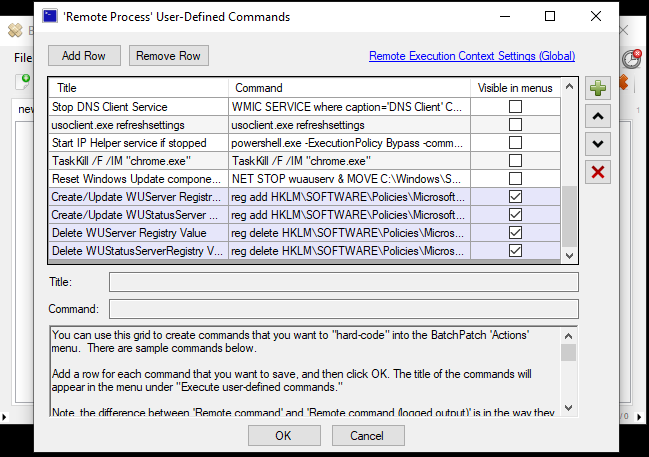
In the screenshot below you can see that I have created 4 command under ‘Actions > Execute remote process/command > Create/modify remote commands‘
Create/Update WUServer Registry Value to http://mywsus:8530
reg add HKLM\SOFTWARE\Policies\Microsoft\Windows\WindowsUpdate /v WUServer /t REG_SZ /d http://mywsus:8530 /f |
Create/Update WUStatusServer Registry Value to http://mywsus:8530
reg add HKLM\SOFTWARE\Policies\Microsoft\Windows\WindowsUpdate /v WUStatusServer /t REG_SZ /d http://mywsus:8530 /f |
Delete WUServer Registry Value
reg delete HKLM\SOFTWARE\Policies\Microsoft\Windows\WindowsUpdate /v WUServer /f |
Delete WUStatusServerRegistry Value
reg delete HKLM\SOFTWARE\Policies\Microsoft\Windows\WindowsUpdate /v WUStatusServer /f |
You can use commands like the ones above to execute “pre” and “post” commands in BatchPatch. Though, rather than delete the registry values in your case you might want to set them back to whatever they were originally set to by your Group Policy settings. Also in many cases it might be fine to never run a “post” command at all, and instead just let Group Policy automatically refresh on its own when you’re done with your BatchPatch duties, especially if your BatchPatch duties will include rebooting target computers since a reboot will initiate a Group Policy refresh when the computer comes back online. Figure out what works best in your environment for your needs. Even if you don’t initiate a reboot, the Group Policy will be automatically refreshed within 90 minutes.
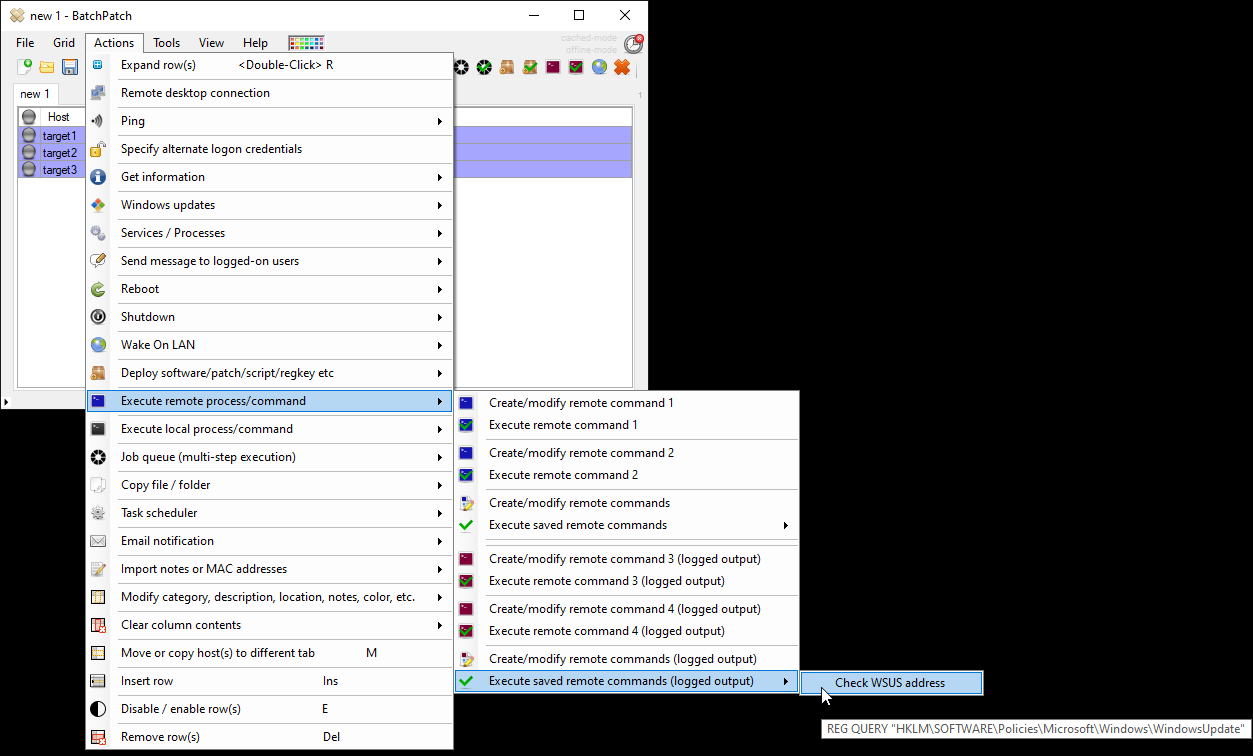
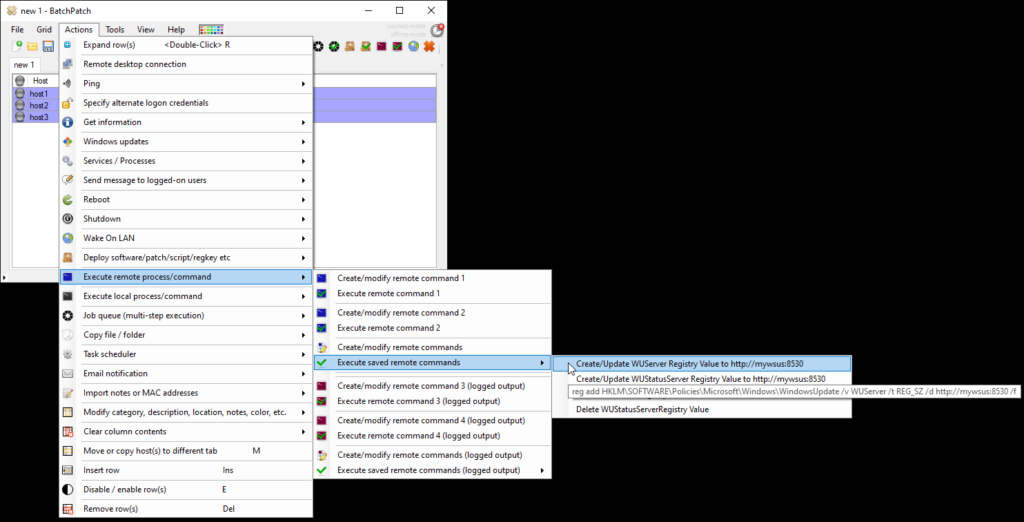
“Pre” and “post” commands can be run by selecting the desired target hosts in the BatchPatch grid and using ‘Actions > Execute remote process/command > Execute saved remote commands‘
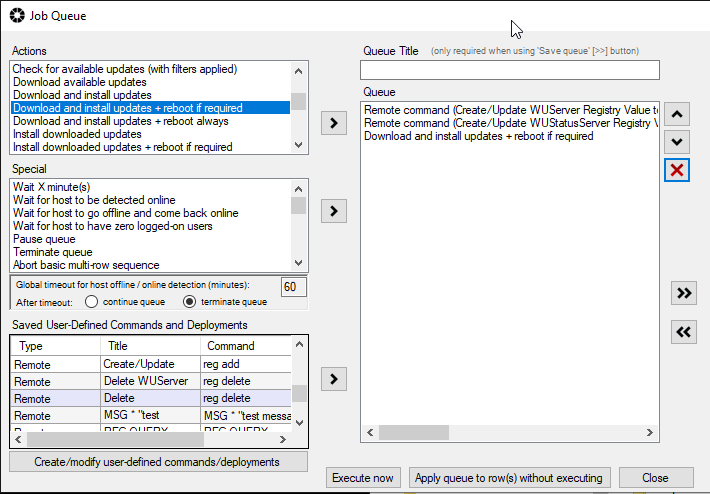
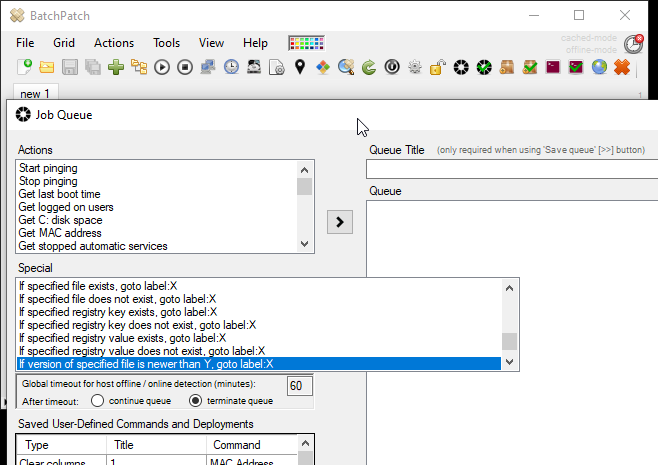
Alternatively you could create a Job Queue that automatically executes your “pre” and/or “post” commands before and after various Windows Update actions. For example, see below for one possible Job Queue idea. To have this job queue perform as desired/expected, make sure BatchPatch server selection is set to ‘Default / Managed’. Then when you run the queue it will update the WUServer and WUStatusServer registry values on the target machine before initiating the Windows Update command, so when the Windows Update action runs it will use the WUServer and WUStatusServer values that you inserted, thereby enabling you to utilize a different WSUS, temporarily. Here is one example of how your job queue could look: