You can use BatchPatch to upgrade your target computers from Windows 10 to Windows 11 by following the process outlined below. For this example I upgraded from a new Windows 10 22H2 installation to a Windows 11 24H2 installation, but the process should generally work for any release of Windows 10 to 11, and you can perform the deployment on numerous target machines simultaneously.
-
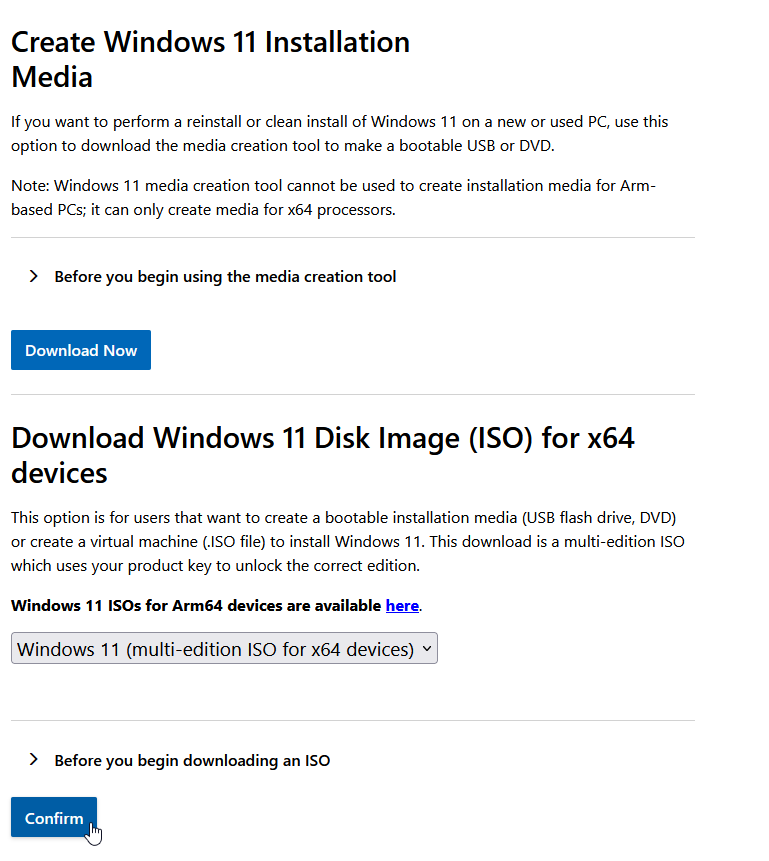
Obtain the Windows 11 ISO installation media from Microsoft
At the time of this writing, you can obtain the Windows 11 ISO from https://www.microsoft.com/en-us/software-download/windows11. In the past if you wanted an ISO file you would first have to download the Windows Media Creation Tool first (also available from the same link), and then you could run the media creation tool to obtain the ISO, but now they also have a direct link for the ISO file, which makes the process quicker and simpler.
-
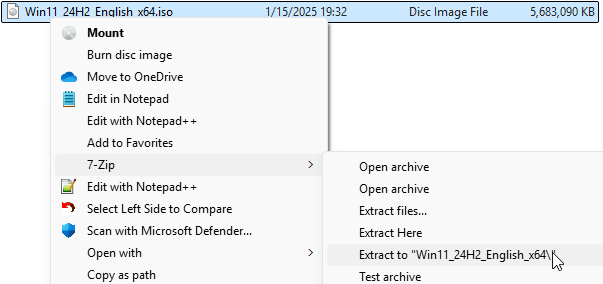
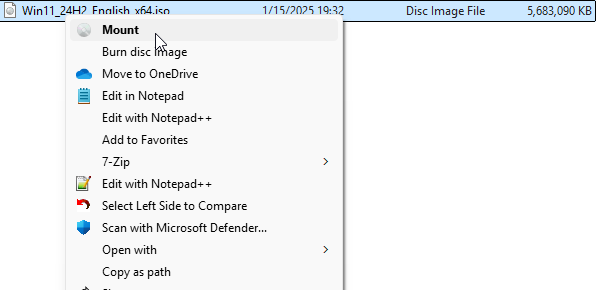
Extract the contents of the ISO file to a folder
To perform the extraction you can either use a tool like 7-zip to directly extract the contents,
or you can instead mount the ISO in Windows by browsing to the file, right-clicking on it, and then selecting the Mount option.
-
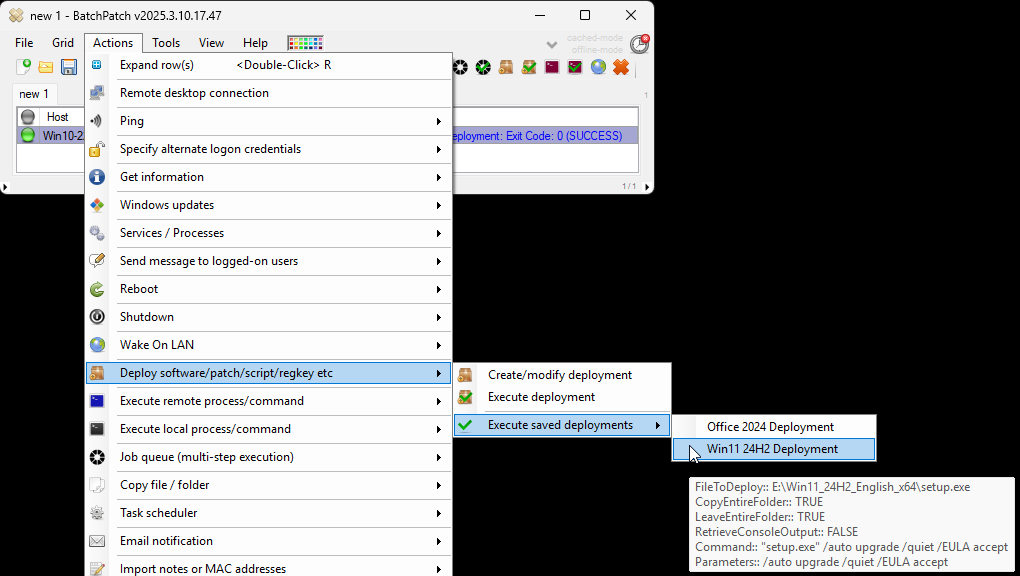
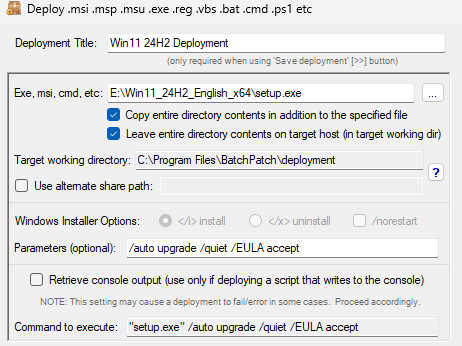
Create the BatchPatch deployment
by selecting the desired target computers in the grid, and then clicking on Actions > Deploy > Create/modify deployment….
Click on the … button to browse to the location of your setup.exe file, which will be inside of the folder where you extracted the Windows 11 ISO contents.
Next, check the two boxes below that field to Copy entire directory and Leave entire directory.
The Target working directory is where BatchPatch will copy the installation files to on the target computer. In this case since we have to use the setting to Leave entire directory, you could change this location if you want. The reason we have to leave the entire directory at the end of the deployment is because Windows will still need it to complete the setup process when the machine is rebooted. Once the target computer has rebooted and completed the Windows 11 setup process, you may delete the contents of the directory.
Lastly, make sure your Parameters field is identical to mine. It should contain the following text:/auto upgrade /quiet /EULA accept
-
Save and execute the deployment
At this point you can save the deployment configuration with the double-right-arrow >> button. If you want to execute the deployment immediately on the selected target hosts in the grid, click Execute now in the deployment configuration window. Alternatively if you save the deployment for execution at a later time, you’ll be able to execute it directly from the Actions menu by selecting the desired target hosts in the grid and clicking on Actions > Deploy > Execute saved deployments