Create a custom job queue
- Let’s start by creating our custom job queue. Select ‘Actions > Job Queue > Create/modify job queue‘
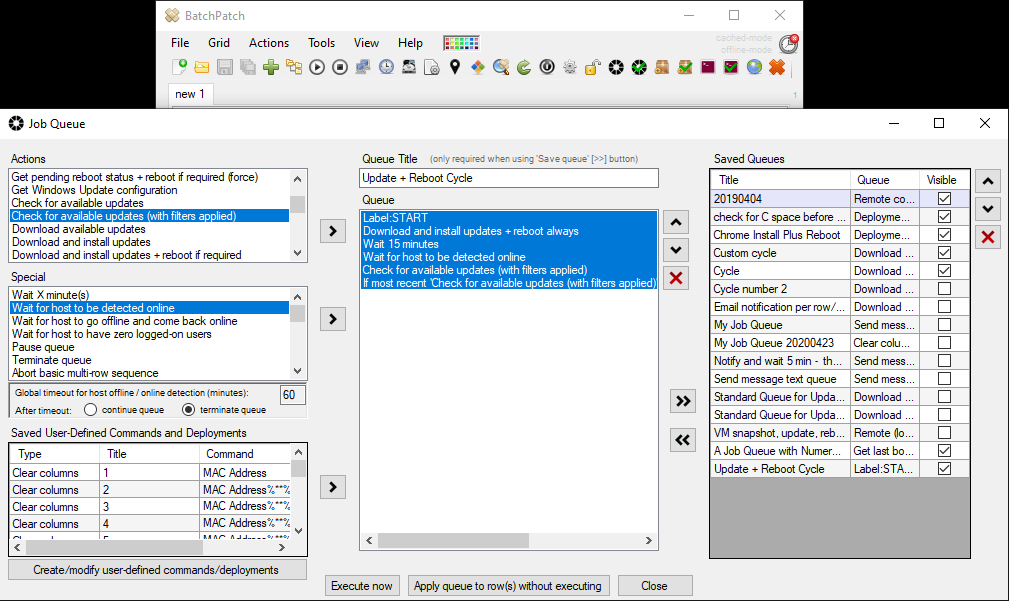
- In the Job Queue window, create your desired queue. In this case I have created a queue to execute an update + reboot cycle, indefinitely, until there are no more updates available to download/install. My queue is as follows:
Label:START
Download and install updates + reboot always
Wait 15 minutes
Wait for host to be detected online
Check for available updates (with filters applied)
If most recent 'Check for available updates (with filters applied) found any updates, goto label:START

- Give the queue a title (mine is ‘Update + Reboot Cycle‘), and then click the double-right arrow to save it.
- Now that our custom queue has been created and saved, we can setup our scheduled task. Highlight the rows in the grid that you want the scheduled task to apply to. Next, click on ‘Actions > Task scheduler > Create/modify scheduled task‘
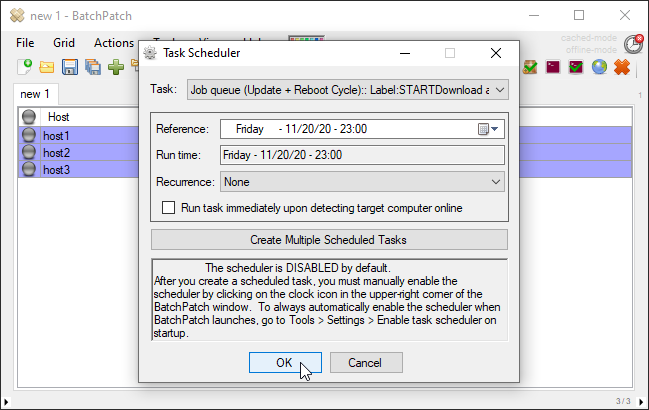
- In the Task Scheduler window, from the Task drop-down menu find the job queue that you created, and then select it. Next, set the run date and time. You’ll do this by modifying the ‘Reference’ datetime picker. Optionally select a recurrence option. Then click OK.
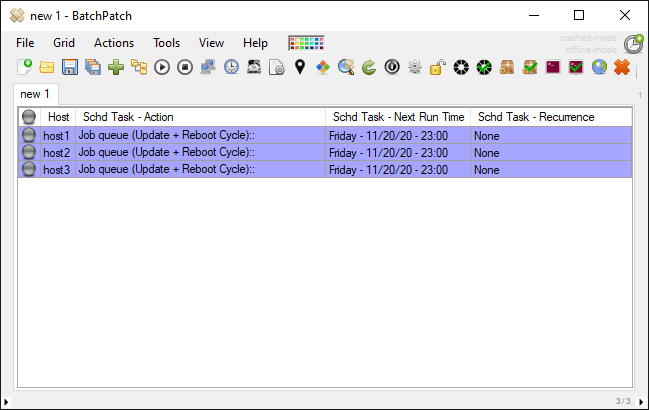
- The only thing left to do now is make sure that the task scheduler is enabled. In the upper-right corner of the BatchPatch window you’ll see a small clock/timer icon. If it’s red, it’s disabled. If it’s green, it’s enabled. Click the icon to toggle it from enabled to disabled and vice versa. If it’s disabled, no scheduled tasks will be executed at their configured run times, so make sure it’s enabled if you want your tasks to execute.

- If you need/want this grid’s scheduled tasks to execute without BatchPatch having to be open and/or without the computer needing to be logged-on, you can send the grid to the BatchPatch service instance. In this case, it won’t matter if your task scheduler icon is green or red (enabled or disabled) in the current instance of BatchPatch because in the service instance of BatchPatch, the task scheduler is always on/enabled and cannot be turned off or disabled. To send the grid to the BatchPatch service instance, right-click on the tab header and select ‘Send grid to service instance‘, as illustrated in the screenshot below.
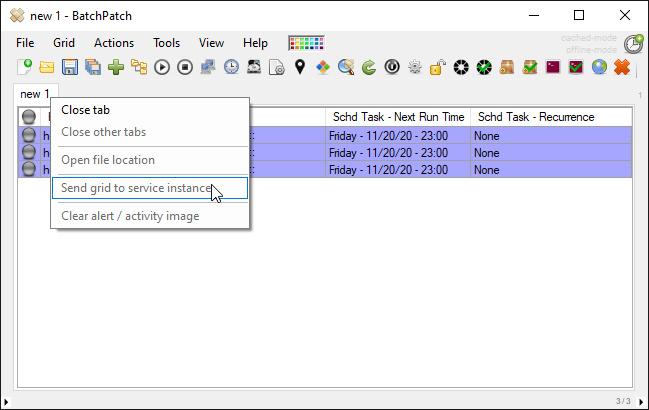
If the ‘Send grid to service instance‘ option is grayed out like it is in my screenshot, it means that the BatchPatch service instance is not installed. If you would like to install it, follow the instructions in this posting: Running BatchPatch as a Service