When a systems administrator is performing a maintenance operation on end-user computers, one of the things that can really help significantly is being able to notify any currently logged-on users of any impending actions that are about to occur. Even if it’s a late-night or early-morning maintenance window, you never really know who might actually be working on the computer at any given time, and even though you likely would have already sent numerous emails during the days/weeks leading up to the maintenance to notify the users of the upcoming maintenance window, inevitably the end-users either disregard these emails in the first place, or they forget about them until it’s too late. They end up finding that their computer is updating and/or rebooting right before their eyes, unexpectedly, while they are working on a very important document.
BatchPatch provides a couple of basic ways to notify logged-on users of impending actions to their computers. Below I’ll show you how to use these to make sure your end-users don’t get surprised when you reboot their machines.
Method 1: Send message to logged-on users
- This method actually utilizes the Windows built-in MSG command to send any message to the logged-on users of target computers. The only limitation here is that the message cannot exceed 255 characters. Highlight the target hosts in the grid, then select ‘Actions > Send message to logged-on users > Create/modify messages‘

- In the window that appears (see screenshot above), enter your message text, and optionally if you want the message to automatically close after X seconds, you can tick the appropriate box and specify a value for X. However, for most situations it’s usually best to leave the message on the screen. This way the end user will be more likely to see the message without missing it. When the logged-on user of the target computers sees the message, he/she will be able to close it.
- If you want to save the message for repeat usage at a later time/date, or if you want to incorporate the notification into a BatchPatch job queue, so that you can automate a sequence of events that includes an end-user notification, then make sure to fill in the ‘Title’ field, and then click on the double-right-arrow button to save the message for future use.
- At this point you’re ready to send the message. If you want to send it now, click on ‘Send message now‘. However, if you want to send it later, make sure it has been added to the ‘Saved Messages’ grid on the right, and then close the window. Once you’ve done that you can send the message at any time by selecting it from the Actions menu, as illustrated in the screenshot below.

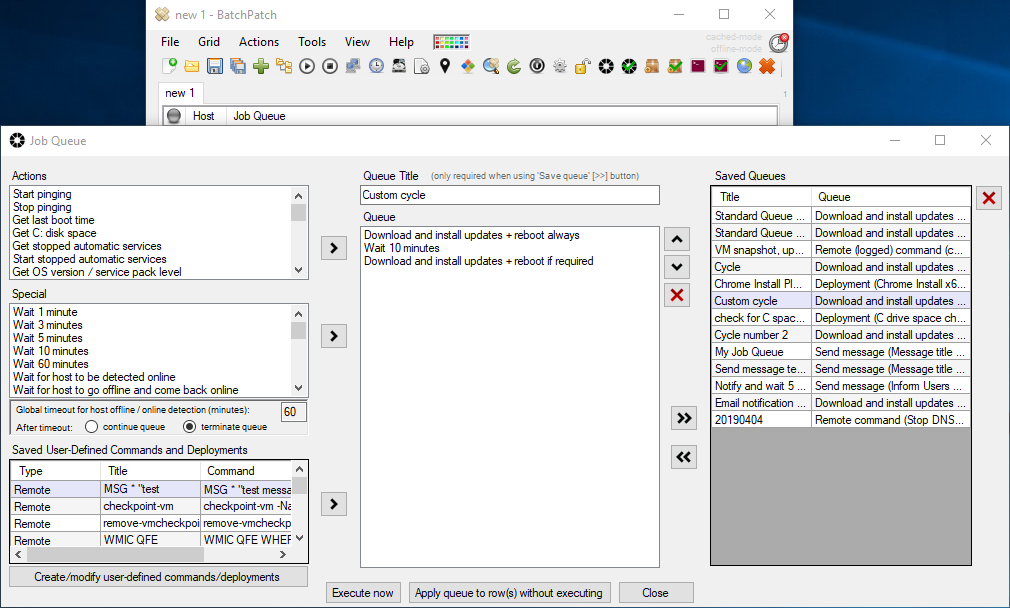
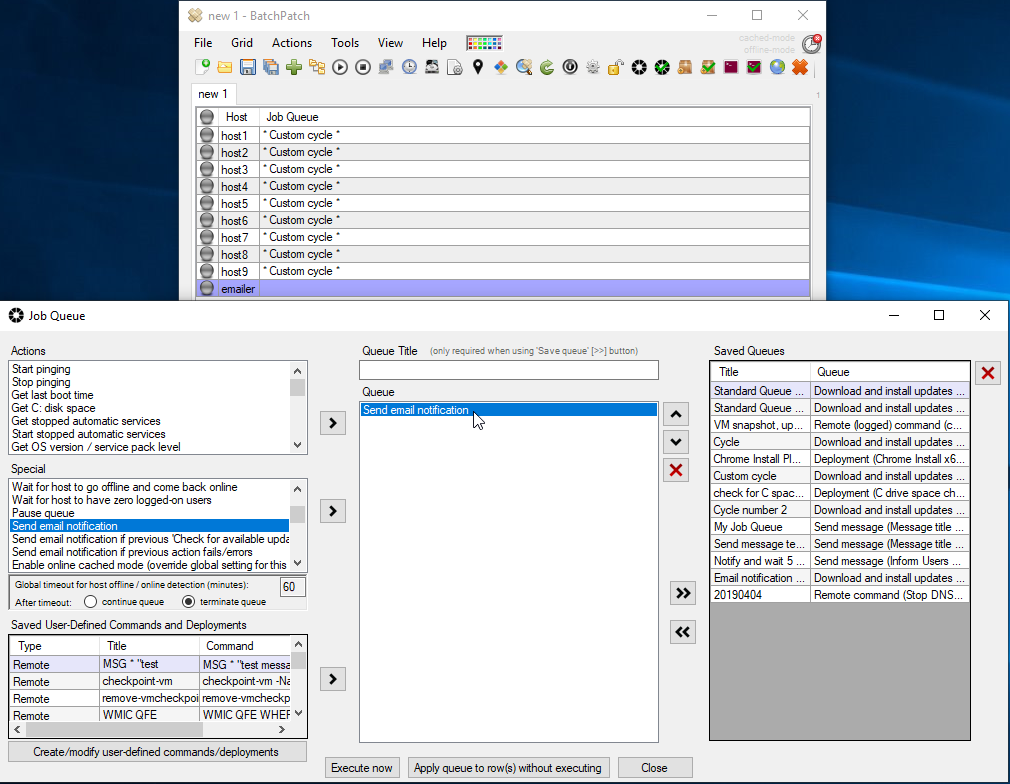
- If you want to add your saved message to a job queue at some point, you can do that by selecting it from the ‘Saved User-Defined Command and Deployments’ grid that appears in the lower-left portion of the job queue window. It will be listed as ‘Type’ ‘Send message’.

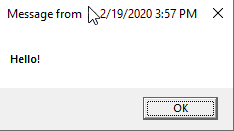
- When the message is actually sent, it will appear on the target computer to the logged-on users as shown in the screenshot below.
Method 2: Advanced reboot with user-notification
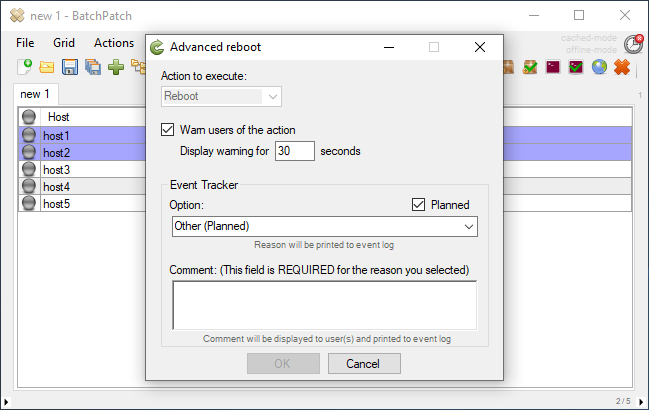
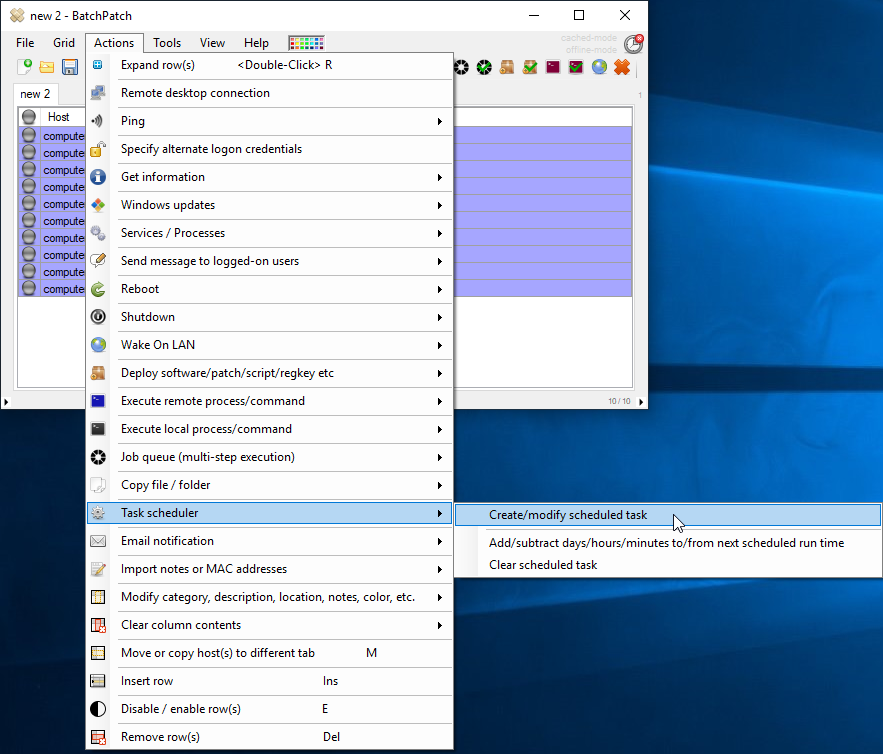
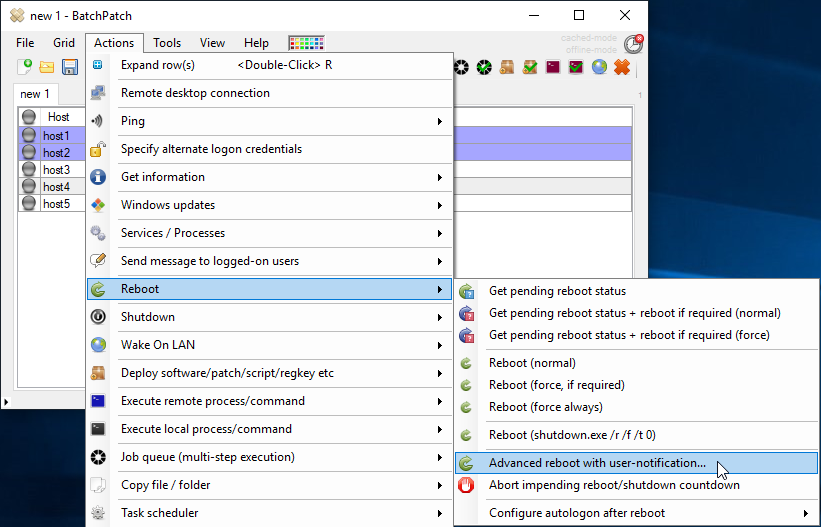
- The other option you have for notifying logged-on users is built-in to the ‘Advanced reboot‘ and ‘Advanced shutdown‘ methods in BatchPatch. We’ll just look at the ‘Advanced reboot’ method for the sake of this example. Highlight the target hosts in the grid, and then select ‘Actions > Reboot > Advanced reboot with user-notification‘
- In the window that appears you have the ability to tick a box to ‘Warn users of the action‘. Then you can enter the desired message that you want the users to see in the ‘Comment’ field at the bottom of the window. When you use this operation, the comment will also be printed to the event log on the target computer, so this option for notifying end-users of an impending action might be less favorable in many cases.
- After you enter something in the comment field, you’ll be able to click OK to execute the reboot action, which will pop a message to logged-on users of the selected targets computers as well as create an entry in the event log on those computers with that same message/comment text.