Every network environment has its own requirements that are particular to it, depending on the types of servers and services running, the service level agreements in place between companies and their customers, as well as any other factors that may influence how decisions are made about maintaining the environment and its security etc.
When it comes to automation, there are cases where an administrator might need or want to completely stop a service that is running on a particular server or group of servers before beginning the update and reboot process. And depending on how the service is configured (automatic vs manual), it might need to be manually started after the reboot completes. Today I’m going to demonstrate how you can use BatchPatch to automate this process very easily on any number of target computers. You can schedule the process to run at a specific date/time, or you could simply configure it to run on-demand with a single click trigger.
Tutorial
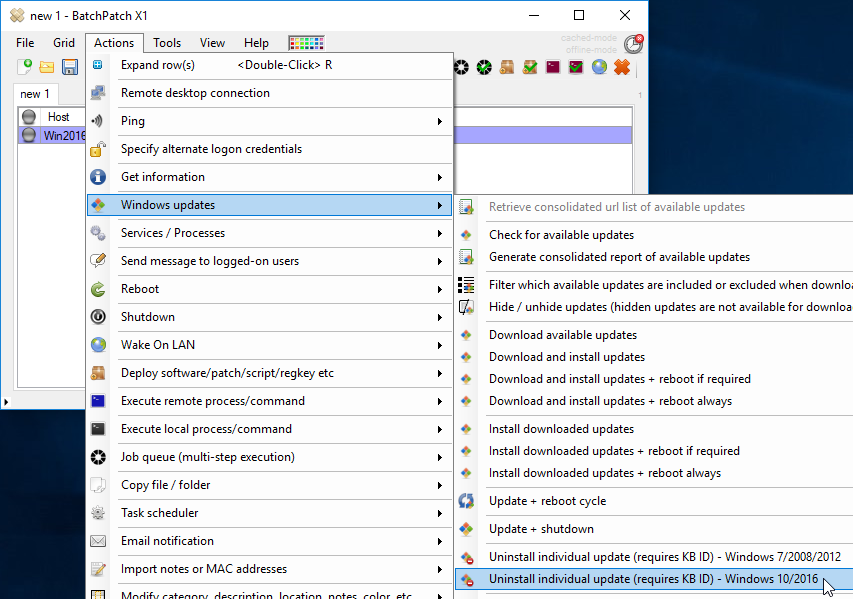
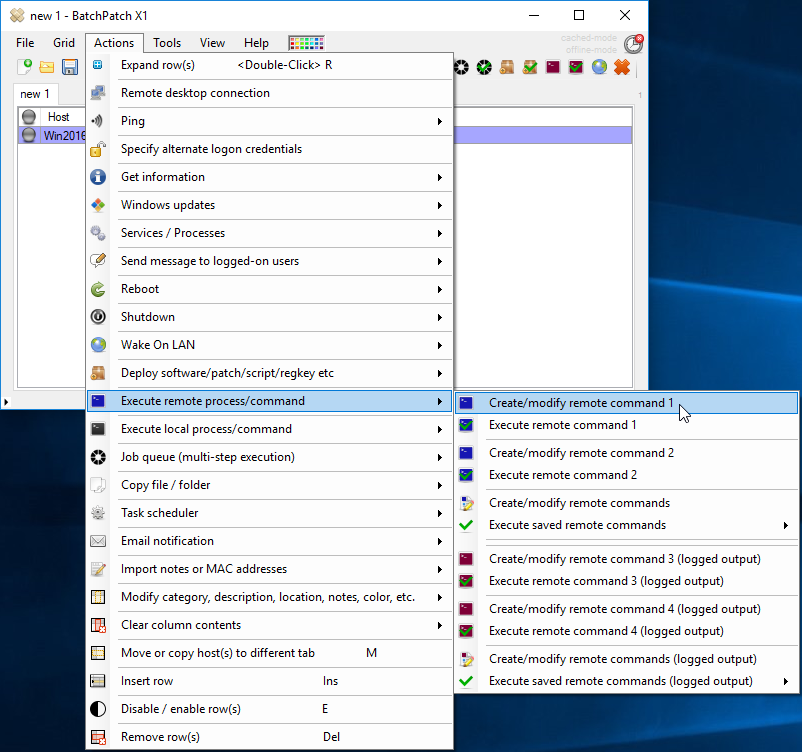
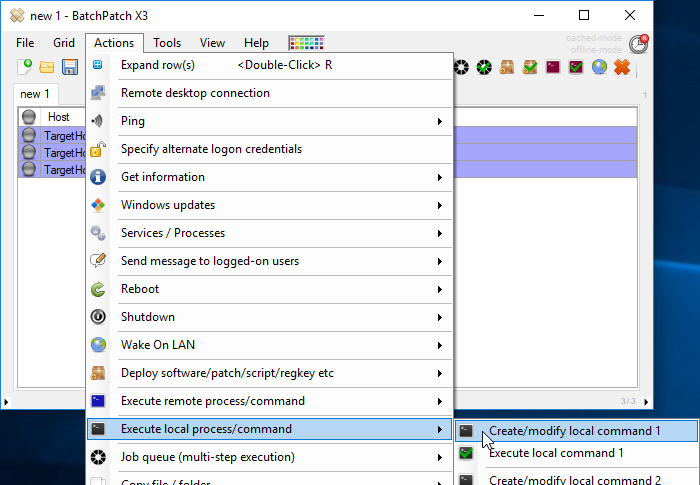
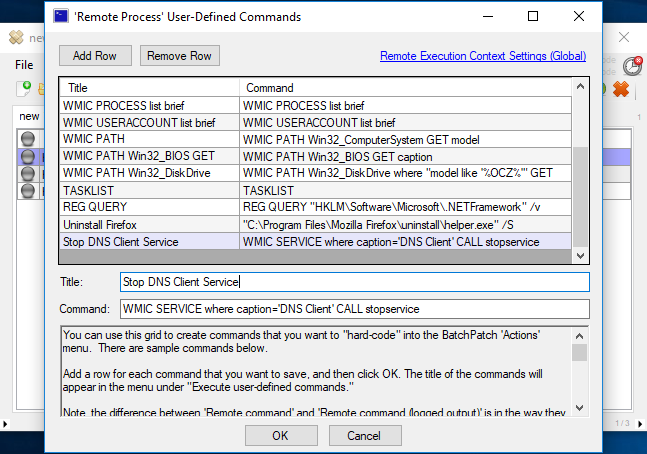
- We’ll start by creating and saving a remote command in BatchPatch that will handle stopping the desired service. Click on ‘Actions > Execute remote process/command > Create/modify remote commands‘. In the window that appears click ‘Add Row’ and then insert the following command, substituting the name of the service you want to stop. In this example I’m just going to be stopping the DNS Client to illustrate the process, though realistically the DNS Client is not a service that anyone typically needs to be messing with. You can see in the screenshot that I’ve inserted the command into the command field, and I’ve given it a title in the title field. If you intend to use BatchPatch to start the service at some point, then go ahead and also create a row with a command to start the service. In most cases administrators probably have services that need to be running set to ‘Automatic’ so that they automatically start after a reboot. If this is the case for your service, then you won’t need to create a startservice command, but of course you should do whatever is needed for your situation. Click OK when finished.
WMIC SERVICE where caption='DNS Client' CALL stopservice
WMIC SERVICE where caption='DNS Client' CALL startservice
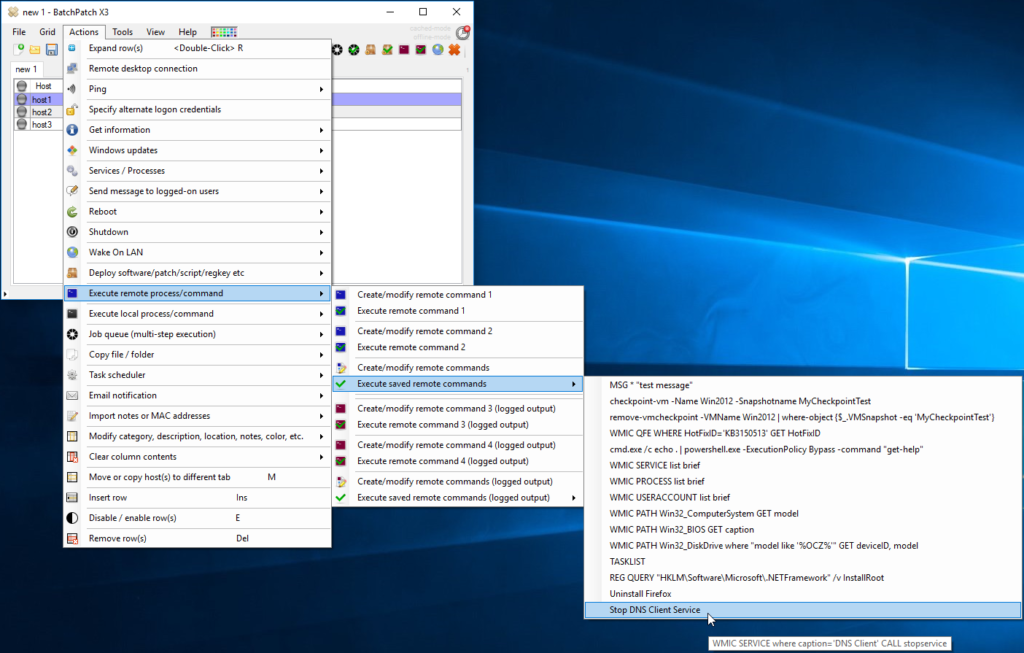
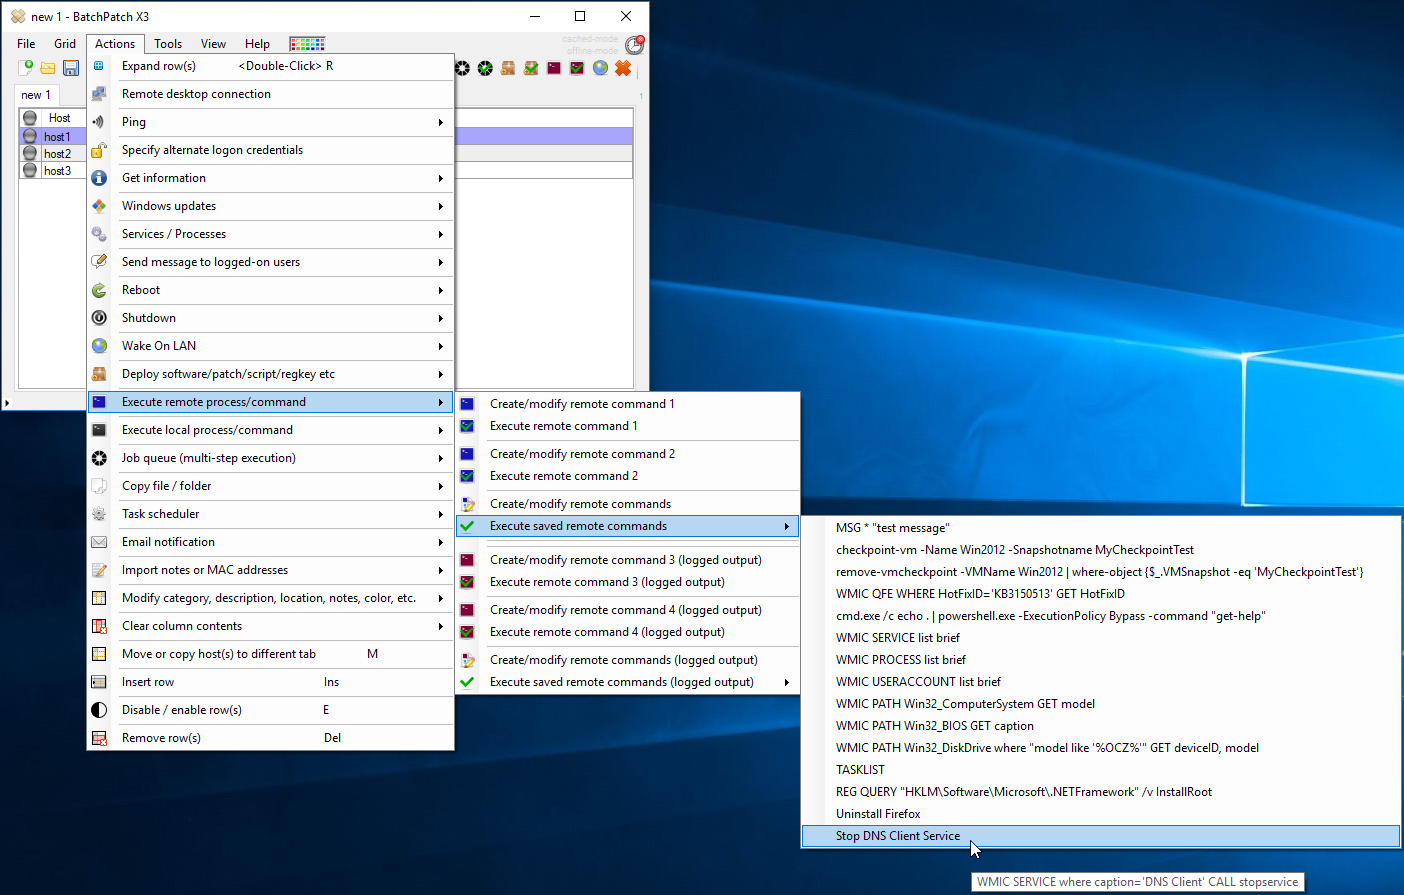
- Now that the stop service command has been created it would be wise to take a moment to test it and make sure it works as desired/expected. To test it we can simply select a target host in the grid, and then click on ‘Actions > Execute remote/process command > Execute saved remote commands > Stop DNS Client Service’. Then make sure that the service has been stopped as desired, either by reviewing the services console manually/directly on the target computer or by using ‘Actions > Services/Processes > List all services’ from within BatchPatch. This action will give you a list of all services and their current states.
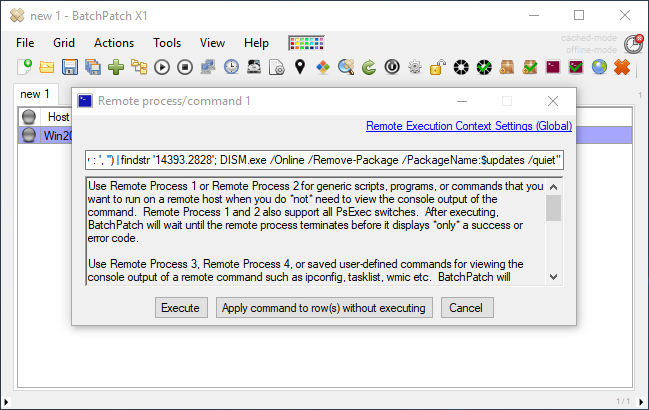
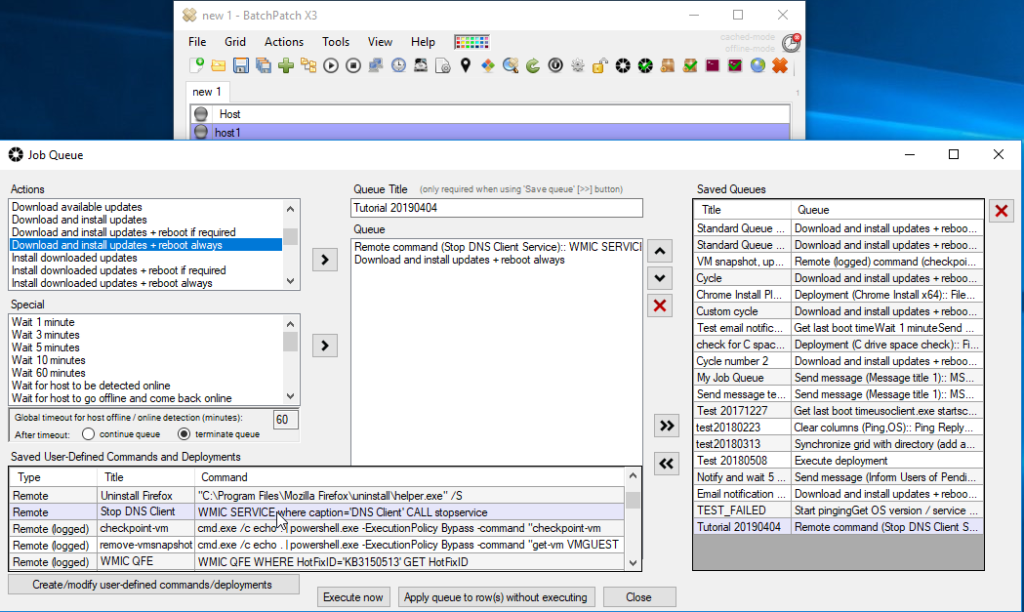
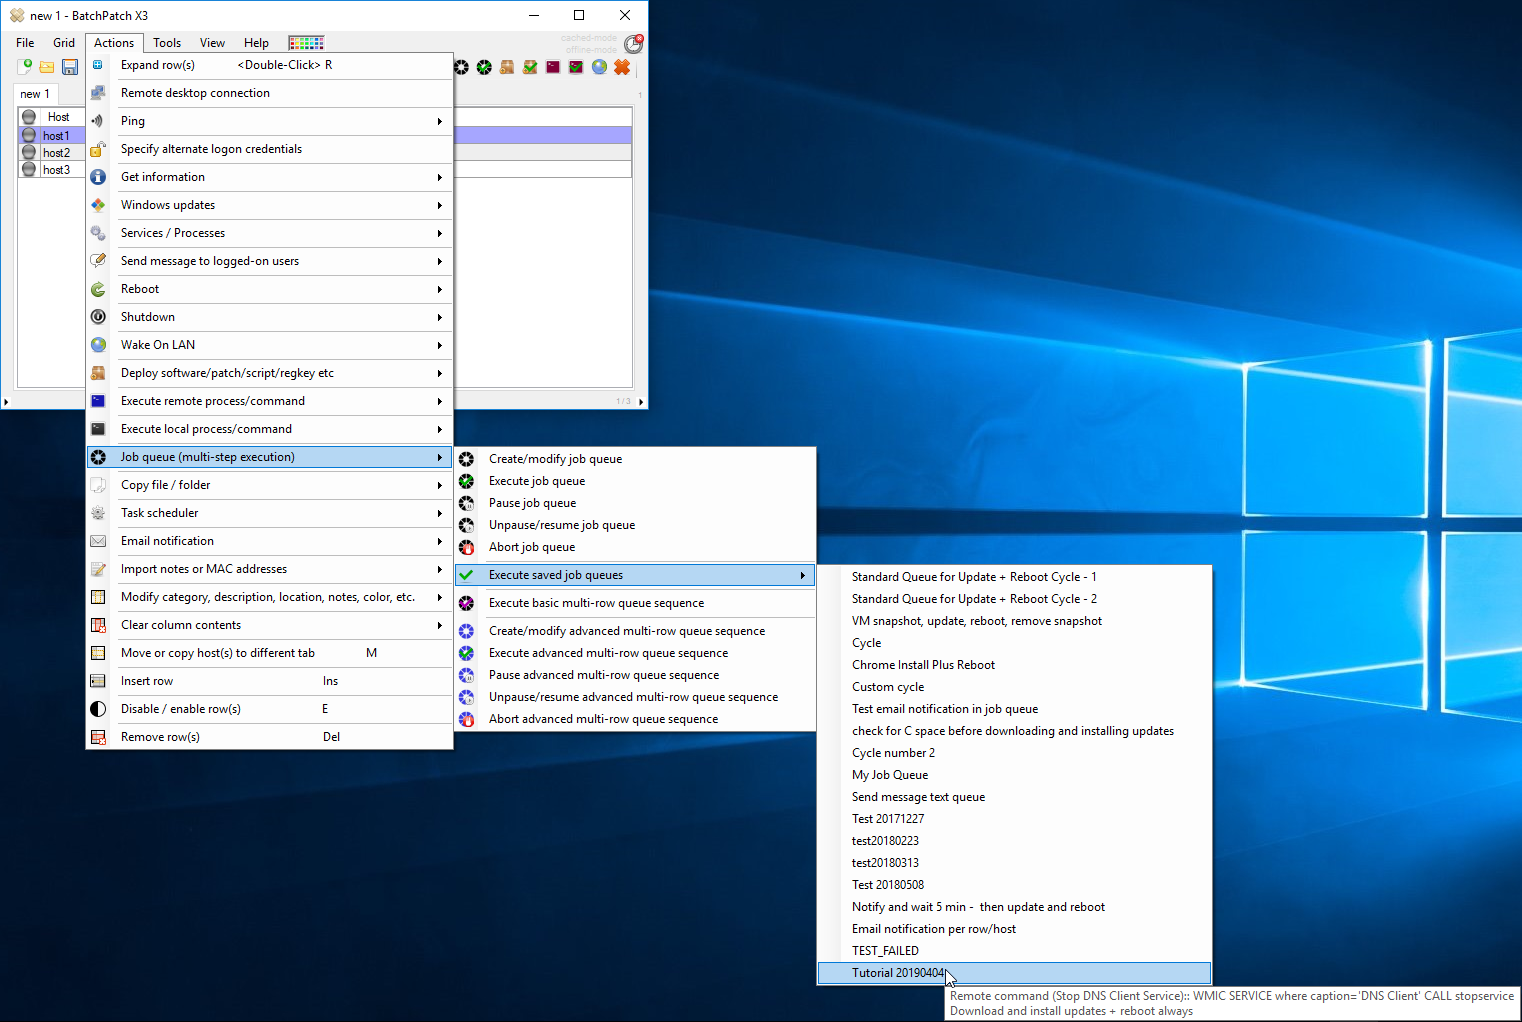
- Once you have verified that your command works properly, you’re ready to create a job queue. The job queue is what will handle the process of sequentially executing the stop service command followed by the update/reboot command. Select ‘Actions > Job Queue > Create/modify job queue’. In the job queue window first find the command you created in the ‘Saved User-Defined Commands and Deployment’ grid in the lower left corner of the window. Double-click on your command (or use the right-arrow button) to add it as the first item in the queue. Next, add the ‘Download and install updates + reboot always’ command from the ‘Actions’ listbox in the upper left corner of the window. Input a title for the job queue, and then click the double-right-arrow button to save it. You should have something like the screenshot below. Close the window when you’re done.
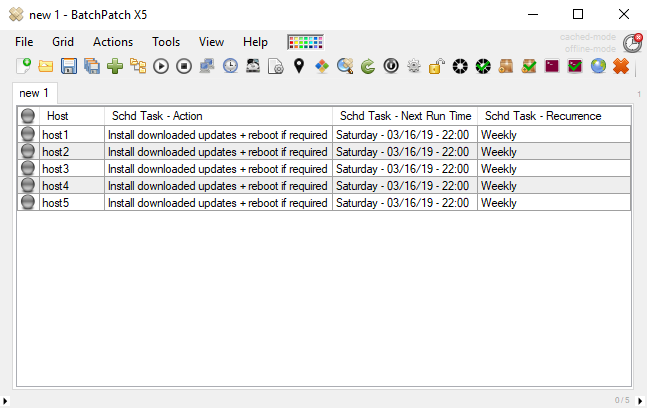
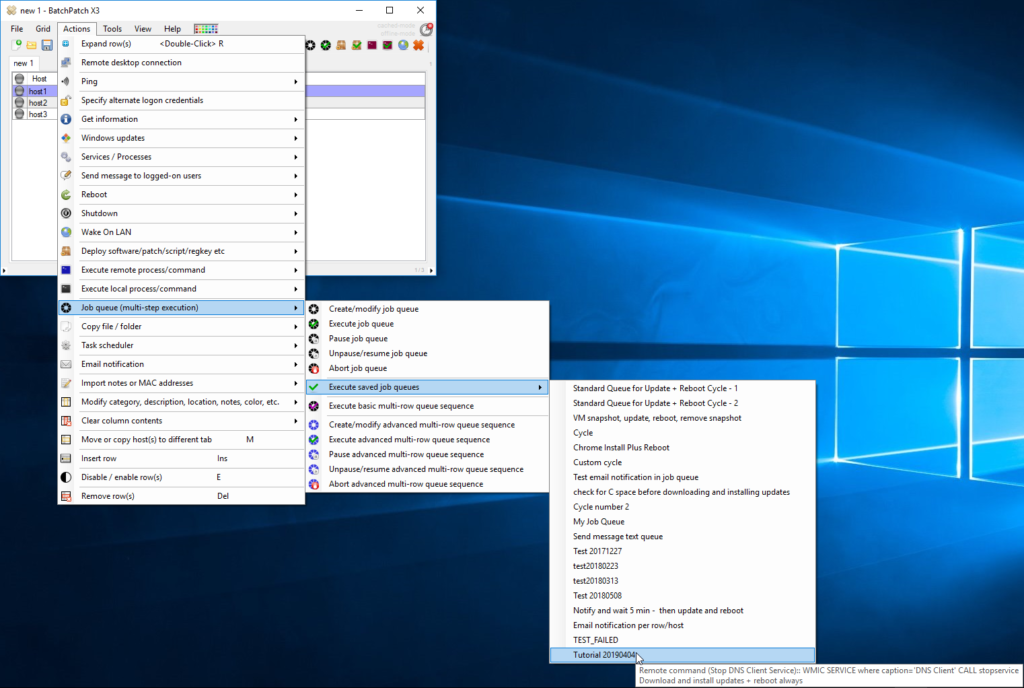
- That’s practically all there is to it. Now if we want to run this job queue on-demand at any time, we can simply select the desired servers in the BatchPatch grid, and then click ‘Actions > Job Queue > Execute saved job queues > Tutorial 20190404’. Of course you’ll use whatever title you gave to your queue.

Other Considerations
- If you want to have this job queue run as a scheduled task on a specific date/time, that’s easy to do. You’ll select the desired rows, click on ‘Actions > Task scheduler > Create/modify scheduled task’, and then select your saved job queue from the list of tasks, set the run time/date, and enable the scheduler. Check out this task scheduler tutorial for more details.
- If your service is set to automatic, make sure that you guarantee a reboot will occur. For example in your job queue if you were to choose ‘Download and install updates + reboot if required’ a reboot will not be executed if the update installation doesn’t require it to complete the process. This means that if you have stopped the service and installed updates without a subsequent reboot, your service would be in the stopped state indefinitely without manual interaction. You could use a start service command in the job queue maybe after a 5 minute wait period after the update + reboot if required command, if desired. Or you could simply use a command that guarantees a reboot after the update process. There are numerous ways that this can be handled, and it all really just depends on your needs and preferences.
- If your service is set to manual such that you need to incorporate a start service command into your job queue, that’s fine. However, you’ll want to make sure that the computer has ample time to complete its reboot before you issue the start service command. You can use a ‘Wait’ period in the job queue to handle this. There are more details here about some of the special items in the job queue such as the various ‘Wait’ commands.