We confess… The BatchPatch email notifications feature is not the most intuitive aspect of BatchPatch. However, it’s actually very simple to use, and my goal with this posting is to illustrate how to use email notifications in BatchPatch.
The original design of BatchPatch was focused on real-time patching, with the idea that any action a user chooses to perform will be done while the user is operating the BatchPatch console but not at some later time when the user is no longer in front of the computer. If you’re sitting in front of the BatchPatch console while it’s doing work, there isn’t really much purpose to sending email notifications since everything that BatchPatch is doing is being monitored.
It didn’t take long before we added scheduling options to BatchPatch, so that the operator could choose to run actions in the middle of the night without having to be in front of the computer. This is where the email notifications become more important. If you setup a BatchPatch grid to remotely install Windows Updates and reboot a set of computers at 3AM, you might desire to see the status of that grid when you first wake up in the morning without having to log on to your computer. Wouldn’t it be nice if you could simply take a look through your email to see how things went during the unattended 3AM actions? Fortunately, with the BatchPatch email notifications feature, you can do this quite easily. BatchPatch enables you to send the contents of any grid or individual row in an HTML formatted attachment to any email address or set of email addresses.
The email notifications in BatchPatch are designed to run in two ways. You can setup an email notification to be sent either during a Job Queue or as a Scheduled Task.
Configuring the Default Email Notification Settings:
- Go to Tools > Settings > Email Notifications
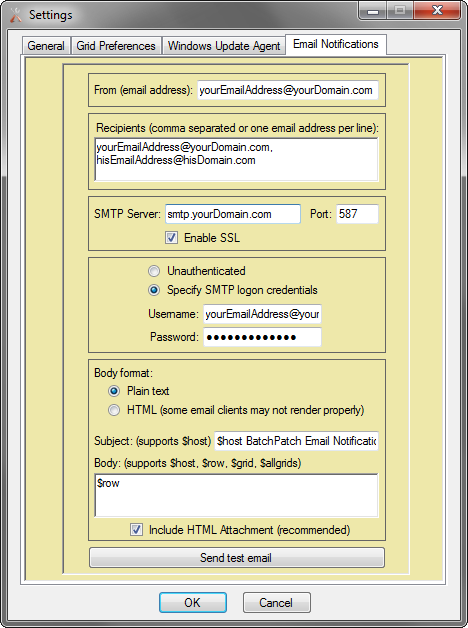
- Fill out the fields in the Email Notification settings form, and use the Send test email button to verify that your settings are correct and actually work. If the Send test email doesn’t complete successfully, you’ll need to adjust your settings until your test email is sent without errors.
- For the subject body format, you have a few options. The subject field can be populated with any text you wish. If you include “$host” in the subject line, then when an email notification is sent, the host name in the BatchPatch row that initiated the email notification will be included in the subject line. The body text field has 4 special “keywords” that you can use. The “$host” keyword will behave the same in the body as it does in the subject line. However, to have the email notification actually include information about the grid, you will want to use use one of the other 3 keywords ($row, $grid, $allGrids).
- $row: If you specify “$row” in the body, the entire contents of the BatchPatch row that initiates the email notification will be included with any email notification that is sent.
- $grid: If you specify “$grid” in the body, the entire contents of the grid that contains the row that initiates the email notification will be included with any email notification that is sent
- $allgrids: If you specify “$allgrids” in the body, the entire contents of the all the grids in the entire BatchPatch instance that contains the row that initiates the email notification will be included with any email notification that is sent.
Overriding the Default Email Notification Settings for an Individual Row:
- Highlight the host(s) that you want to override, and then select Actions > Email Notification > Override default email notification settings
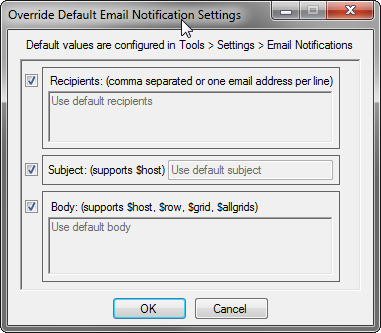
- As you can see, the Override settings allow you to modify the Recipients, Subject, and Body, on a per-row basis. The rules for these fields are the same as described above for the Default Email Notification Settings, but in this case your settings will be for a given row, rather than applying to all rows that have not been overridden.
Using the Job Queue to Send Email Notifications:
- Highlight the rows you wish to act on, and then select Actions > Create/modify job queue
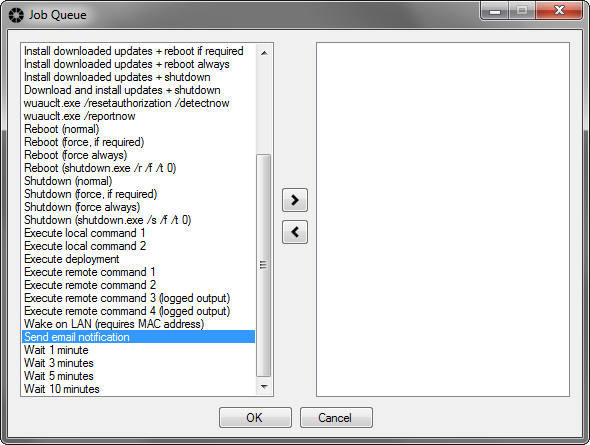
- In the Job Queue form, one of the actions that you may select to add to a queue is “Send email notification.” So, for any action(s) that you want to perform, you may put the “Send email notification” option as the very last item in the queue. When the job queue for that row is executed (either manually or by a scheduled task), the last action in the job queue will send the email notification. The email notification will be sent using the settings defined in Tools > Settings > Email Notifications unless you have overridden the particular row’s email notification settings, in which case the overridden settings for that row will be applied. Note that for the per-row email notification that we describe here, it probably makes the most sense for the “Body” field for your email notifications to be set as “$row” so that each row’s email notification sends the contents of its own row in the body of the email.
Using the Task Scheduler to Send Email Notifications:
For many users it doesn’t make a lot of sense to have each row send its own email notification at the end of a task. Often times it makes more sense to only send one email notification at the end of a series of tasks. For this, we prefer to use a scheduled task to send an email notification at a specific date/time. For example, if you are running a series of tasks at 2AM for a set of hosts, you could setup a single email notification to run for the entire grid (or all grids in the BatchPatch instance) at, say, 3AM. When 3AM comes, an HTML export of the entire grid (or all grids, if using $allgrids in the body text) will be sent to the specified email address(s). At 7AM when your alarm wakes you up out of a wonderful slumber, just pop open your smart phone email application to check out the grid status at 3AM without needing to get out of bed. You’ll be able to see exactly what happened during the 2AM actions by examining the HTML attachment email notification that was sent at 3AM.
- Create a “dummy” row in a BatchPatch grid. The reason this is a “dummy” row is because it’s not going to be used to perform an action on a specific host. Instead it will be used by BatchPatch strictly for sending an email notification at a specific date/time. You may use any “dummy” host name you like for the row.
- Highlight the row and then create a scheduled task for the row by clicking Actions > Task Scheduler > Create/modify scheduled task
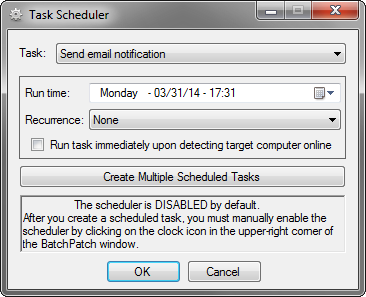
- Set any email notification overrides that you want for the particular row by highlighting the row and selecting Actions > Email Notification > Override default email notification settings. We recommend to use “$grid” or “$allgrids” in the body text field so that when the email notification is actually sent at the scheduled time, it will include the grid contents for the entire grid ($grid) or all grids in the BatchPatch instance ($allgrids).
- Create a scheduled task that will perform the Send email notification action, as shown in the screenshot above.
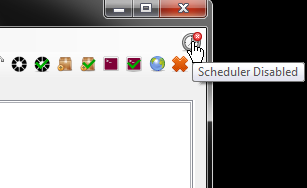
- Make sure to ENABLE THE TASK SCHEDULER by clicking on the small clock icon in the upper right corner of the BatchPatch window.
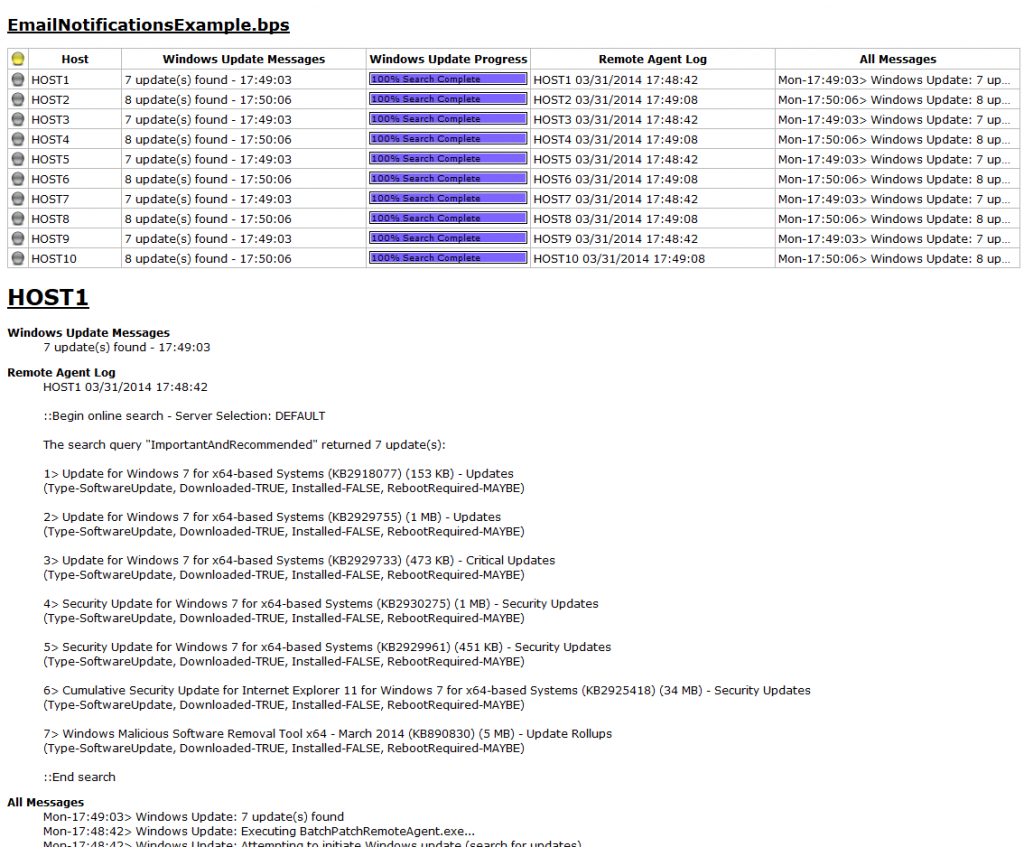
You can view a sample BatchPatch email notification (HTML export) here: