

In order to use BatchPatch to deploy Windows 10 feature update 1809, please follow the method outlined below. The normal Windows Update actions in BatchPatch are not sufficient for installing the feature updates to Windows 10. Also note just for the sake of clarity that even though these are considered Windows 10 feature updates, the Windows Update Agent (WUA) puts these in the update classification called Upgrades. EDIT: Starting with the April 2020 release of BatchPatch, feature updates can also now also be installed using the normal Windows update actions, though cached mode must be disabled in order for that to be successful.
- Obtain the Windows 10 Media Creation Tool from Microsoft. Follow this link and then choose the option to download the tool. Be careful to not select the option to ‘Update now’ because at the time of this writing the above link will have both options– a link to update the current computer plus a separate link to download the Windows 10 Media Creation Tool. If you choose ‘Update now’ you’ll begin the update process for the computer that you are using to view that webpage. Instead choose the ‘Download tool now’ option, though note that it’s very possible that Microsoft could change the language or the text on the download button by the time you are reading this to something other than ‘Download tool now’. Also note, the Windows 10 Media Creation Tool does not let you choose which version of Windows 10 it will download. It will only ever download the latest release, which at the time of this writing is version 1809. If you have another means of obtaining Windows 10 media, such as through a volume licensing agreement with Microsoft, then you may do that instead of using the media creation tool.
- Launch the Windows 10 Media Creation Tool that you downloaded in the previous step. NOTE, you *must* be logged on to the computer as a local administrator when you launch the tool. For reasons that Microsoft has not made clear, it is *not* sufficient to use run-as to launch the media creation tool elevated as administrator. Instead you have to actually be logged on to the computer with the admin account before you launch the tool. Otherwise you’ll end up launching the tool as a standard user and clicking through screens until the tool itself notifies you that it cannot complete its job.
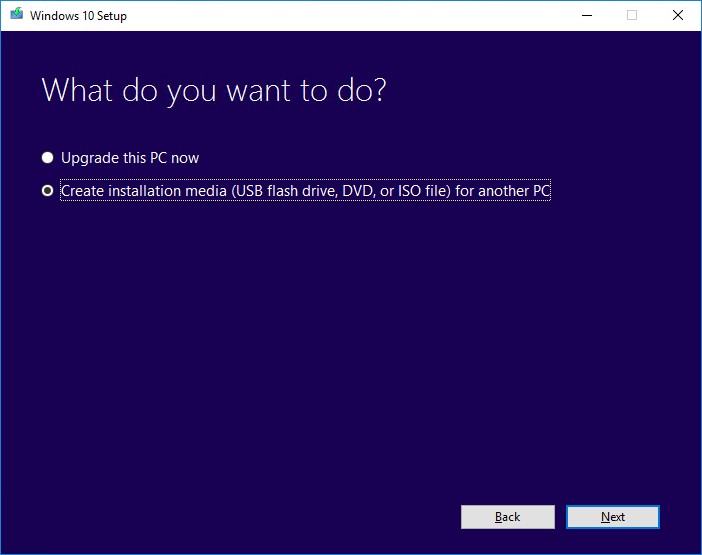
- Use the Windows 10 Media Creation Tool to create installation media. When you run the tool you will be prompted to select either ‘Upgrade this PC now’ or ‘Create installation media (USB flash drive, DVD, or ISO file) for another PC. The goal here is not to upgrade the current PC but rather to obtain media that can be used to update other PCs, so choose the second option to ‘Create installation media…’ and then click ‘Next’.
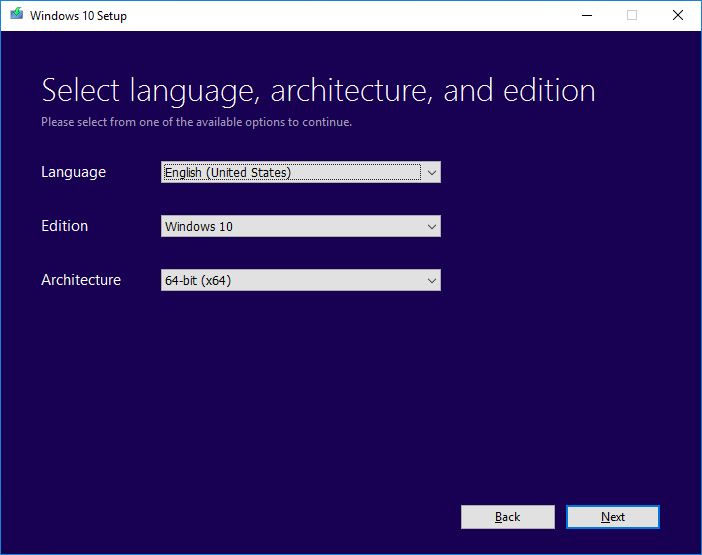
- Select the desired language, edition, and architecture, and then click ‘Next’.
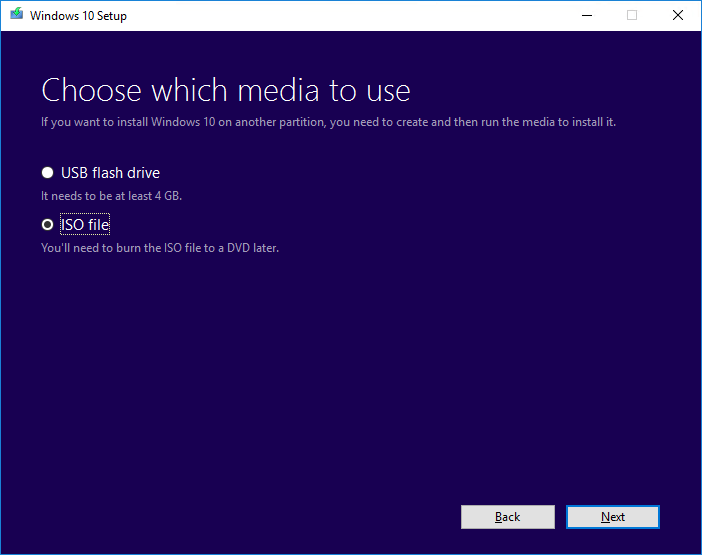
- Choose which media to use. For this tutorial you should select ISO as the media type. When you click ‘Next’ you will be prompted to choose a disk location for the ISO file to be saved. Choose a folder and then wait until the download completes. It will take some time because it’s ~4GB.
- Extract the ISO contents to a folder on your computer. When the download completes you will need to browse to the ISO file location. Many different tools can be used to extract the contents of the ISO file. We prefer 7-zip, which is free, for this sort of thing. When the extraction is complete you should have all of the feature update installation files in a single folder.

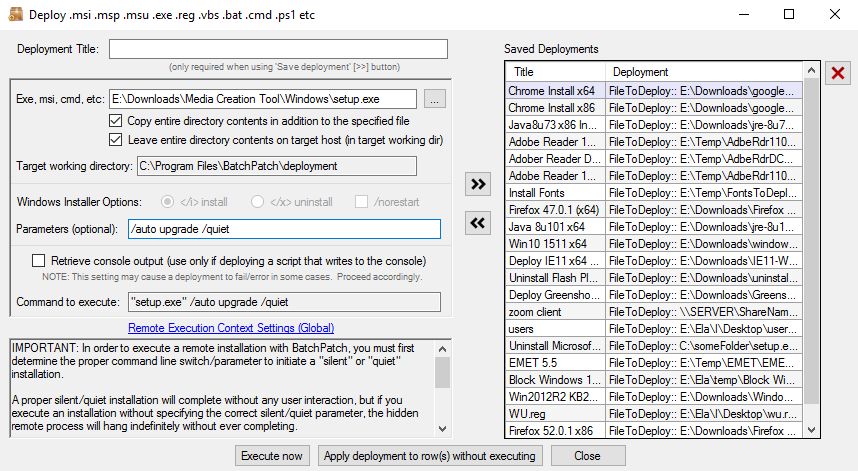
- Create a BatchPatch deployment. In BatchPatch click on Actions > Deploy > Create/modify. In the Deployment interface that appears, browse to the folder where you extracted the ISO contents, and select the setup.exe as the file to deploy. Make sure to tick the ‘Copy entire directory‘ box and the ‘Leave entire directory‘ box. When the upgrade/installation is being performed, Windows will reboot the target computer multiple times during the process. The installation/upgrade process must have access to all of the files required for the upgrade. Having both of the checkboxes ticked will ensure that the process has all of the needed files available to it during the installation. After the upgrade is complete you may delete the files from the target computer(s), but just make sure that you don’t delete them until the upgrade process is 100% complete. In your BatchPatch deployment configuration you will also need to add the following parameters:
/auto upgrade /quiet
- Execute the deployment. In the deployment configuration from the previous step you can either save the deployment to execute later by using the double-right-arrow ‘>>’ button, or you can execute the deployment now for the currently selected rows in the BatchPatch grid by clicking the Execute now button. If you saved the deployment configuration for later, then when you are ready to deploy the upgrade to your target computers, go ahead an execute it by clicking Actions > Deploy > Execute deployment, and then choose the deployment that you just created/saved. The process will take some time to complete because BatchPatch has to copy the entire multi-gigabyte media folder to the target computer(s) before it can execute the upgrade. When BatchPatch shows Exit Code: 0 (SUCCESS) for a given target computer it means that the BatchPatch process has completed, but you should still expect that the target computer(s) will still be working and will still reboot at least one time but possibly multiple times while Windows is upgraded and configured, so be patient and let it complete!
NOTE: We have had a couple of reports from users who received the following error:
Deployment: Error: Access to the path '\\TargetComputer\C$\Program Files\BatchPatch\deployment\autorun.inf' is denied.
It’s unclear why these users experienced this error even though most other users have executed the deployment successfully without encountering the error. My guess is it might have something to do with the application used to extract the .ISO file and the way permissions were applied or inherited. Regardless, if you encounter this error it can be resolved quickly and easily by just deleting the autorun.inf file from the source directory after extracting the ISO contents but before executing the actual deployment for any target computers. In this way when BatchPatch copies the installation files to the target computer, the autorun.inf won’t even be there, so this error won’t occur.