Sometimes you might need or want to only install a specific handful (or more) of updates on remote computers, rather than installing all of the updates that are available for those computers. With BatchPatch we provide a few different ways to accomplish this task.
Method 1:
View a list of available updates, and then select or deselect a checkbox for each update that you want (or don’t want) to install. Then execute the update installation for the only the updates that you selected.
- Please review the following tutorial: Filter Which Available Updates Are Included Or Excluded When Downloading Or Installing Windows Updates

Method 2:
Create a list of updates to be installed on target computers, and then execute the update installation for only the updates specified in the list.
(For a video demo instead of method 2, please see Installing Specific Updates on 20 Remote Computers Simultaneously – Video Demo.)
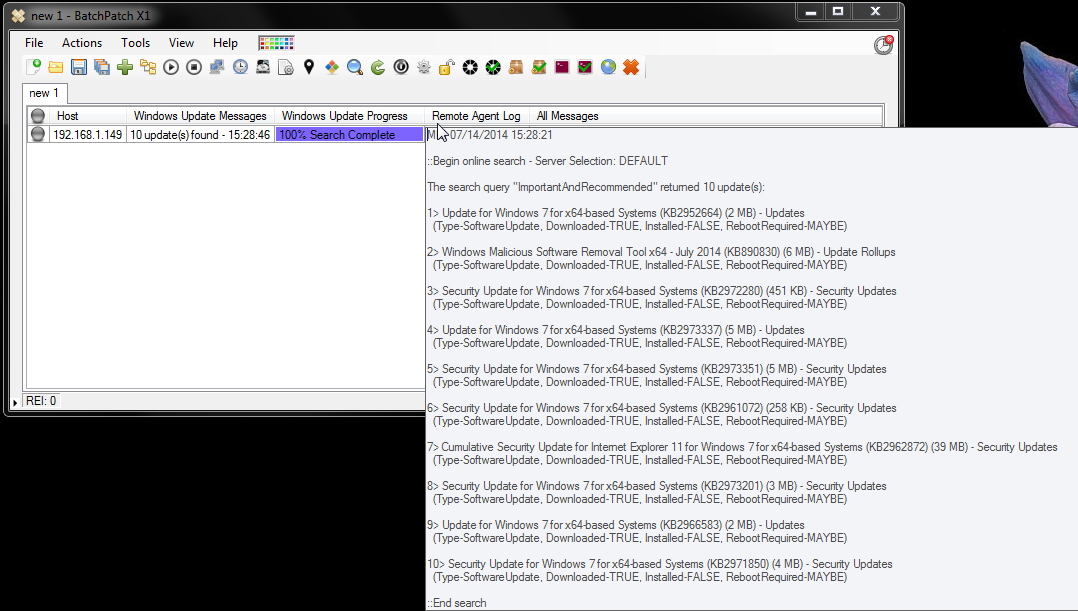
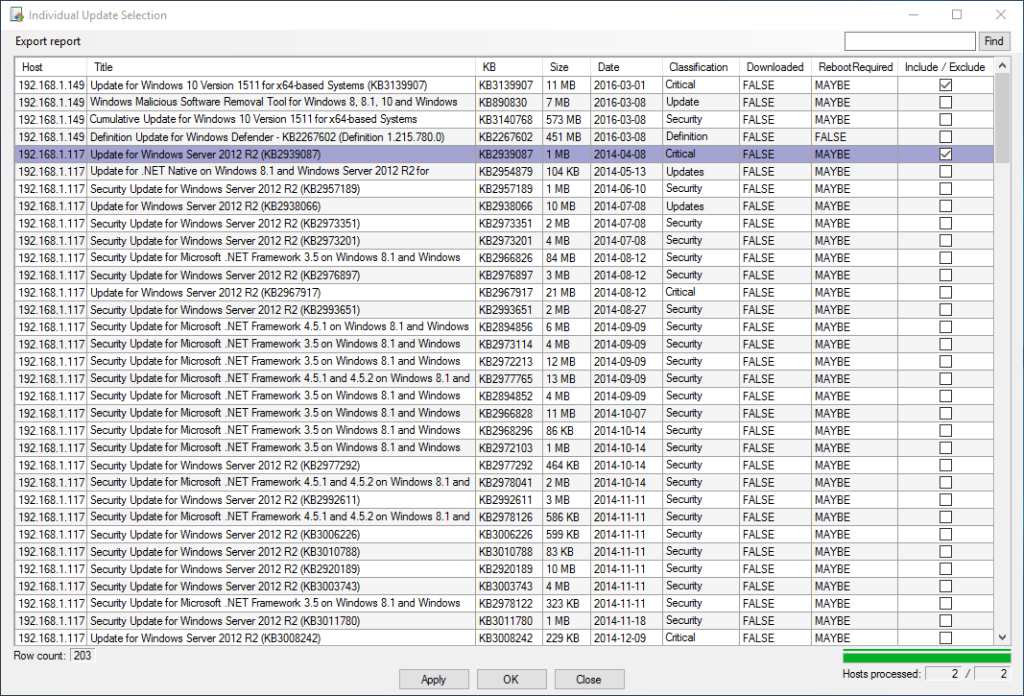
- Let’s start by checking the target host(s) to see what updates are available to install. Highlight the host(s) and then select Actions > Windows Updates > Check for available updates
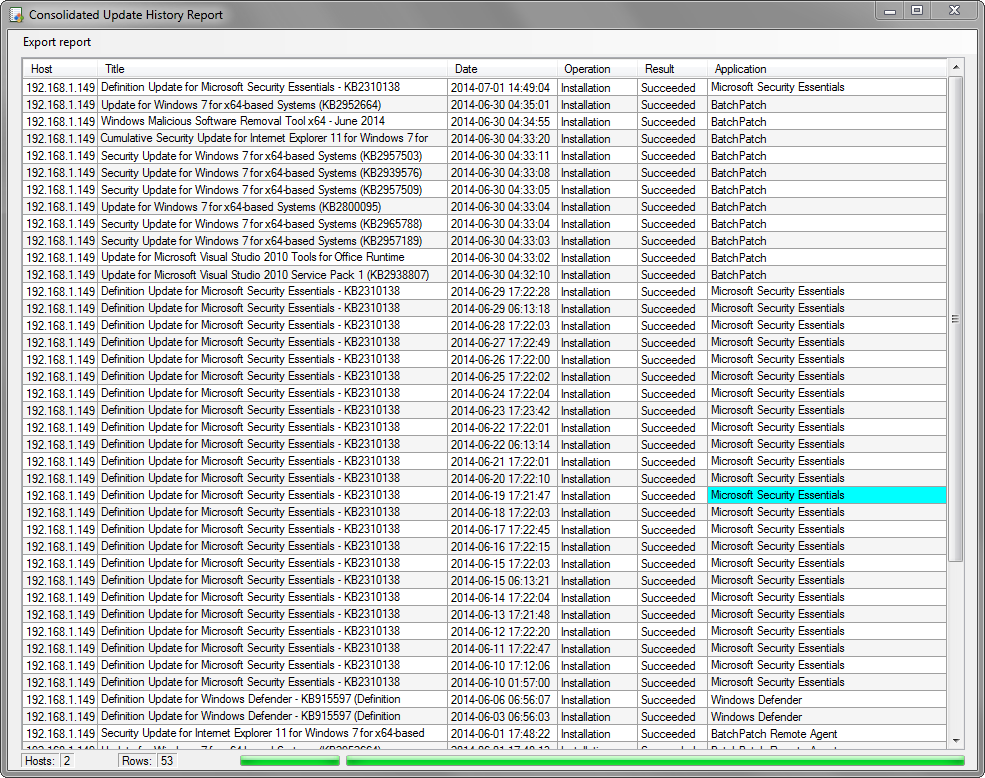
- We can see in the screenshot below that there are 37 updates available on our target host. I’ve expanded the ‘Remote Agent Log’ column by middle-clicking on it, so that we can see the list of available updates.
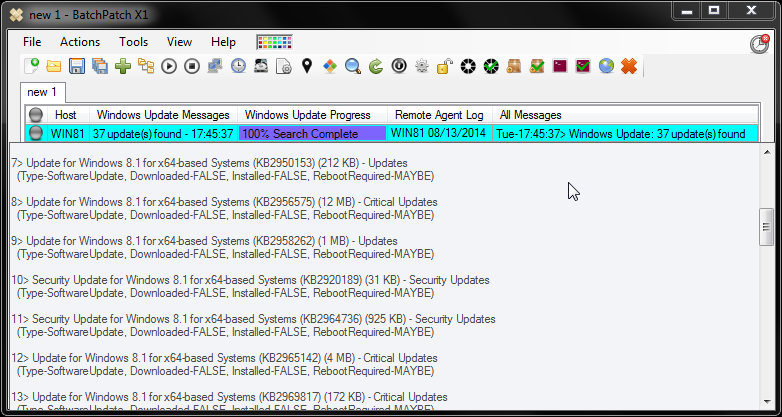
- For the sake of this tutorial, let’s select 3 of the available updates to install. We’ll use KB2956575, KB2920189, and KB2964736.
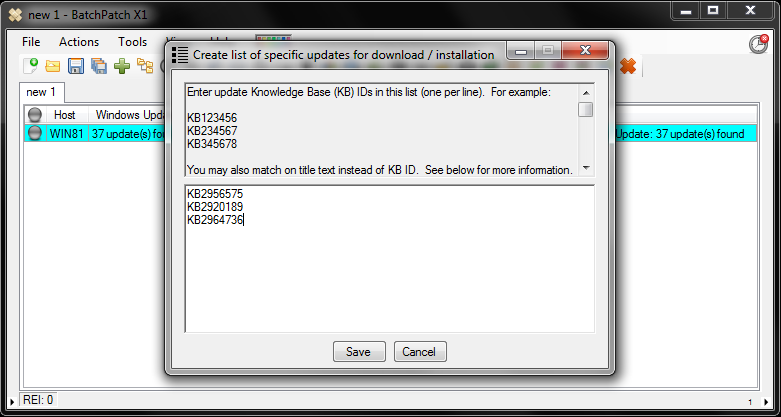
- Select Actions > Windows Updates > Filter which updates are included or excluded when downloading/installing > Include specific updates (textual)
- Copy the KB IDs for the three updates into the provided field, with one KB per line. Then save the list. We do not strictly have to use KB IDs because the update filtering is actually done by comparing the title of the update to the entries in our list. If an available update’s title contains the text of an entry in our list, it will be installed. However, generally speaking, to guarantee uniqueness in our entries, it’s always best to use KB number whenever possible so that we don’t end up installing more updates than we actually want to install. For example, if we simply entered “Security update for Windows” in the list, then any available update that has “Security update for Windows” in its title would end up getting installed, which is not what we want in this case.
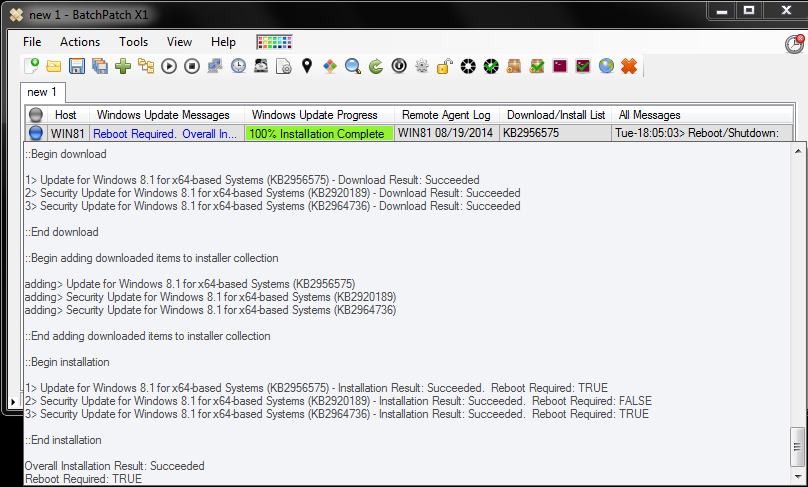
- Now that are list of specific updates has been saved, the last thing left to do is install the updates. I will select Actions > Windows Updates > Download and install updates + reboot if required
- After the task completes, we can review the ‘Remote Agent Log’ column again to see that only the 3 specific updates were installed on the target host.
Method 3:
Create a list of updates to hide on target computers, hide only those specific updates, and then install all remaining visible updates.
- In this method, instead of first selecting the specific updates that we want to install, we instead first select all of the updates that we want to exclude. Let’s start by checking the target host(s) to see what updates are available to install. Highlight the host(s) and then select Actions > Windows Updates > Check for available updates
- We can see in the screenshot below that there are 34 updates available on our target host. I’ve expanded the ‘Remote Agent Log’ column by middle-clicking on it, so that we can see the list of available updates.
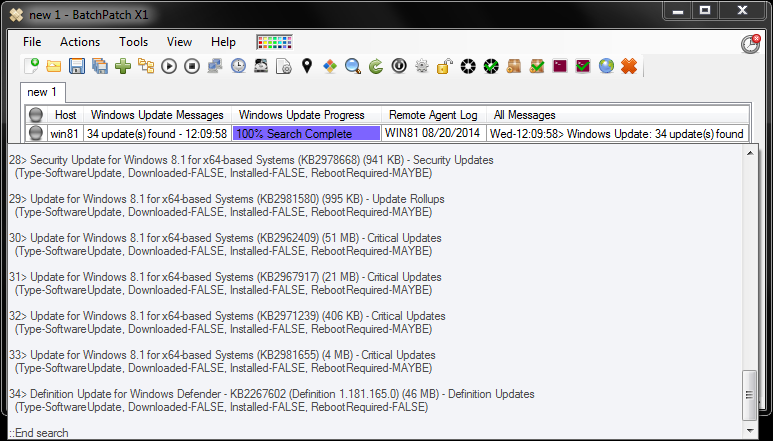
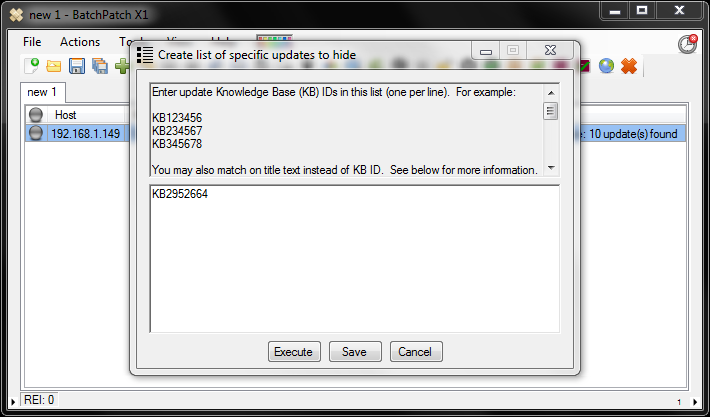
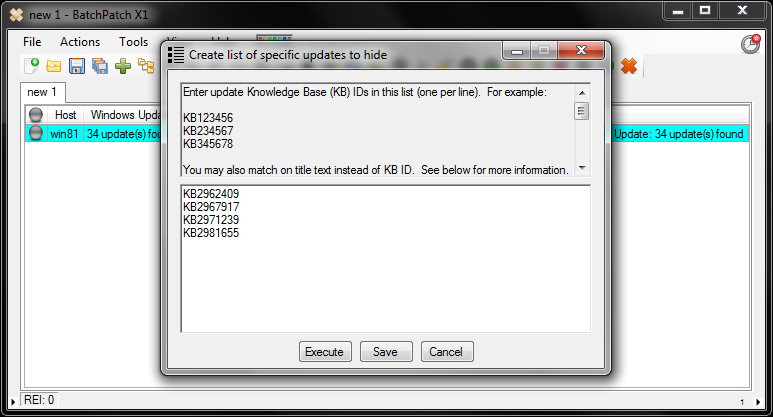
- In this example, let’s select 4 of the available updates to exclude by hiding. This means that after we hide 4 updates, we’ll have 30 leftover to install. Let’s hide KB2962409, KB2967917, KB2971239, and KB2981655.
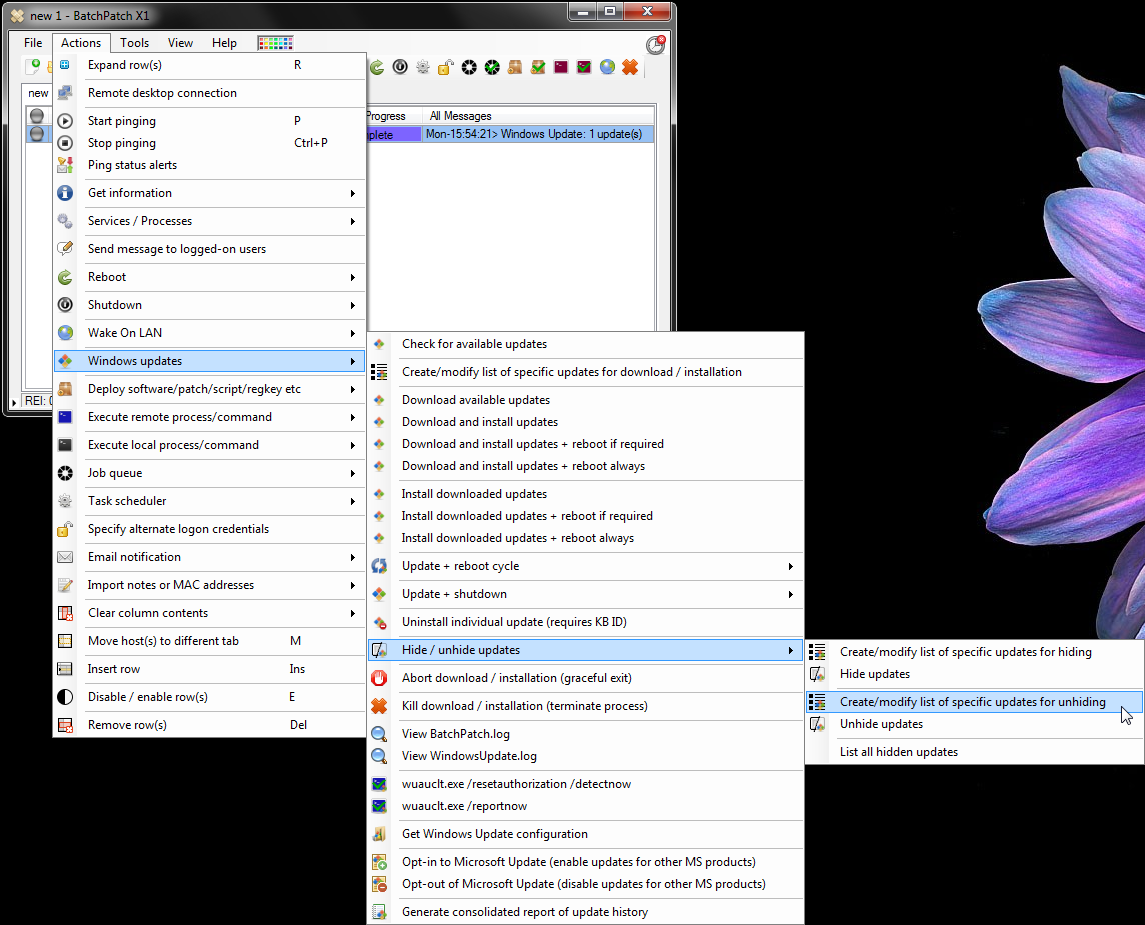
- Select Actions > Windows Updates > Hide/unhide updates > Create/modify list of specific updates for hiding
- Copy the KB IDs for the four updates into the provided field, with one KB per line. We do not strictly have to use KB IDs because the update filtering is actually done by comparing the title of the update to the entries in our list. If an available update’s title contains the text of an entry in our list, it will be installed. However, generally speaking, to guarantee uniqueness in our entries, it’s always best to use KB number whenever possible so that we don’t end up hiding more updates than we actually want to hide. For example, if we simply entered “Security update for Windows” in the list, then any available update that has “Security update for Windows” in its title would end up getting hidden, which is not what we want in this case.
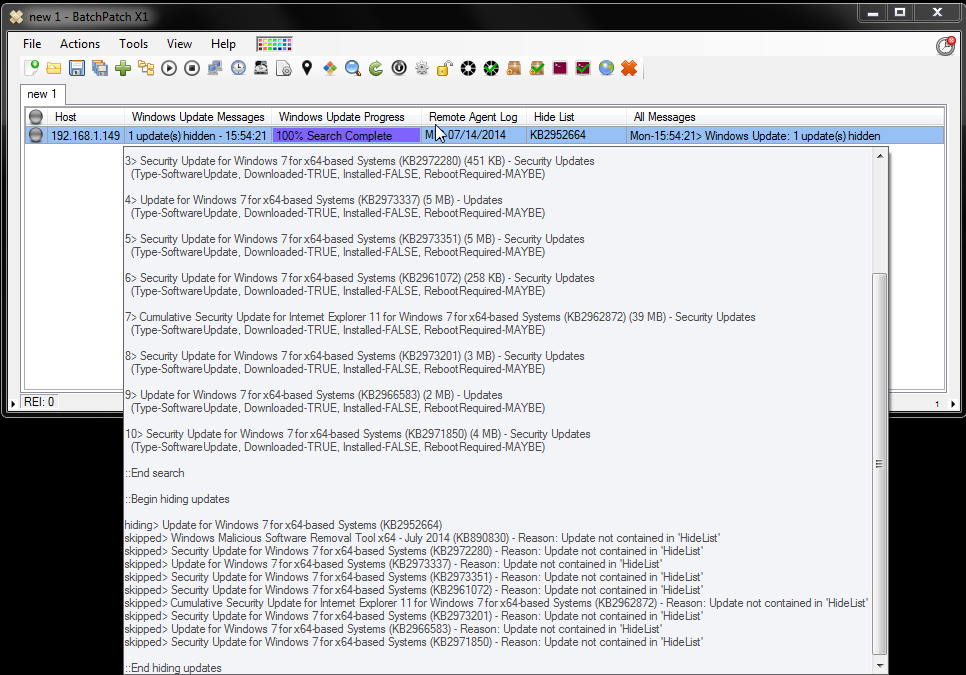
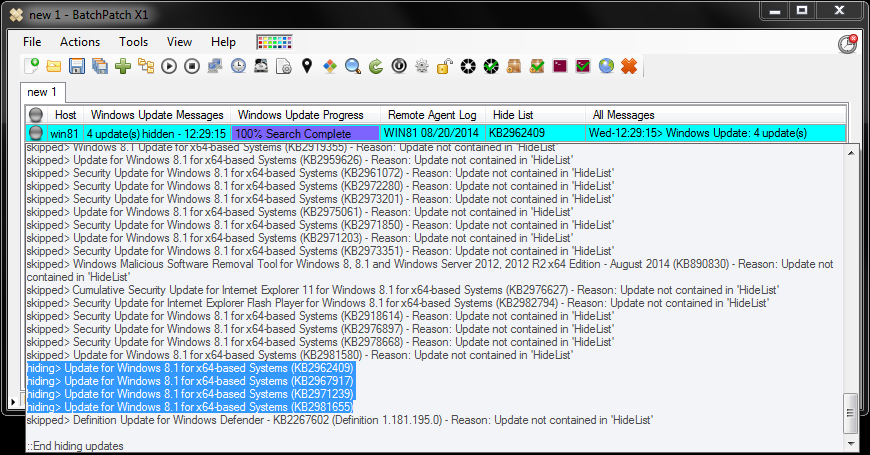
- Click on the ‘Execute’ button. The four updates in our list will be hidden on the target host, leaving the other 30 updates available. We can examine the ‘Remote Agent Log’ column once again to confirm this.
- The last step is to install all of the remaining 30 updates. We can do this by selecting Actions > Windows Updates > Download and install updates + reboot if required. Only the visible updates will be installed. The hidden updates will remain hidden indefinitely, though we can unhide them at any time in the future if we want/need to install them.
IMPORTANT NOTE ABOUT HIDING UPDATES:It’s important to note that Microsoft can effectively unhide an update that you have previously hidden simply by republishing it at a future date. That said, if you hid an update on target computer at some point in the past days/weeks/months, it’s always good when starting a new session to first check for available updates to make sure that a previously hidden update that you still do not want to be installed has not been republished and unhidden by Microsoft in between your last session and your current session.