Deploying Windows Service Packs to Many Computers using BatchPatch

Did you know that you can deploy Windows Service Packs with BatchPatch? It’s actually very simple, just like deploying software or patches. BatchPatch gives you a simple way to push a service pack installer file to target computers, execute the service pack installation across all the target machines at the same time, and then reboot them with ping monitoring.

Before getting started, there are two items that we should address to help things go as smoothly as possible.

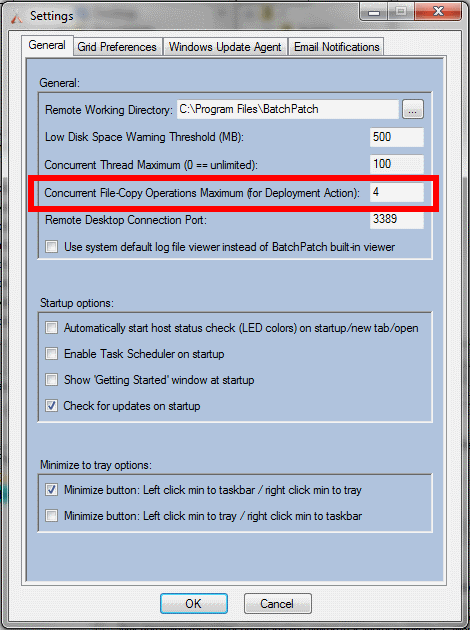
  • First, let’s take a look at the Concurrent File-Copy Operations Maximum setting, which can be viewed by clicking Tools > Settings > General. The purpose of this setting is to prevent the network connection from being overloaded when BatchPatch is in the process of copying the service pack installer file (or any file that is being deployed) to target computers. So, let’s say you execute the service pack deployment across 100 machines. Without this maximum setting enabled, BatchPatch would try to copy the 500+ megabyte executable file to all 100 computers simultaneously. For the sake of performance, this probably isn’t the greatest idea. It would make much more sense to copy the file to only one or a few machines at a time.
     
    Note, if you wanted to you could actually use the Concurrent Thread Maximum setting to limit the number of active deployment execution threads in BatchPatch. However, since an individual service pack installation can take quite a while to complete, your overall time needed to deploy a service pack to 100 computers would be significantly increased since only X deployments would execute simultaneously, where X is the Concurrent Thread Maximum value that you specify in Tools > Settings.

    So, instead of lowering the maximum number of concurrent threads, BatchPatch provides you with the ability to limit just the number of active file-copy operations that BatchPatch will perform. This means that if you execute a deployment simultaneously across 100 target machines, BatchPatch will only attempt to copy the installer file to X number of machines at a time, where X is the number you specify for the Concurrent File-Copy Operations Maximum setting. However, as the file copy completes for each machine, there will be no delay in the execution process as there would be with the Concurrent Thread Maximum setting.
     
    For a large service pack installer file, I recommend keeping the Concurrent File-Copy Operations Maximum setting quite low, possibly even as low as 1, depending on your preference. Somewhere between 1 and 4 is probably a sweet spot, but feel free to use your own judgement. If you were manually going to copy a large file to multiple computers, how many transfer streams would you want to run at one time? As always, testing gives you the most information to make an educated decision, but there is no wrong answer here. It just depends on what you want and what you think will work well.

  • SettingsForm-GeneralTab

  • The second item we need to address is the location of the service pack installer file. Put it somewhere on the same machine that you’re using to run BatchPatch. Avoid deploying the service pack from a different computer’s shared directory. The reason for this is because for each target host that BatchPatch is deploying to, BatchPatch will end up pulling the file down from the network location through the computer that is running BatchPatch, and then finally on to the target host. This will double the amount of data that the BatchPatch computer has to transfer. However, if you start with the exe on the BatchPatch computer, then it can just push it directly to the target hosts.

OK, so let’s get started with the actual deployment. For this example we are deploying Windows 7 Service Pack 1.

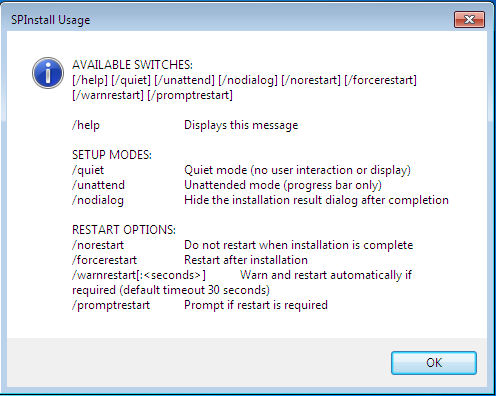
  1. First we need to determine what is the quiet/silent installation switch for the service pack exe. To do this we open a command prompt (Start > Run > cmd.exe) and type C:\deploymentFiles\windows6.1-KB976932-X86.exe /? where ‘deploymentFiles’ is the location of your service pack installer file. The /? will show us the command line switches that the exe supports. We will use /quiet /nodialog

    Win7SP1_setup_parameters

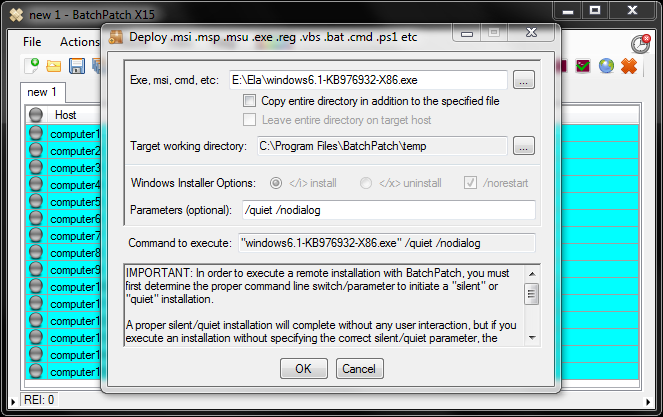
  2. Now, in the BatchPatch grid highlight the hosts that you want to deploy the service pack to, and then click on Actions > Deploy software/patch/script etc > Create/modify deployment. We need to select the location of the installer exe, and then we need to add /quiet /nodialog to the parameters field.

    CreateModifyDeployment

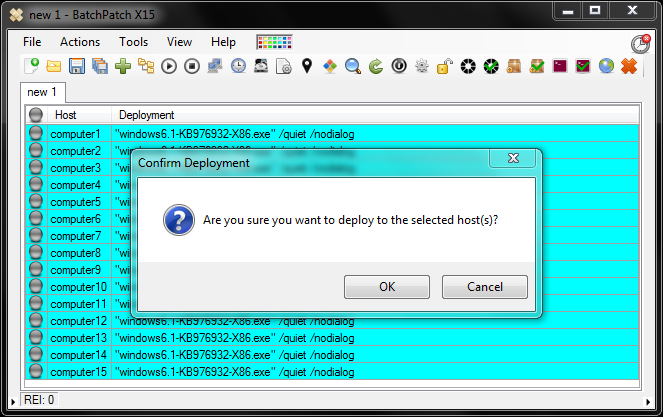
  3. After clicking OK we can see that each row has a Deployment command populated. Now all we need to do is execute the deployment. Highlight the rows and select Actions > Deploy software/patch/script etc > Execute deployment. Click OK to confirm deployment. That’s it! Now we wait for execution to complete.

    ConfirmDeployment

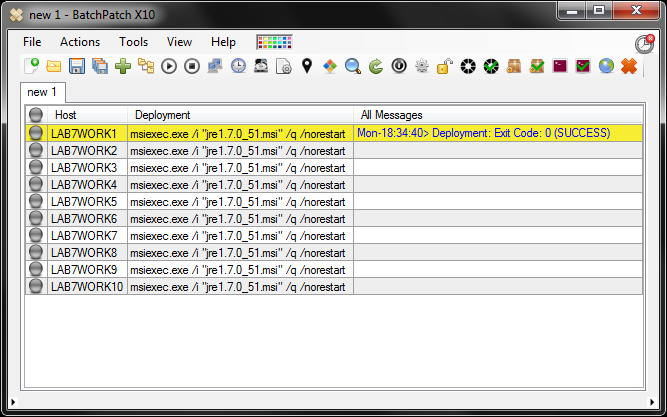
  4. If installation completes successfully we will see Exit Code: 3010, which is a typical exit code for Windows installer files that means the installation was successful but reboot is required to complete it. However, since we didn’t specify the /norestart switch, Windows will actually automatically initiate the reboot for us anyway.
Posted in Blog, General, Tutorials | Tagged , , | Comments closed

Using BatchPatch to Start and Stop Windows Services on Multiple Computers

Did you know that BatchPatch provides functionality to control Windows services on remote computers? For example, maybe you want to remotely reboot a large number of computers, but after they come online you also want to make sure that all services that are set to automatic are started. Fortunately you can do that pretty easily with BatchPatch. There are built-in scripts that enable you to perform the following actions on your network of computers. Best part is that you can perform these actions on many computers, simultaneously:

  • List all services
  • List automatic services
  • List manual services
  • List disabled services
  • List automatic services that are currently in a stopped state
  • Start automatic services that are currently in a stopped state
  • Start a specific service, by name
  • Stop a specific service, by name

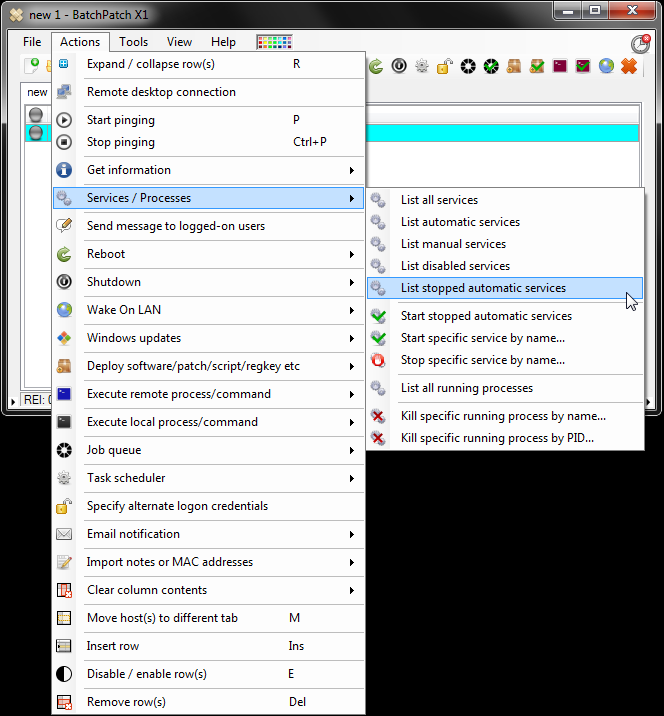
To get a list of the services that are set to Automatic but currently in a stopped state, highlight your host(s) and select Actions > Services / Processes > List stopped automatic services

ListStoppedAutomaticServices

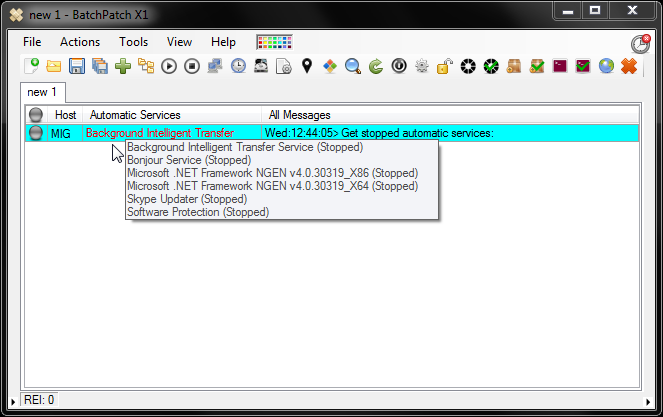
Notice that our stopped automatic services are listed in red:

ListOfStoppedAutomaticServices

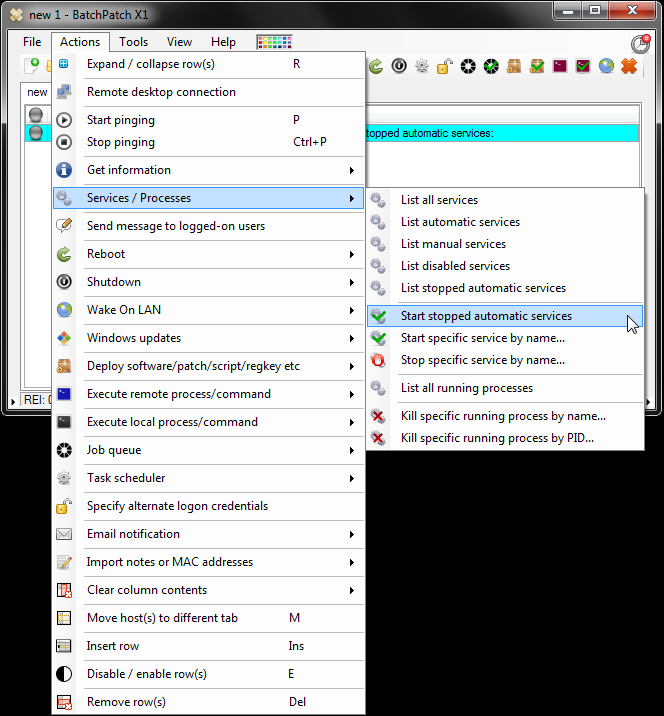
If we want to issue a start command to all of the Automatic services that are currently stopped, no problem. We just select Actions > Services / Processes > Start stopped automatic services

StartStoppedAutomaticServices

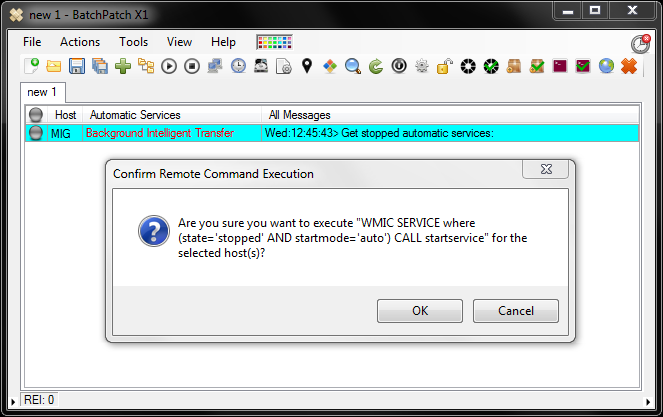
A confirmation dialog appears asking us to click OK to continue with the operation. The script that will be executed on the highlighted hosts is displayed.

StartStoppedAutomaticServices-Confirmation

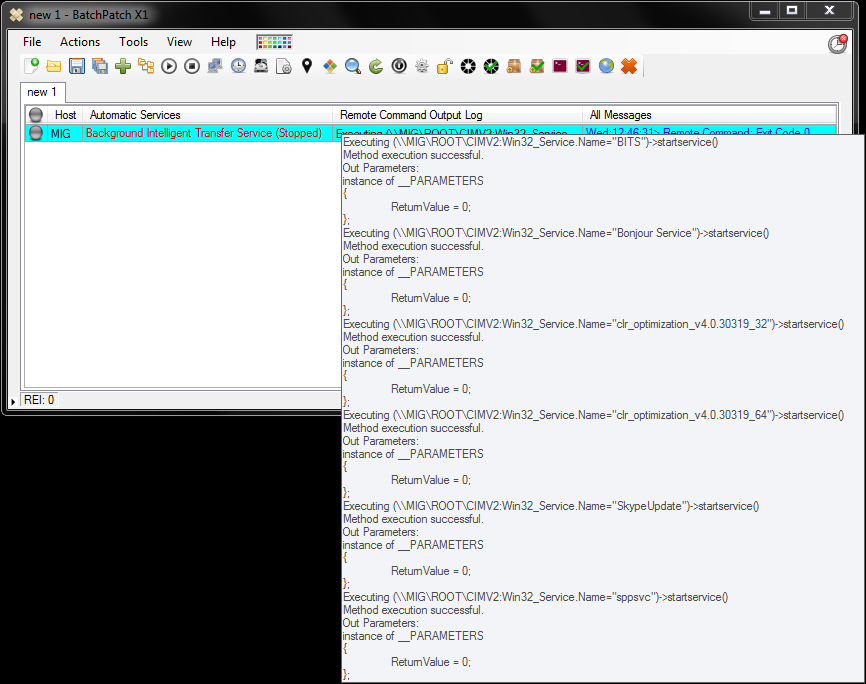
After clicking OK, BatchPatch will reach out to all of the target hosts that are currently highlighted in the grid, and it will execute the command to start all stopped automatic services. Upon completion we will see Exit code 0 in the All Messages column. We can then confirm that all of the services were sent start commands by looking at the contents of the Remote command output log column:

StartedStoppedAutomaticServicesToolTip

Posted in Blog, General, Tutorials | Tagged , , | Comments closed

Deploy Registry Keys to Many Computers – Video Demo

Registry key deployment to numerous remote computers using BatchPatch – Video Demo:

Posted in Blog, General, Tutorials, Videos | Comments closed

Deploy Registry Keys to Multiple Computers Using BatchPatch

A systems administrator frequently needs to update the Windows Registry of every computer on his/her network. Did you know that you can use BatchPatch to accomplish this task extremely rapidly? BatchPatch provides administrators with a very simple way of getting registry keys to remote computers on a network.

  1. Before we do anything please note that if you are going to be deploying a registry key/value to the HKEY_CURRENT_USER (HKCU) hive of the target computer(s), then you need to make sure that your ‘Remote Execution Context‘ is set to ‘Elevated token‘ and not ‘SYSTEM‘. If you are deploying a registry key/value to the HKEY_LOCAL_MACHINE (HKLM) hive of the target computer(s), then your ‘Remote Execution Context‘ can probably be set to either ‘SYSTEM‘ or ‘Elevated token‘. More details here: ‘Remote Execution Context
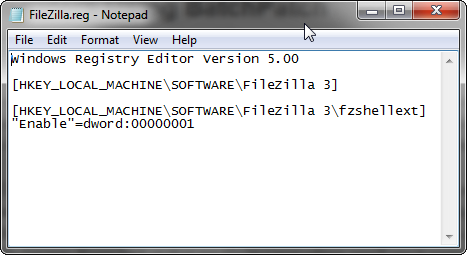
  2. Create a .reg file for deployment. To do this you simply launch regedit.exe and highlight the key that you want to deploy to your target computers, and then choose File > Export. The registry editor application will create a .reg file for you. If you look at that reg file in a text editor, you’ll see it contains a line for each value in the key that you are creating/modifying. In the below screenshot you can see a .reg file for a FileZilla configuration that contains a single DWORD value in the HKLM\SOFTWARE\FileZilla key.
     
    FileZilla_RegFile

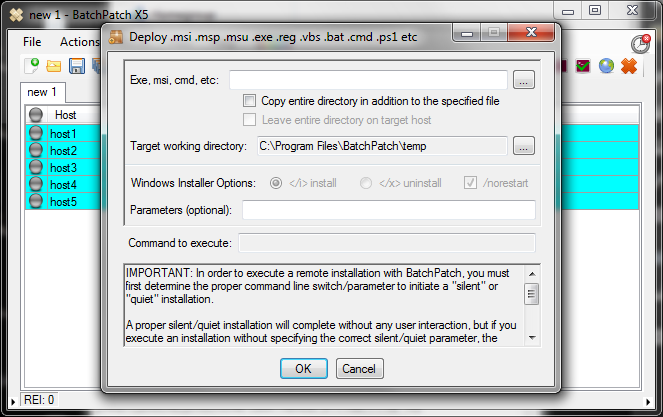
  3. Now that you have your .reg file prepared, highlight the hosts in BatchPatch that you want to deploy it to, and select Actions > Deploy software/patch/script/regkey > Create/modify deployment
     
    Deploy_Registry_Key
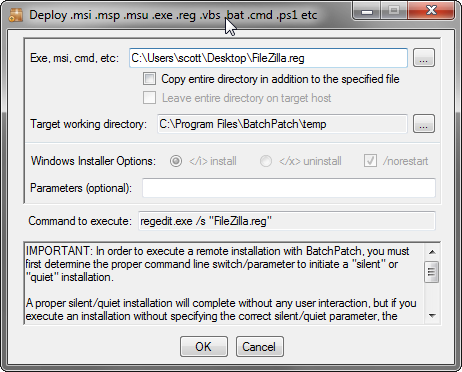
  4. Browse to the location of your .reg file. After you select the file and click OK, you’ll see that BatchPatch displays the Command to execute:
    regedit.exe /s "yourRegFile.reg"
     
    Deploy_Registry_Key2
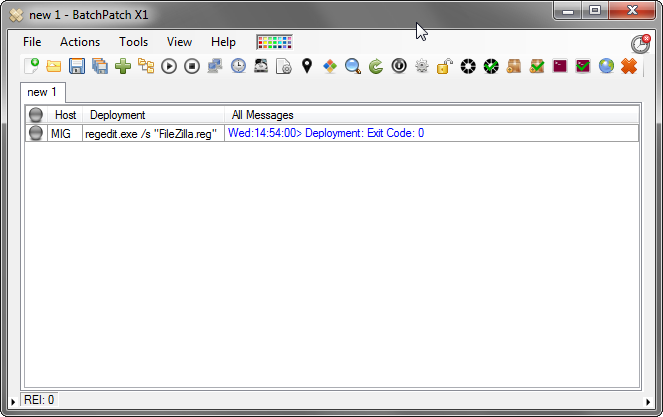
  5. The last thing you need to do is actually execute the deployment. You can do this by highlighting the hosts you are deploying to, and then select em>Actions > Deploy software/patch/script/regkey > Execute deployment. Upon successful completion of the deployment you should see Exit Code: 0 in the All Messages column.
     
    Deployment_Exit_Code_0


Here’s a video demonstration of registry key deployment with BatchPatch:

Posted in Blog, General, Tutorials | Tagged , | Comments closed

Deploy Software Remotely to Many Computers

This video demonstrates how to deploy software to multiple computers quickly and easily. It only takes a few clicks and a few seconds. In this instance we push install Notepad++ to 5 computers on our network.
 

Posted in Blog, General, Tutorials, Videos | Tagged , , | Comments closed

BatchPatch – New Features – 2014-02-13

Hey folks! – We published a new build earlier today, and I would like to take a moment to share with you some of the new features.

Read remote event log entries

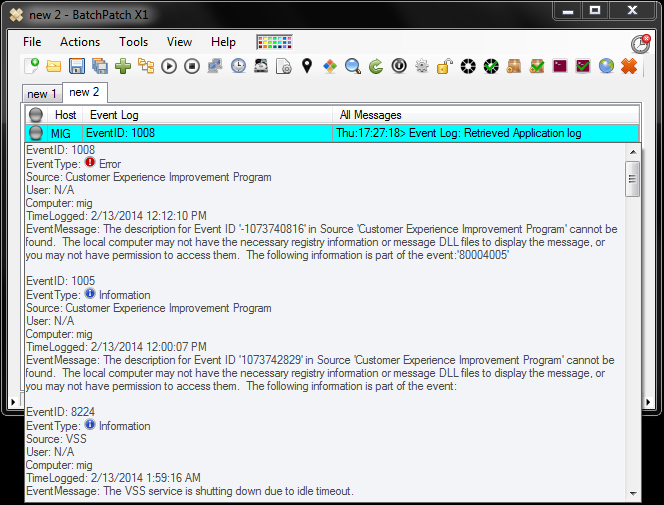
It’s now super-easy and convenient to use BatchPatch to help diagnose problems on your computers. We’ve added direct support to query the Windows event log on remote computers. This feature should come in very handy.
Select Actions > Get Information > Get event log entries
 
BatchPatch_EventLogQuery


Read remote registry keys directly

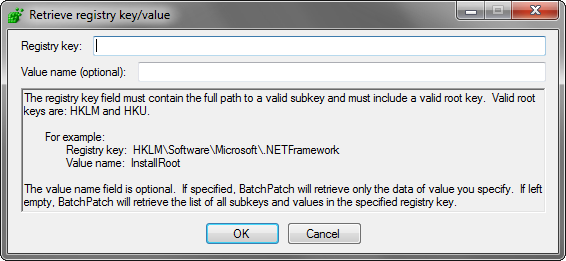
Using BatchPatch to query remote registry keys has been possible for a long time. However, in this most recent release we’ve added direct support for this functionality to make it easier for you to utilize.
Select Actions > Get Information > Get reg key/value
 
BatchPatch_ReadRemoteRegistry


Send custom messages to the logged-on users of your computers

It’s now very simple to notify logged-on users of any actions you are about to perform, especially if those actions will cause them to be booted off 🙂
Select Actions > Send message to logged-on users
 
BatchPatch_SendMessageToLoggedOnUsers


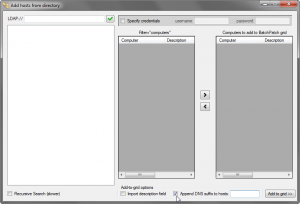
Optionally append DNS suffix to host names when importing hosts from Active Directory

If you prefer to import host names including the FQDN, this is now just a check-box away.
 
BatchPatch_ADPicker

Posted in Blog, General | Tagged , | Comments closed

BatchPatch Integration with WSUS and Group Policy

One of the questions we commonly receive is what is the best way to use BatchPatch in conjunction with a WSUS server?

First, let me say that BatchPatch works great in conjunction with WSUS, and since WSUS is free and extremely simple to setup, there’s little reason to not have it. However, WSUS is definitely *not* required. BatchPatch will work great without it.

If you don’t already have a WSUS server setup, you can typically get WSUS installed and running in only 30-60 minutes. If you aren’t familiar with WSUS, I would encourage you to install it on a spare VM. It requires little processing power, though it does require a substantial amount of hard drive space, and at a minimum you’ll want to allocate a 20GB data partition to it to store all of the updates. Download it for free from Microsoft: http://technet.microsoft.com/en-us/windowsserver/bb332157.aspx

A few advantages to using a WSUS server

  • Reduced bandwidth consumption: Your WSUS server will download updates from Microsoft, and then your clients will download updates from your WSUS server. Without WSUS, your clients would normally all retrieve updates directly from Microsoft.
    ***Note, BatchPatch also has a feature called Cached Mode, which enables you to reduce bandwidth consumption *without* WSUS by having BatchPatch download updates only on the computer running the BatchPatch console. Once downloaded, BatchPatch can then distribute these updates to your clients. See Cached Mode and Offline Updates for more information.
  • Easily approve or decline which updates will be seen by client machines: You can have WSUS automatically approve updates for you, but if there’s a specific update you want to make sure your machines don’t get, it’s easy to simply decline it.
    ***Note, BatchPatch is also capable of installing only specific updates and/or hiding specific updates without WSUS – see Installing Specific Updates and Hiding Specific Updates for more info
  • Reporting: WSUS will give you some basic reporting functionality.
    ***Note, BatchPatch also provides update history reporting. Please visit Create a Consolidated Report of Windows Update History for more info.

Our recommended approach to using BatchPatch with WSUS

  1. Use Group Policy to have your client machines automatically download updates from the WSUS:
    • Create/edit a group policy that is linked to the OU containing your computers
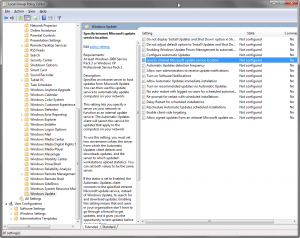
    • In Group Policy editor (gpedit.msc) go to Computer Configuration > Administrative Templates > Windows Components > Windows Update and make sure to enable the Specify intranet Microsoft update service location setting with your WSUS server as the target. Assuming that you are using the default WSUS configuration, then the value format for this policy would be
      http://MyWSUSServer:8530
    • In the same location, set the Automatic Updates detection frequency to an interval of 1 hour, which will ensure that your machines retrieve updates soon after they are available
    • In the same location, set the Configure Automatic Updates setting to 3 = (Default setting) Download the updates automatically and notify when they are ready to be installed
    • Review this posting, which explains a potential issue that can arise due to the ‘Dual Scan’ functionality that Microsoft introduced to Windows 10 in August 2017.

     
    GroupPolicyEditor_WindowsUpdate

  2. When your maintenance windows begins, use BatchPatch Actions > Windows Updates > Install downloaded updates, which will tell your client machines to install updates that they have already downloaded. They will not reach out to your WSUS unless you instead select BatchPatch Actions > Windows Updates > Download and install updates. However, the whole purpose of using group policy setting number “3” (specified above) is to have your machines download available updates before your maintenance window begins. This way when you are actually ready to install updates on your machines, you can minimize the total time the process takes by having the updates already downloaded. Of course you are welcome to use BatchPatch to initiate the download portion if that’s your preference, but for maximum time savings, we like to have the clients pre-download any available updates. This will also prevent any potential bottlenecks on the WSUS server.
Posted in Blog, General, Tutorials | Tagged , | Comments closed

Silently Deploy EXEs and MSIs to Computers on Your Network

BatchPatch makes it very simple to deploy not only Windows Updates but also software, scripts, registry keys, MSIs, EXEs… you name it. Today we’re going to be discussing how to deploy software to computers on your network. In this case we’ll use Firefox as an example. (Scroll to the bottom for a video demonstration)

1. Launch BatchPatch and right click on the empty grid. Choose “Add hosts…” (NOTE, you may also add hosts directly from Active Directory or from a .TXT or .CSV file).

BatchPatch_AddHosts

2. Add the computer names or IP addresses of the machines that you want to deploy to. Then click OK.

BatchPatch_AddHosts_2

3. After clicking OK, you’ll see the hosts listed in the BatchPatch grid.

BatchPatch_Grid

4. Select Actions > Deploy software/patch/script/regkey etc > Create/modify deployment

BatchPatch_CreateDeployment

5. At this point you should be looking at the Deployment form.

5

6. Browse to the location of the Firefox setup file on your computer by clicking the “…” button to the right of the textbox at the top of the Deployment form. In order to deploy any software EXE, MSI, MSP, or MSU, we must also make sure that when the file is executed remotely on the target computers, it will be executed silently or quietly. This means that it will not prompt the user to select any installation options or click OK or Next etc. We need the installer package to run on its own without any user interaction whatsoever. If the installer prompts for user interaction, it will hang indefinitely on the target computer. This is because the installer will be executed hidden, and any popups will not be visible to users and will just wait indefinitely for someone to interact with them and click OK or Next etc. So, we add the /S switch to the Parameters field. Remember that different installer files will have different silent/quiet parameters. Some use /S or /s while others use /Q or /q. Others may use a different parameter or parameters altogether. At the time of this writing, the Firefox executable supports both /S and -ms. Either of those switches will work for a silent deployment. For any deployment it’s important to first determine what switch to use either by checking with the vendor, googling, or by running the installer at the command line with a /? or ? parameter to see what options the particular installer has. Click OK to close the Deployment form.

BatchPatch_DeploymentForm

7. You should now have a command in the Deployment column for each host that you intend to deploy to. You are ready to execute the deployment.

BatchPatch_DeploymentCommand

8. All that’s left to do is execute the deployment. Go to Actions > Deploy software/patch/script/regkey etc > Execute deployment. When you do this, the firefox_setup_26.0.exe file will be copied to the target systems, and then the “firefox_setup_26.0.exe /S” command will be executed on each target. BatchPatch will report Exit Code 0 if all was successful.

BatchPatch_ExecuteDeployment


Video – Deploying Software to Multiple Computers with BatchPatch:


Posted in Blog, General, Tutorials | Tagged , | Comments closed

BatchPatch – New Features Released Fourth Quarter 2013

Hey everyone – I just wanted to take a few minutes to blog about some of the new features that we’ve added to BatchPatch over the past several months. We’ve been able to get a lot of good functionality added, and there is still a plenty more to come in the new year. The list of features below only covers the more significant additions.  There have also been a ton of minor updates and improvements made in the past months.

Download and/or Install Specific Windows Updates by Name

Not only can you easily download and install all available Windows Updates, but now it’s also very easy to choose specifically which Windows Updates you want to download and/or install on target computers simply by inputting a list of KB numbers or update titles.  See Actions > Windows Updates > Create/modify list of specific updates for download / installation.

Hide / Unhide Windows Updates

If you’re not using a WSUS server, you might find that you want or need to hide updates that you don’t want to install in order to prevent them from constantly re-appearing in the list of available Windows Updates on your network of computers.  BatchPatch lets you easily choose which updates to hide or unhide.  See Actions > Windows Updates > Hide / Unhide updates.

Bypass the Default/Managed Update Server and Use Microsoft Update Instead

If you are using WSUS or SCCM in your environment, there are times where you may still want to have computers check-in with Microsoft Update instead of your own managed update server.  BatchPatch now has an option to bypass your managed server so that you can search, download, and install available updates from Microsoft Update instead.  See Tools > Settings > Remote Agent (or Tools > Settings > Windows Update Agent).

New PDF BatchPatch Administrator’s Guide

It’s now much easier to get help with the new searchable PDF Administrator’s manual.  The support forum is, of course, still available, and you can always email us too.  See Help > BatchPatch Admin Guide.

Emulate Microsoft’s Delivery of “Important” and “Recommended” Updates

BatchPatch now has search options that allow you to search only for Important updates or Important + Recommended updates.  See Tools > Settings > Remote Agent (or Tools > Settings > Windows Update Agent).

View BatchPatch.log and WindowsUpdate.log Files in the System Default Viewer Instead of the BatchPatch Built-In Log Viewer

If you have a log file viewer that you prefer to use, such as CMTrace, you are now able to have BatchPatch launch log files in that viewer rather than in the built-in viewer.  See Tools > Settings > General.

Email Notifications

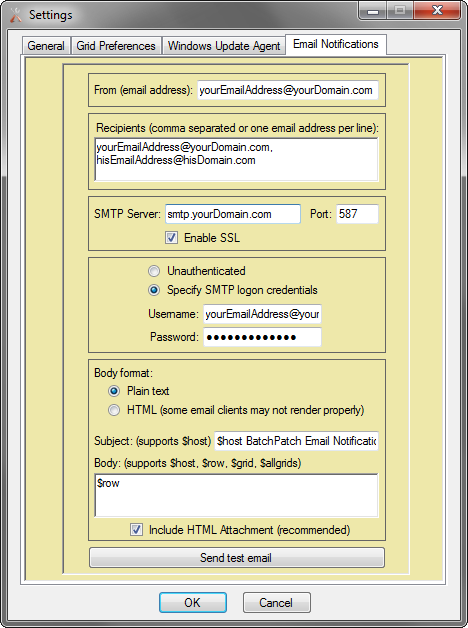
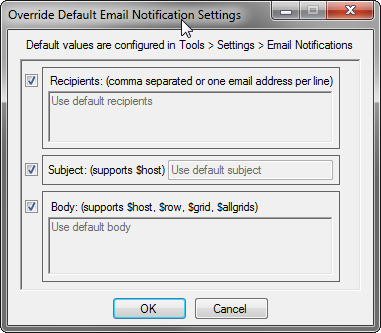
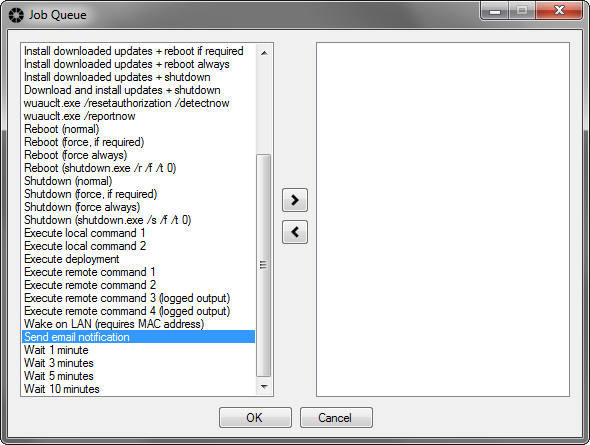
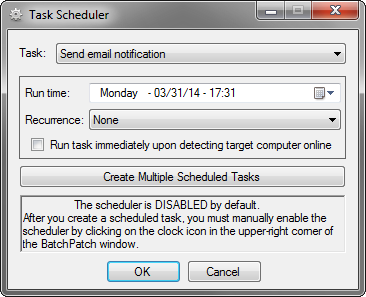
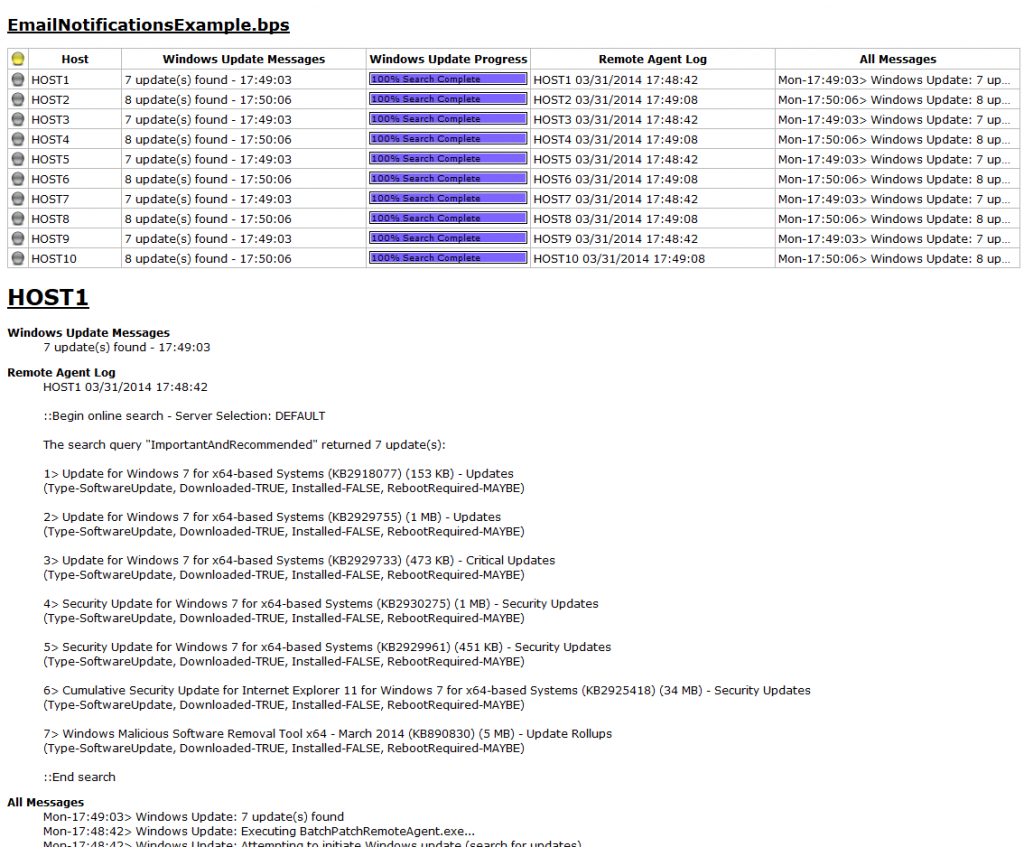
BatchPatch now includes functionality to send email notifications either in a BatchPatch Job Queue or as a BatchPatch Scheduled Task.  Notifications may be sent per-row, per-grid, or per-all-grids in a given instance of BatchPatch.

Export BatchPatch Grids to HTML

Use the File > Export grid option to save a grid or grids at HTML files.  This option gives you a nice view of a BatchPatch grid and all the cell contents in an easy to digest format.

Retrieve the Pending Reboot Status of Target Computers

There is no longer any need to question if your computers are waiting to be rebooted.  BatchPatch can reach out to target machines and check all of the places that Windows stores pending reboot information, so that you can know exactly what the status of your machines are.


Posted in Blog, General | Tagged , , , , | Comments closed

Installing Specific Windows Updates on 20 Remote Computers – BatchPatch Video Demo

Posted in Tutorials, Videos | Tagged , , , , , , , | Comments closed