Virtual Machine Guest + Host Update and Reboot Sequence Automation

Today I want to take some time to address a common scenario for administrators of virtual machine environments. In the most recent release of BatchPatch we added a new feature called the ‘Advanced multi-row queue sequence,’ which allows the BatchPatch administrator to create more complex update and reboot sequences than were previously possible. One example of where this can really come in handy is for virtual machine environments.

Imagine for a moment that you have a Hyper-V host with a dozen virtual machine guests running on it. When Microsoft ‘Patch Tuesday’ arrives, you want an easy way to update all of the virtual machines and then update the physical VM host, and then finally reboot the VM host. Not only that, but you want to do it by launching a single task that will take care of the entire process so that you don’t have to pay attention to each step along the way. The new ‘Advanced multi-row queue sequence’ in BatchPatch let’s you do exactly that.

For this example, we’ll use the BatchPatch ‘Advanced multi-row queue sequence’ to create and then execute a sequence to download and install Windows Updates on all of the virtual machine guests on a particular virtual machine host. And then as soon as the updates have been installed on all guests, the host will be automatically triggered to download and install updates plus reboot.

  1. To get started let’s select all of the VM guests on Hyper-V_HOST1.
    2015-03-23 16_12_16-new 1 - BatchPatch X8
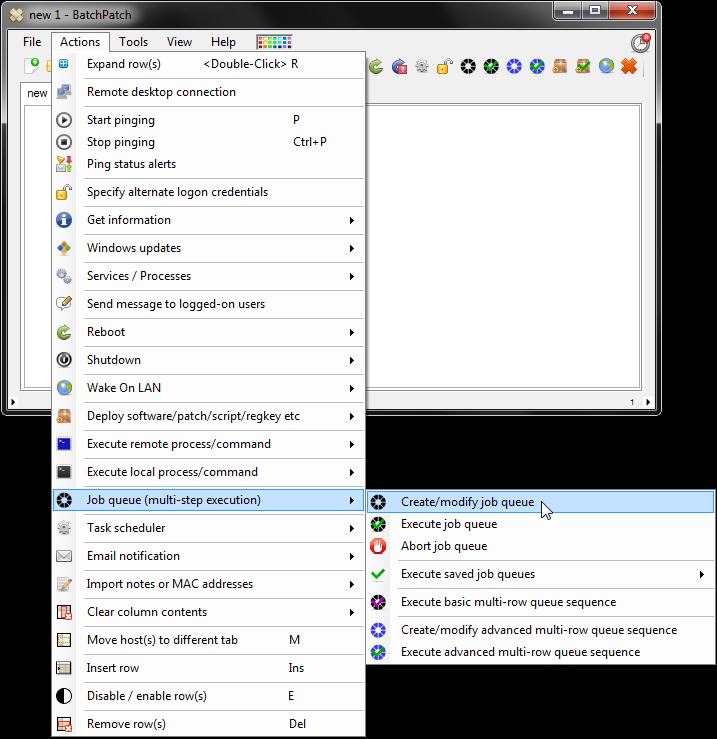
  2. Next select ‘Actions > Job Queue > Create/modify advanced multi-row queue sequence.’ In the ‘Advanced Multi-Row Queue’ window we have to now choose a name for our sequence, and we have to specify the position number of each host/guest that will participate in it. In the screenshot below you can see that I’ve called the sequence ‘Hyper-V_Sequence1’ and I’ve applied position number 1 value to all of the VM guests, with the VM host getting position number 2. What this means is that when we eventually execute the sequence, all position number 1 rows will execute simultaneously, and then BatchPatch will wait for them to complete. Once all position 1 rows are done, the position 2 row will begin execution. The sequence name is used to determine which rows are participating in a given sequence. If you apply the same sequence name to all rows, then all rows will be included in the same sequence. If you want to have multiple different sequences in a single grid, no problem. To do that you simply need to apply a different sequence name along with appropriate position numbers to each group of hosts.
    2015-03-23 16_15_27-new 1 - BatchPatch X8
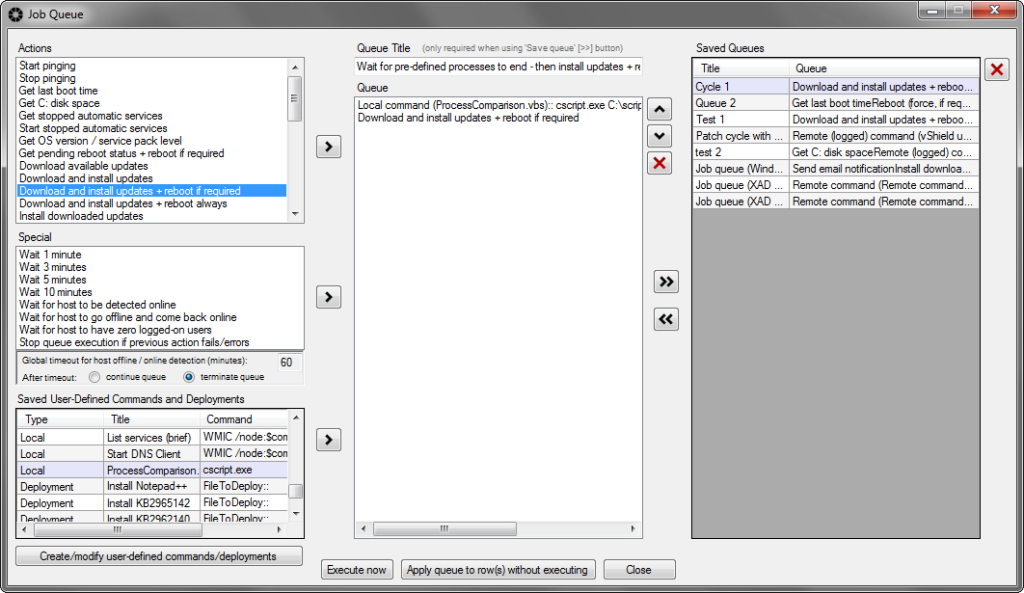
  3. Now that we’ve set the sequence name and position numbers, we have to configure the actual action that each row will execute when the sequence is launched. To do this, we select all of the VM guest rows and then go to ‘Actions > Job Queue > Create/modify job queue.’ In the job queue window we’ll select ‘Download and install updates.’ Then we click ‘Apply queue to row(s) without executing.’ Lastly, we select the VM host row and apply a queue to it as well. However, in this case we’ll apply ‘Download and install updates + reboot always.’
    2015-03-23 16_20_10-Job Queue
    We end up with something like this:
    2015-03-23 16_21_30-new 1 - BatchPatch X8
  4. We’re almost done with the setup. The last thing we need to do is create an ‘Execution row’ for the sequence. This is a special row that we designate to enable us to actually launch the sequence. The host name that we specify for the row doesn’t actually matter, but for the sake of clarity I’ve created a new row ‘Hyper-V_Sequence1_ExecutionRow’ in the ‘Host’ field.
  5. 2015-03-23 16_25_19-new 1 - BatchPatch X9

  6. The final step is to execute the sequence. In this example we’ll launch the sequence manually, but you can just as easily launch the sequence at a specific time and date using the ‘Task Scheduler.’ To launch the sequence on-demand, highlight the ‘Execution Row’ and then select ‘Actions > Job Queue > Execute advanced multi-row queue sequence.’ The ‘Confirm Action’ prompt appears and tells us exactly what is about to happen. When we click ‘OK,’ the job queue that we specified for each row in the grid that contains the sequence name ‘Hyper-V_Sequence1’ will be executed in the order that we specified, which now appears in the ‘Advanced Multi-Row Queue’ column. In this instance that means all of the VM guests will download and install updates. When they are all finished, the VM host will then download and install updates plus reboot.
    2015-03-23 16_30_08-new 1 - BatchPatch X9
Posted in Blog, General, Tutorials | Tagged , , , | Comments closed

Advanced Multi-Row Queue Sequence

In the most recent release of BatchPatch we added a cool new feature that we’re really excited about. It’s called the Advanced Multi-Row Queue Sequence. This new automation feature really ties together some of the other functionality in the application, so that you can now create much more advanced, automated sequences. Essentially it allows you to expand the functionality of a normal job queue across multiple rows. Instead of just having a single host be able to execute a sequence of actions on that host, independently of tasks that might be running on other hosts, the advanced multi-row queue sequence allows you to tie together or link the actions of different hosts into one larger, more complex sequence.

You can use the advanced multi-row queue sequence to execute an action or a set of actions on one or more target computers. When those target computers complete the specified actions, another target computer or set of computers could be triggered to execute an action or set of actions. When the second set of computers is finished, a third set of computers could be triggered, and so on. In a single sequence you can integrate scripts, deployments, updates, reboots, and pretty much anything else that BatchPatch has to offer.

Admittedly, it’s a bit challenging to explain the advanced multi-row queue, so after I do my best to give you some examples of how it might be used, I’ll include a step-by-step tutorial so that you can see exactly what I mean. Below are a few ways that one can use this new feature:

  • In a virtual machine environment an administrator could use an advanced multi-row queue sequence to update and reboot all the VM guests as well as their VM host, all in a single automated sequence. The sequence could be configured so that when it begins all VM guests are updated, and then when all VM guests are finished updating, the VM host is automatically triggered to update and reboot.
  • In an environment that utilizes a script to put the entire environment into ‘maintenance mode,’ an advanced multi-row queue sequence could be used to launch the script and wait for it to complete, and then upon completion start the update process on hosts, and then when the update process on hosts is completed, another script could be triggered to disable ‘maintenance mode’ for the environment.
  • Some environments require that machines are only taken offline or rebooted in a very specific order. The advanced multi-row queue sequence allows you to easily string together actions such that any number of hosts could be updated and rebooted in any order desired by the administrator. Target hosts could be setup to update sequentially or simultaneously, or you could configure a combination of sequential and simultaneous actions.

Tutorial: Using the Advanced Multi-Row Queue Sequence

    In this example we’re going to configure and execute a sequence that will download and install updates on two target hosts, then reboot the two hosts and wait for them to go offline and come back online, and then when both of the target hosts are back online, two other hosts will be triggered to download and install updates plus reboot. This should give you a very good idea of the types of things that can be done with the advanced multi-row queue sequence.

  1. The first thing we have to do is configure the regular job queue for each row. Since all 4 hosts in our sequence are going to be performing the same actions, we can apply the same queue to all of them. However, if you are going to have different hosts complete different actions, then adjust accordingly so that each host’s job queue is set to complete only the tasks that need to be completed on that host. Highlight the hosts and select ‘Actions > Job Queue > Create/modify job queue.’ In the ‘Job Queue’ window choose the desired actions, and then click ‘Apply queue to row(s) without executing.’ In the screenshot below you can see that I’ve selected two actions:
    Download and install updates + reboot always
    Wait for host to go offline and come back online

    2015-03-04 16_41_45-Job Queue
  2. Once the desired job queue is applied to each row, we have to choose a name for our sequence, and we have to set the order of execution. In this example our sequence is going to execute the job queue on host1 and host2 simultaneously. Only after both rows’ actions are complete and the hosts have come back online after being rebooted will the job queues for host 3 and host 4 be executed simultaneously. Select ‘Actions > Job Queue > Create/modify advanced multi-row queue sequence.’
    2015-03-04 16_48_26-new 1 - BatchPatch X4
  3. Every sequence in a grid has to have a unique name. All rows with the same sequence name will be considered part of the same sequence. If two rows are given different sequence names, those two rows will not be able to participate in the same sequence. As you can see in the screenshot, using the ‘Apply values to selected row(s)’ button, I’ve set the sequence name ‘Tutorial,’ and I’ve set the sequence position numbers for all hosts so that host1 and host2 are in position number 1, and host3 and host4 are in position number 2.
    2015-03-04 16_52_44-new 1 - BatchPatch X4
  4. We’re almost done, but before we can actually execute the sequence, we need to create a specially designated ‘ExecutionRow.’ Since a sequence might be comprised of numerous rows, we use this specially designated ‘ExecutionRow’ for launching the sequence. In this case, the host name used in the execution row doesn’t matter and can be anything. I’ve chosen ‘TutorialExecutionRow’ but you could use anything you want. I then highlighted the row and chose the “Create Sequence Execution Row” option, and then I clicked ‘Apply values to selected row(s).’ In the screenshot below in the ‘Advanced Multi-Row Queue’ column we can see what this looks like. All 5 rows are assigned the same sequence name ‘Tutorial.’ The 4 hosts that will be included in the sequence also have position numbers, while the execution row is assigned as such.
    2015-03-04 17_04_38-new 1 - BatchPatch X5
  5. We’re now ready to execute the sequence! Highlight *only* the execution row, and then select ‘Actions > Job Queue > Execute advanced multi-row queue sequence.’ That’s all there is to it. You can even set the execution row to be launched by the Task Scheduler if you desire. However, as always we urge you to use caution when running a complex sequence without a human monitoring the process.

    You’ll notice that when you launch the sequence the first thing that happens is both host1 and host2 start performing the actions in their respective job queues since they are both assigned sequence position number 1. Once both hosts have completed their respective queues, only then will host3 and host4 begin their job queues because host3 and host4 are both assigned sequence position number 2.

    If you’re confused about this feature, another tutorial that demonstrates how you might use the advanced multi-row job queue sequence is posted here: Virtual Machine Guest Host Update And Reboot Sequence Automation
Posted in Blog, General, Tutorials | Tagged , , , | Comments closed

Basic Multi-Row Queue Sequence

One of the questions we get sometimes is how do you update and reboot a set of computers in a specific sequence, without having to babysit the entire process?

In the most recent version of BatchPatch we introduced the basic ‘multi-row job queue sequence.’ This new feature takes the existing job queue to the next level by allowing you to string together job queues from multiple rows in the BatchPatch grid all into a single, larger multi-row (multi-host) job queue.

So, let’s say you have 10 machines, and you want them to be updated and rebooted one at a time, so that no more than one host from the group is ever offline at any given time. You can use the new basic ‘multi-row job queue sequence’ to accomplish this. Another potential use case is for a virtual machine environment. You might want to update each guest VM in sequence, followed by the VM host. (NOTE: We also have an *advanced* multi-row queue sequence, which allows much more complex sequences that are not limited to a single host at a time. You can use it to execute actions on multiple hosts, and when those hosts all complete their actions, another set of hosts can be triggered to execute actions, and when all of the second set completes, a third set can be triggered, and so on. Very cool stuff!)

Below I explain how to use the new basic ‘multi-row job queue sequence’ to perform a simple ordered reboot sequence for 3 hosts. The goal here is to reboot host1, wait for it to go offline and come back online, then reboot host2 and wait for it to go offline and come back online, and then finally reboot host3.

  1. First we need to apply a job queue to each row that we want to include in the multi-row job queue sequence. Highlight the hosts and then select ‘Actions > Job queue > Create/modify job queue’. The job queue that we’re creating contains only 2 items:

    Reboot (force, if required)
    Wait for host to go offline and come back online

    Click ‘Apply queue to row(s) without executing’
    2015-02-10 17_34_38-Job Queue

  2. After applying the queues to the selected rows we’re ready to start our multi-row queue sequence. Highlight the rows in the order that you want them to be processed. Then select ‘Actions > Job queue > Execute basic multi-row queue sequence’
    2015-02-10 17_39_21-Program Manager
  3. That’s all there is to it! In the screenshot below you can see that our first host is in the process of rebooting and ‘waiting for host to go offline and come back online.’ The second and third hosts are queued.
    2015-02-10 17_43_58-new 1 - BatchPatch X3
Posted in Blog, General, Tutorials | Tagged , , | Comments closed

Retrieving Event Log Entries from Remote Computers

One of the functions that BatchPatch provides is the ability to retrieve information from many target computers, simultaneously. And one of the most common sources of information that systems administrators need to access is the event log. So, the question then is how does one use BatchPatch to obtain event log information from remote computers? See below.

  1. First, make sure the ‘Remote Registry’ service on the target computer is enabled and running. If it’s not already running, you can use BatchPatch to start it. The two commands that you would need to run are:

    WMIC SERVICE where (displayname='Remote Registry') CALL ChangeStartMode Manual

    WMIC SERVICE where (displayname='Remote Registry') CALL startservice

    If you’re not familiar with using BatchPatch to remotely execute commands, please see this link for instructions. You can use the two commands listed above, in conjunction with the instructions at the following link, to enable and start the Remote Registry service on your target computers:
    Executing Remote Commands With BatchPatch
  2. Once you have the ‘Remote Registry’ service running on the target computers in question, you’re ready to retrieve event log information. Highlight your host(s) in the grid, and then select ‘Actions > Get information > Get event log entries > Settings/filters’.
  3. In the ‘Event Log Filters’ window, choose the desired settings. Note, the more logs we search, the longer the process will take, so it’s a good idea to search only as far back as you need to. You can optionally include or exclude particular types of events or specific event IDs. Once the desired filters are applied, click OK. For this example I am searching a max of 1000 entries over the past 24 hours.
    2015-02-23 16_27_09-new 1 - BatchPatch X1
  4. Now that the desired filters are set, let’s retrieve matching entries from the System log on the target computer(s). Highlight the host(s) and select ‘Actions > Get information > Get event log entries > System’. If you want to retrieve contents of the Application log or the Security log, you would simply choose the appropriate menu item. However, in this example I’m interested in retrieving only entries in the System log.
    2015-02-23 16_32_44-Program Manager
  5. That’s pretty much all there is to it! Wait for a moment until the query returns, and then you’ll be able to examine the entries that were found.
    2015-02-23 16_37_53-new 1 - BatchPatch X1
    2015-02-23 16_36_48-Program Manager
Posted in Blog, General, Tutorials | Tagged , | Comments closed

Using the Task Scheduler in BatchPatch

BatchPatch really shines when it comes to providing real-time control and monitoring of the Windows Update process, reboots, software deployments, and remote script execution on numerous computers. But what if you want to execute tasks while you’re sleeping? For sysadmins it’s extremely common to have to perform tasks on servers at off-hours, often in the middle of the night. We’re all used to staying up through the middle of the night to perform various maintenance routines, but there are plenty of times we’d rather be lying in bed and letting our computers perform scheduled tasks for us! Needless to say, scheduled tasks are absolutely *not* appropriate for every situation. Many times a task is too critical to be executed without human oversight, but in the cases where something is less critical, why not let BatchPatch handle it for you in the middle of the night?

For example, let’s say that you have some servers that aren’t super-critical, but they still get used a lot and can’t be easily taken down during the day. Perhaps on these servers it’s safe for you to schedule an update + reboot in the middle of the night? Obviously that is your decision to make, and you always have to be prepared for something to go wrong. However, assuming you’ve decided that you want to run updates/reboots in the middle of the night, here’s how you can do it with BatchPatch.

  1. Highlight your hosts in the BatchPatch grid, and then select ‘Actions > Task scheduler > Create/modify scheduled task.’ You’ll see the Task Scheduler appear.
    2015-02-17 15_09_52-new 1 - BatchPatch X3
  2. In the drop-down menu, select the task that you want to perform. For the sake of this example, we’re going to use “Download and install updates + reboot if required.” However, you can choose any BatchPatch task, including any of the custom commands or scripts that you’ve previously created. After selecting the desired task, set the run time, and then click OK.
  3. We can see that there is a task and time applied to each row that we had previously selected, but we’re not quite done. The task scheduler is disabled by default. So, even though we setup task actions and run times, we have to enable the scheduler in order for our tasks to be submitted for execution at the desired times. To enable the scheduler, click on the small clock/timer icon in the upper right corner of the BatchPatch window. The icon will turn from red to green, indicating that the scheduler has been enabled.
    2015-02-17 15_10_58-Program Manager
  4. Note, you can set the scheduler to be always-on, if you want, so that you don’t have to manually enable it. Go to ‘Tools > Settings > General’ and select the checkbox to ‘Enable Task Scheduler on startup.’
    2015-02-17 15_21_30-Program Manager
  5. That’s all there is to it. The scheduled tasks will run at the designated times. What if you want to receive an email of the grid activity? We agree that it would be convenient to wake up in the morning and check your email to see how things went. In this case, one option is to create an additional row in the grid with a new task that will be responsible for emailing you an HTML report of the grid status at some point after you expect your tasks to be complete. In this example I’ve created an email notification task to run 2 hours after my updates/reboots.
    2015-02-17 15_28_00-new 1 - BatchPatch X4
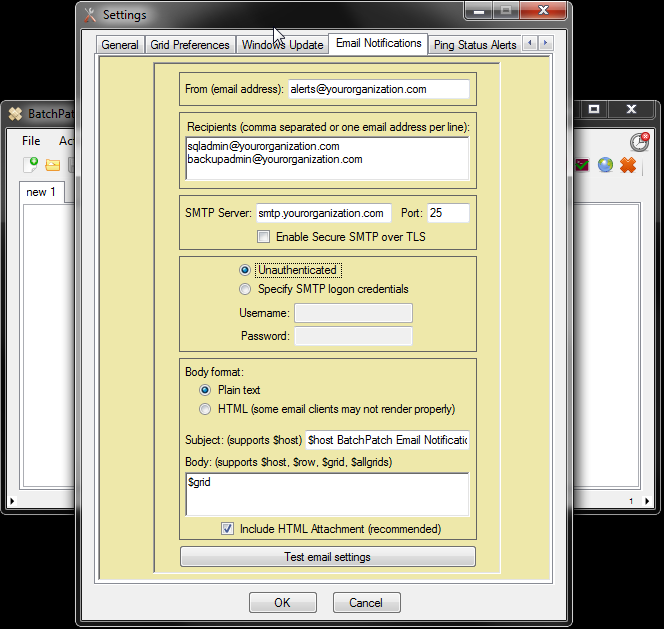
  6. The email notification that we created in the previous step will be sent according to the settings defined in ‘Tools > Settings > Email notifications.’ However, I want to make one adjustment in my email notification task, so that the notification sends me an entire grid report instead of just a single row report. Select ‘Actions > Email notifications > Override default email notification.’ Then type “$grid” in the ‘Body’ field. This tells BatchPatch to email me a whole grid report when this task is executed.
    2015-02-17 15_30_44-new 1 - BatchPatch X4
  7. The final grid, ready to run tasks tonight, looks like the screen below.
    2015-02-17 15_33_08-new 1 - BatchPatch X4
Posted in Blog, General, Tutorials | Tagged , | Comments closed

Sequencing Updates and Reboots Across Multiple Target Hosts

One of the questions we get sometimes is how do you update and reboot a set of computers in a specific sequence, without having to babysit the entire process?

In the most recent version of BatchPatch we introduced the ‘Basic Multi-Row Queue Sequence.’ This new feature takes the existing job queue to the next level by allowing you to string together job queues from multiple rows in the BatchPatch grid all into a single, larger multi-row (multi-host) job queue.

In the next version of BatchPatch, expected to be released in early Spring 2015, we will be introducing the ‘Advanced Multi-Row Queue Sequence.’ This feature will improve upon the basic sequence by allowing more complex configurations. Instead of limiting you to sequences that process one host at at time in a specified order, the advanced sequence functionality will enable you to process multiple hosts in sequence, such that you could have X number of hosts perform any actions, and when they complete their actions, another set of Y number of hosts can be triggered to perform actions, and when they complete their actions, another Z number of hosts can be triggered to perform actions, and so on.

For a detailed tutorial on using the ‘Basic Multi-Row Queue Sequence’ please follow this link: Using the Basic Multi-Row Queue Sequence

For a detailed tutorial on using the ‘Advanced Multi-Row Queue Sequence’ please follow this link: Using the Advanced Multi-Row Queue Sequence

Posted in Blog, General, Tutorials | Tagged , , | Comments closed

Uninstalling Java Remotely from Numerous Computers

One task that nearly every administrator has to complete at some point or another is the removal of Java. As with many typical sysadmin tasks, removing software on remote computers is very quick and simple with BatchPatch. Today I’d like to show you how to remove Java from many computers using BatchPatch. We have a few different options for executing the uninstallation, so take a look through all options before deciding which one you want to use. IMPORTANT: Always test a destructive process like this on a non-production machine before you attempt to perform an action on one or many production machines!

Method 1 (Preferred Method): Uninstall a specific Java version, by UninstallString:

    This method provides more precision since it uses the exact uninstall string for the application instead of a name search. However, it also requires a bit more effort.

  1. First we need to locate the UninstallString value in the registry for the version of Java that we want to remove. Generally one of the following two registry keys will contain the UninstallString value that we are looking for:

    HKEY_LOCAL_MACHINE\SOFTWARE\Microsoft\Windows\CurrentVersion\Uninstall
    OR
    HKEY_LOCAL_MACHINE\SOFTWARE\Wow6432Node\Microsoft\Windows\CurrentVersion\Uninstall

    On my test machine I located the UninstallString value for Java 8 Update 31, and it contains the following data:
    MsiExec.exe /I{26A24AE4-039D-4CA4-87B4-2F83218031F0}
  2. In BatchPatch, highlight the target hosts and select ‘Actions > Execute remote process/command > Create/modify remote command 1’. Enter the following syntax into the command field, substituting the correct string for the particular version of Java that you are uninstalling:
    MsiExec.exe /qn /X{26A24AE4-039D-4CA4-87B4-2F83218031F0} /norestart
  3. Click the ‘Execute’ button
    2015-01-28 18_18_25-new 4 - BatchPatch X1
  4. In the ‘All Messages’ column we see exit code 0, which indicates success.
    2015-01-28 18_19_32-new 4 - BatchPatch X1


IMPORTANT NOTE:

Methods 2 and 3 should be used with caution. Both of the following uninstallation methods utilize the Win32_Product class. However, before proceeding with either method, please review this article to learn why some sysadmins are opposed to using the Win32_Product class.

Method 2: Uninstall a specific Java version, by name query:

  1. In BatchPatch, highlight the target hosts and select ‘Actions > Execute remote process/command > Create/modify remote command 3 (logged output)’. Enter the following syntax into the command field, substituting the version of Java that you want to remove. Make sure that the name you use matches the exact name that appears in the ‘Add/Remove Programs’ wizard on the target computer(s):
    wmic product where (name = 'Java 8 Update 31') call uninstall
  2. Click the ‘Execute’ button
    2015-01-28 18_13_18-new 2 - BatchPatch X1
  3. You can see in the screenshot below that this command returns successfully with exit code 0. Also, the ‘Remote Command Output Log’ column shows the output that was returned by the target, giving us additional confirmation of what was executed.
    2015-01-28 18_01_40-Program Manager

Method 3: Uninstall all versions of Java, by name query

Method 3 and Method 1 are similar, except we change the query in Method 3 to include all software products on the computer that begin with the name ‘Java’

  1. In BatchPatch, highlight the target hosts and select ‘Actions > Execute remote process/command > Create/modify remote command 3 (logged output)’. Enter the following syntax into the command field:
    wmic product where (name like 'Java%') call uninstall
  2. Click the ‘Execute’ button
    2015-01-28 18_24_41-new 5 - BatchPatch X1
  3. You can see in the screenshot below that this command returns successfully with exit code 0. Also, the ‘Remote Command Output Log’ column shows the output that was returned by the target, giving us additional confirmation of what was executed. Note, in this case every app on the computer that has a name beginning with ‘Java’ is removed. The reason we see a return code of 1605 for the ‘Java Auto Updater’ is because the Java uninstallation was executed first, and the Java Auto Updater was removed as part of the Java uninstallation. WMIC didn’t know that, of course, so when it tried to remove ‘Java Auto Updater,’ it returned 1605, because ‘Java Auto Update’ was already removed. 1605 translates to ERROR_UNKNOWN_PRODUCT - This action is only valid for products that are currently installed.
    2015-01-28 18_26_10-new 5 - BatchPatch X1
Posted in Blog, General, Tutorials | Tagged , | Comments closed

BatchPatch Ports

Remote connections in BatchPatch are established using a combination of WMI (Windows Management Instrumentation), SMB (Server Message Block) and PsExec. Additionally ICMP (Internet Control Message Protocol) is used for pinging. BatchPatch also needs access to the target computer’s administrative shares: ADMIN$ and IPC$.

In order for PsExec and SMB to work properly…
If you are using Windows Firewall on the target computer, then generally the only thing you need to do is create an exception for “File and Printer sharing.” More details on configuring Windows Firewall can be found here: Using BatchPatch with Windows Firewall. However, if you are *not* using Windows Firewall and instead are using some other firewall, then you would need to explicitly permit traffic to the target computer from the BatchPatch computer on the following ports in order for SMB and PsExec to function properly:

UDP 137
UDP 138
UDP 445
TCP 135
TCP 137
TCP 139
TCP 445

As a test, after you configure the firewall you should try to connect from the BatchPatch computer to the target computer’s ADMIN$ share, which you can do by going to ‘Start > Run’ on the BatchPatch computer, and then type “\\targetComputer\ADMIN$” without the quotes. The ADMIN$ share doesn’t need to be explicitly enabled unless you have previously disabled it through group policy or registry changes.

In order for WMI and ICMP to work properly…
The target computer must be able to receive and process RPC (Remote Procedure Call) requests. Both the WMI and RPC services must be running on the target computer. If you’re using Windows Firewall on the target computer, then please follow the instructions on this page to configure it properly: Using BatchPatch with Windows Firewall. On that page you will be instructed to enable ‘File and Printer Sharing’ along with ‘Windows Management Instrumentation (WMI)’ or ‘Remote Administration’ depending on the target operating system.

To test WMI try executing ‘Get last boot time’ in BatchPatch. If you see an RPC error, then your firewall still needs additional adjustment. If you see an ‘Access Denied’ error, make sure that the account you are using to run BatchPatch (or the account that you specified in the ‘Alternate credentials’ dialog for the target) has local administrator privileges on the target. If you continue to see ‘Access Denied’ have a look at this page.

Additionally, test ICMP by pinging the target computer from the BatchPatch computer. Normally an ICMP exception shouldn’t need to be explicitly enabled in the Windows firewall because it will be included implicitly as part of the ‘Remote Administration’ exception noted above. However, if you find that WMI is working successfully but pinging is still not working, consider enabling ICMP explicitly in the Windows firewall configuration.

WMI and hardware/network firewalls

If there is a hardware firewall involved in addition to or instead of the Windows firewall, the configuration for WMI can potentially be a bit trickier, depending on the particular firewall device. WMI connections, by default, are not established on a static/fixed port. Instead WMI uses dynamic port configuration for its connections, which means that the actual ports used for a given connection are established on-the-fly at the time of connection. Each connection will end up using different ports. In the context of a classic hardware firewall, this used to be a problem because hardware firewalls would typically require any open ports to be configured manually. An enterprise firewall administrator could never know in advance which ports would need to be opened. However, fortunately many modern firewalls now implement DCE/RPC, which solves this problem and allows the use of dynamic ports for WMI/RPC. If you have a network level hardware firewall in place between the BatchPatch computer and the target computers, you’ll need to configure it to allow DCE/RPC, so that it can open the necessary ports, on-the-fly, for each WMI connection. More info on DCE/RPC can be found at the following two links:

https://en.wikipedia.org/wiki/DCE/RPC
http://wiki.wireshark.org/DCE/RPC

If DCE/RPC is not an option, it’s also possible to configure WMI to operate over a single port: WMI Static Port configuration

Posted in Blog, General, Tutorials | Tagged , , , , | Comments closed

BatchPatch Tips and Shortcuts

  • Diplaying cell contents: The quickest and simplest way to view the content of any particular cell in a BatchPatch grid is to middle-click on the cell. The middle-click button is the same as the scroll-wheel on most mouses. If you didn’t already know, the wheel is also a button that can be clicked/pushed just like a regular left or right mouse button. Middle-click a cell to quickly view its contents.
    MiddleClickToolTip
  • Moving the cell contents tooltip/window: After you display the cell contents with middle-click, sometimes you might want or need to move the tooltip that is displayed to a new location. You can do this by right-clicking anywhere on that tooltip/window. Then just drag it to the desired location.
  • Expanding row contents: You can double-click on any row in the grid to display the entire row’s contents in an HTML formatted window. If you want to view the contents of more than one row at a time, then simply highlight the rows and press the ‘R’ key on your keyboard. Alternatively you may right-click on the selected rows and then click the option to ‘Expand row(s)’
    ExpandRowContents
  • Moving rows up/down in the grid: You might not have realized that you can move individual rows or groups of rows up and down in the grid without sorting the entire grid. Highlight the rows you want to move and then hold down the CTRL key and press the + or key to move the rows up or down.
    MovingRows
  • Adding/removing buttons on the ToolStrip/ToolBar: Select ‘Tools > Customize visible toolstrip buttons’, and then check or uncheck the items you want to add or remove. If you ever want or need to reset the ToolStrip back to its default configuration, you can do that by selecting ‘Tools > Reset toolstrip to default configuration.’
  • Re-arranging icons/buttons on the ToolStrip/ToolBar: Hold down the ALT key, and then select the button you want move with left-click. Drag it to a new location on the ToolStrip and it will stay there. If you ever want or need to reset the ToolStrip back to its default configuration, you can do that by selecting ‘Tools > Reset toolstrip to default configuration.’
  • Toggling the grid border style: Pressing CTRL-B will toggle through the 4 possible grid border style options. You can have no cell borders, horizontal borders only, vertical borders only, or both horizontal and vertical borders, which is the default configuration.
    BorderStyle
  • Modifying the row selection color: If you don’t like the default yellow row selection color, make it any color you want. Select ‘Tools > Row selection color’ or simply click on the color palette icon in the menu strip. You’ll be presented with a new window where you can either select one of the out-of-box colors or set your own color by clicking on the color palette.
    RowSelectionColor
  • Changing the intensity of the alternating row background color: There is a tiny little arrow icon in the lower-left corner of the BatchPatch window. Clicking this icon reveals a slider that lets you change the intensity of the gray row background color for alternating rows in the grid. You can disable it altogether by dragging the slider to the lowest possible position.
  • Transparency: Yes, it’s true that BatchPatch supports transparency, if you so desire. This is one of those features that we included for fun, simply because we could (not because we think it’s useful). 🙂 In the lower-right corner of the BatchPatch window there is a tiny arrow icon. If you click on this icon a slider will appear. Lower the slider if you want to make the BatchPatch window transparent.
  • LED images: The column that appears farthest to the left in the BatchPatch grid contains ‘LED’ images to indicate online/offline status of computers in the grid. While these LED images will change color when a row is rebooted or pinged, did you know that you can also control these images independently of what actions are executed for a given row? For example, if you load a list of hosts into a grid, you can simply left-click on the LED image row header to start (or stop) an online/offline check for all hosts in the grid. Furthermore, if you middle-click the LED image row header, all LED images in the grid will be reset to gray. Middle-clicking the LED image of a specific row will disable that particular row from being included in the online/offline status check. Shift-middle-clicking a specific row’s LED image will turn that image blue, which can be used to indicate ‘completion’ if you desire.
    LED_Demo
  • Importing hosts: Did you know that when importing computer names or IP addresses into the BatchPatch grid, you can simultaneously import MAC addresses and/or general notes? For example, when you select ‘File > Add Hosts’ you aren’t limited to just adding a list of computer names (EDIT 20150602: new/additional import options are available and explained here: Importing Hosts and Other Information Into a BatchPatch Grid) . If you want to add a MAC address with each computer, you can do so by formatting your list as follows:

    host1#1C6F65D56413
    host2#2D:5E:43:F2:21:24


    If you want to populate the ‘Notes’ column for a given host, then you can use the following syntax:

    host4|notes for host4
    host5|notes for host5


    If you want to populate both MAC and Notes for your hosts, then use this syntax:

    host1#1C6F65D56413
    host2#2D:5E:43:F2:21:24
    host3#1B3A65B54322|notes for host3
    host4|notes for host4


    Note, you can also create a text file using the above syntax, and then simply drag and drop the .txt file onto the BatchPatch window, or use ‘File > Open’ from within BatchPatch to browse to the .txt file.
Posted in Blog, General, Tutorials | Tagged , | Comments closed

Remotely Deploy a Standalone .MSU Update to Multiple Computers

You need to install a single .MSU update on many computers, but you don’t want to log on to each computer to initiate a manual installation, and you don’t want to deal with writing a script. I know how you feel. I’ve been there many times. The good news is that with BatchPatch you can take care of the entire process with just a few clicks and a couple of minutes. Here’s how it works…

In the example below we will remotely install update KB2965142 using a standalone .msu file obtained from Microsoft.

  1. In the BatchPatch grid, highlight the computers that you will be deploying the update to. In the screenshot below you’ll see that I’m only deploying the update to a single target computer. However, if you are working with many target computers you can simply highlight all of them instead of just one. All other steps are identical.
    2015-01-08 13_54_53-new 1 - BatchPatch X6
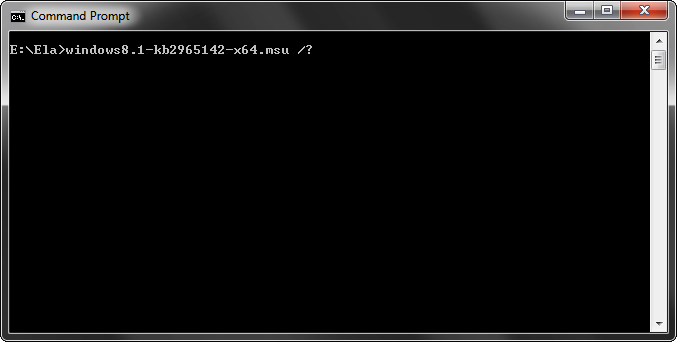
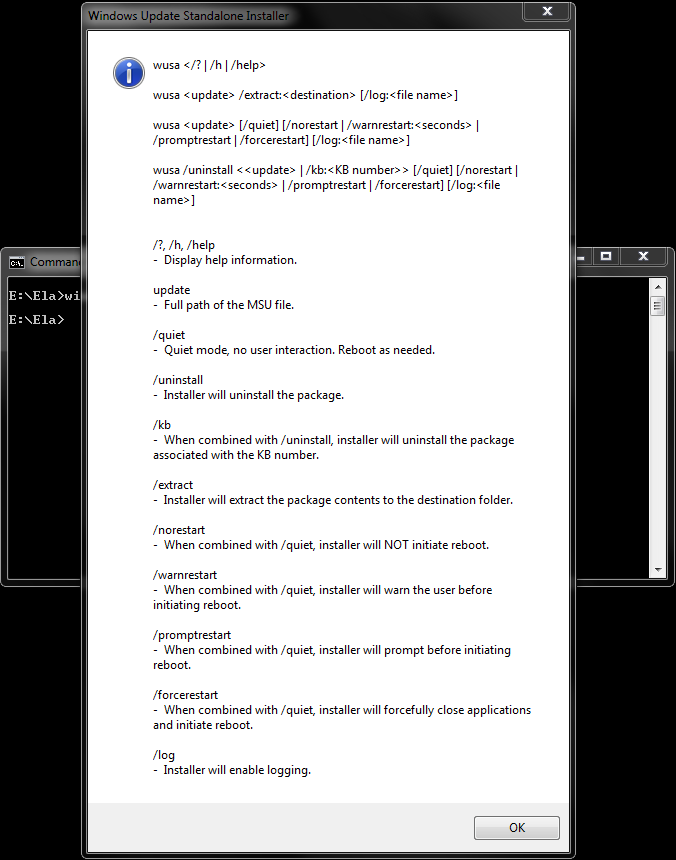
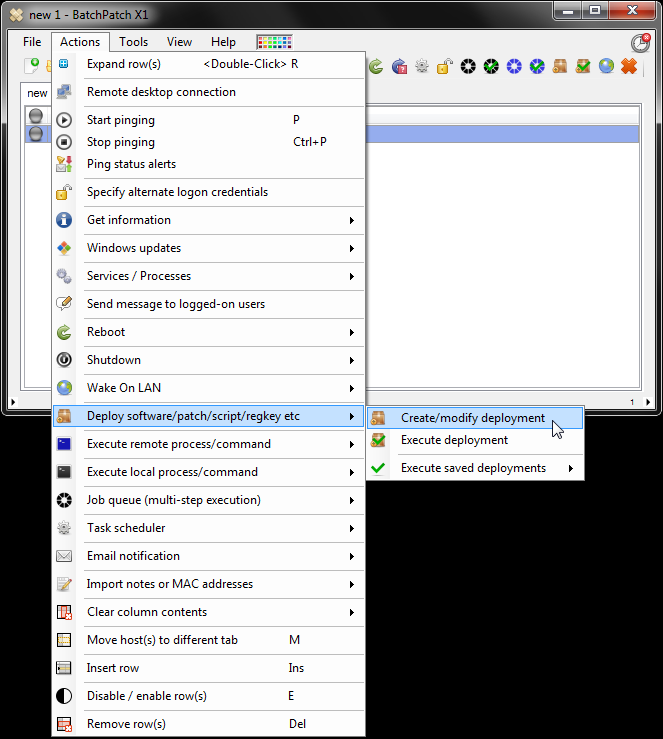
  2. With the host(s) selected, let’s now create the deployment by clicking ‘Actions > Deploy > Create/modify deployment.’ In the deployment window we’ll select the .msu file from our computer, and then we’ll select the ‘ install’ radio button as well as the ‘/norestart’ checkbox since I don’t want the target computer to restart on its own. We can optionally also give this deployment a title so that it can be saved for later use. In this example I’ve used the title ‘Install KB2965142.’ To save it simply click the >> button, which will add it to the list of ‘Saved Deployments.’
  3. 2015-01-08 14_12_34-Deploy .msi .msp .msu .exe .reg .vbs .bat .cmd .ps1 etc

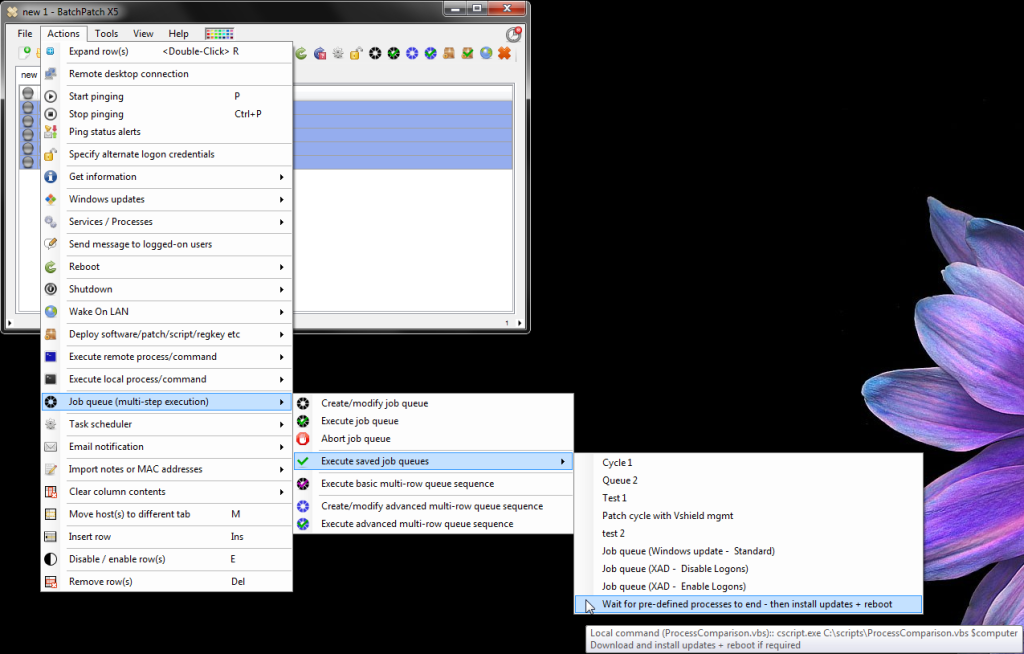
  4. Once the deployment is created we can either execute it immediately for the highlighted rows by clicking the “Execute now” button, or we can close the deployment window and execute it later directly from the Actions menu. In this case let’s close the window so that you can see how it works when you save a deployment before executing it. After closing the deployment window, simply highlight the hosts, right click or use the actions menu, and select ‘Deploy > Execute saved deployment > Install KB2965142.’ We can see that as soon as the ‘Install KB2965142’ is selected, a tooltip appears showing us that particular saved deployment’s configuration. The configuration is, of course, the same configuration that we applied in the previous step before we saved the deployment.
    2015-01-08 14_12_48-Program Manager
  5. We are now presented with a confirmation dialog, which gives us another opportunity to verify the configuration of the deployment that we are about to execute. Click ‘OK’ to begin execution.
    2015-01-08 14_15_12-new 1 - BatchPatch X6
  6. When the installation completes we get exit code 3010, which indicates that the installation was successful but a reboot is required to complete it. We can use BatchPatch to initiate the reboot at our convenience.
    2015-01-08 14_38_11-new 1 - BatchPatch X6
Posted in Blog, General, Tutorials | Tagged , | Comments closed