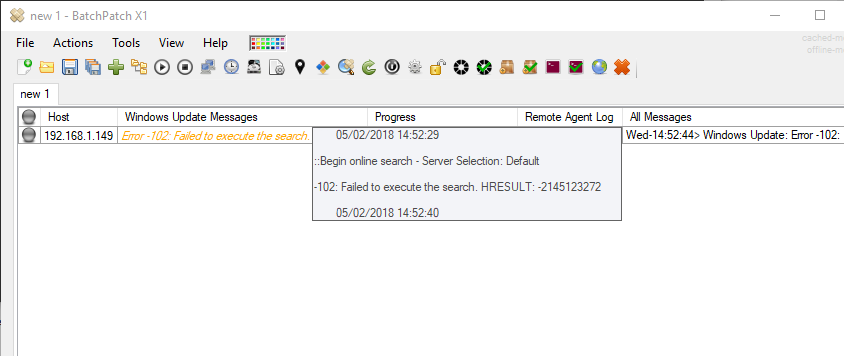
BatchPatch Error: -102 is one of the most common errors that users experience. In general, it indicates that the target computer had some type of problem connecting to the update server, which can be either your local WSUS (Windows Server Update Services) server or Microsoft’s public Windows Update or Microsoft Update server.
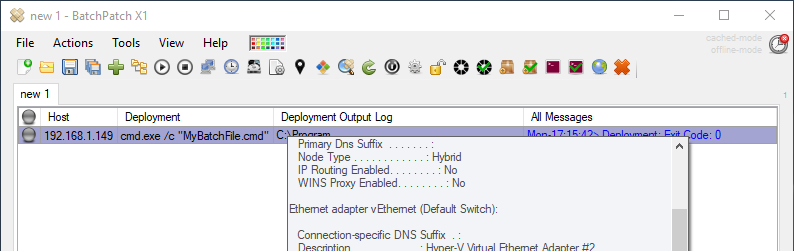
In your ‘Remote Agent Log’ column you will see the full error, which always includes a HRESULT value. If you closed BatchPatch without saving the HRESULT code, you can still view this in the target computer’s BatchPatch.log and/or BatchPatchError.log, which will both be stored in the remote working directory. The default location is C:\Program Files\BatchPatch unless you have modified the ‘Remote working directory’ location under Tools > Settings > General.
You can think of the HRESULT value as a sort-of ‘reason code’ for the issue. So the -102 value simply means that there was a problem with the target computer’s ability to communicate with or connect to the update server. The HRESULT value will be the reason why there was a problem. Below are most of the HRESULT values that have ever been reported to us, as well as possible explanations for why they might occur.
Note, the HRESULT value is reported in decimal format, but it’s helpful to convert it to hex for the sake of google searching for a solution. The hex value is much more likely to turn up helpful search results in comparison to the decimal value. Please see the bottom of this page for a description of how to convert decimal values to hex. Once you have the hex representation of the HRESULT, you can look it up here to see what it means: Windows Update Error Code List
Various HRESULT values that might be seen with a -102 error
Error -102: Failed to execute the search. HRESULT: -2147012866
0x80072EFE -2147012866 ERROR_INTERNET_CONNECTION_ABORTED
The connection with the server has been terminated. |
This error could indicate a proxy configuration problem. For more details on using BatchPatch with an enterprise proxy, please see: using-batchpatch-with-an-enterprise-web-proxy
Alternatively, it’s possible that this error could be caused by any type of application running on the target computer that could sever a network connection. For example, a Host Intrusion Protection/Prevention (HIPS) application, an anti-virus application, or a similar security suite.
Error -102: Failed to execute the search. HRESULT: -2145124322
0x8024001E -2145124322 WU_E_SERVICE_STOP
call was aborted due to service stop or system shut down |
This error would usually occur if the Windows Update service on the target computer was in the process of stopping, or if the computer was in the process of rebooting. Make sure the target computer is online and its Windows Update service is started/running.
Error -102: Failed to execute the search. HRESULT: -2145107934
0x80244022 -2145107934 SUS_E_PT_HTTP_STATUS_SERVICE_UNAVAIL
Http status 503 - temporarily overloaded |
This likely indicates an issue with your WSUS server. It could be a transient load problem or it could indicate that the server needs a reboot or that the web service is not responding properly.
Error -102: Failed to execute the search. HRESULT: -2145107924
0x8024402c -2145107924 WU_E_PT_WINHTTP_NAME_NOT_RESOLVED
Winhttp SendRequest/ReceiveResponse failed with 0x2ee7 error. Either the proxy server or target server name can not be resolved. Corresponding to ERROR_WINHTTP_NAME_NOT_RESOLVED. Stop/Restart service or reboot the machine if you see this error frequently. |
This is the error that we would expect to see if your WSUS were offline or if there were a DNS or proxy problem preventing the target computer from establishing a connection with the WSUS.
Error -102: Failed to execute the search. HRESULT: -2147023838
0x80070422 -2147023838 ERROR_SERVICE_DISABLED
The service cannot be started. If BITS service is disabled by the Administrator, then this error will be seen. |
Make sure the Windows Update service and the Background Intelligent Transfer Service (BITS) are started on the target computer.
Error -102: Failed to execute the search. HRESULT: -2147012867
0x80072EFD -2147012867 ERROR_INTERNET_CANNOT_CONNECT
The attempt to connect to the server failed. |
Make sure that the target computer actually has access to the internet. If you have a proxy in your environment, this error could indicate a proxy configuration problem. For more details on using BatchPatch with an enterprise proxy, please see: using-batchpatch-with-an-enterprise-web-proxy
Error -102: Failed to execute the search. HRESULT: -2147012894
0x80072EE2 -2147012894 ERROR_INTERNET_TIMEOUT
The request has timed out. |
Make sure that the target computer actually has access to the internet. If you have a proxy in your environment, this error could indicate a proxy configuration problem. For more details on using BatchPatch with an enterprise proxy, please see: using-batchpatch-with-an-enterprise-web-proxy
Error -102: Failed to execute the search. HRESULT: -2145124306
0x8024002E -2145124306 SUS_E_WU_DISABLED
non managed server access is disallowed |
We have seen this occur when in Group Policy or Local Policy the following setting is enabled Computer Configuration\Administrative Templates\System\Internet Communications Management\Internet Communication settings\Turn off access to all Windows Update features
Error -102: Failed to execute the search. HRESULT: -2145103860
We have only ever seen this occur in the following situation:
–The target computer is configured via Group Policy or Local Policy to search for updates on your local WSUS server (the relevant policy is ‘Computer Configuration\Administrative Templates\Windows Components\Windows Update\Specify intranet Microsoft update service location’)
AND
–In BatchPatch under ‘Tools > Settings > Windows Update‘ the ‘Server Selection‘ value is set to either ‘Windows Update’ or ‘Microsoft Update’
AND
–In Group Policy or Local Policy the following setting is enabled: ‘Computer Configuration\Administrative Templates\Windows Components\Windows Update\Do not connect to any Windows Update Internet locations’
Error -102: Failed to execute the search. HRESULT: -2145123272
We have seen this occur when the WSUS server is offline or non-existent
Error -102: Failed to execute the search. HRESULT: -2145107943
0x80244019 -2145107943 SUS_E_PT_HTTP_STATUS_NOT_FOUND
Http status 404 - object not found |
This means that the target computer is not able to connect to the update server. If you are using WSUS, make sure that the server is online and reachable, and make sure your group policy setting for Specify intranet Microsoft update service location is correct. More here on WSUS and group policy. If you are not using WSUS, make sure the target computer has internet access, and make sure your proxy settings are correct. More here on proxies with BatchPatch and Windows Update.
Error -102: Failed to execute the search. HRESULT: -2145107940
0x8024401c -2145107940 WU_E_PT_HTTP_STATUS_REQUEST_TIMEOUT
Http status 408 - server timed out waiting for request |
The target computer is trying to connect to the update server, but it’s timing out. This likely indicates either a network issue or an issue with the update server. If you’re using WSUS then it’s probably an issue with the WSUS. If you’re using Windows Update or Microsoft Update then it’s probably a temporary issue with Microsoft’s public update server. If you use a proxy in your environment, this error could also be the result of that. More here on proxy configuration for BatchPatch and Windows Update.
Error -102: Failed to execute the search. HRESULT: -2147024894
0x80070002 -2147024894
ERROR_FILE_NOT_FOUND "The System cannot find the file specified" |
This is probably one of the least common errors that one would be likely to see with -102. We have only ever had a small handful of users report it. It indicates that there is a problem with Windows Update on the target computer. It’s not a BatchPatch problem per se. We would expect the same error if you tried to run Windows Update directly on the target computer. When only a search for updates is performed there is no file that BatchPatch provides that could be missing, and yet the error indicates Windows Update cannot find a file that it needs. All of the users who experienced this issue and reported it to us were able to resolve it by manually downloading and installing Silverlight. We believe that the installation of Silverlight likely somehow resets the broken/missing Windows Update components. One of the users reported that the way this issue manifested in the first place was due to sysprep’ing an image that had a feature upgrade applied possibly before completing the multiple reboots that the feature upgrade required to get to 100% installed/rebooted. It is probably the case that after the issue is resolved Silverlight can then be uninstalled. If you experience this issue and have any additional information to provide about the cause or resolution, please contact us and we’ll update this page accordingly.
Error -102: Failed to execute the search. HRESULT: -2145124302
0x80240032 -2145124302
WU_E_INVALID_CRITERIA "Invalid criteria string" |
Generally the only reason this would occur is if you try to use a search string intended for a newer OS on an older OS where it isn’t supported. This can happen if you select Search for only optional software updates when you execute a search for updates on a target OS that is not Windows 10/2019 build 1809 or newer.
Error -102: Failed to execute the search. HRESULT: -2146762495
0x800B0101 -2146762495
CERT_E_EXPIRED |
Check the certificate on your WSUS. Also check date/time settings on all computers.
Error -102: Failed to execute the search. HRESULT: -2145124297
0x80240037 -2145124297
WU_E_NOT_SUPPORTED "The invoked functionality is not supported." |
We have had only a couple of reports of this in the past. Both were the result of the user running a version of Windows on hardware that Microsoft does not support for that version of Windows. Microsoft blogged about the changes to hardware support here: https://blogs.windows.com/windowsexperience/2016/01/15/windows-10-embracing-silicon-innovation/
Both affected users reported success with the following workaround, which attempts to enable Windows Update in cases where it is disabled due to running on unsupported hardware. We do *not* recommend or encourage this approach, nor do we recommend running Windows on unsupported hardware in the first place, but since a couple of our users have reported success with it, we are including it here for reference. Try it at your own risk: https://github.com/zeffy/wufuc/releases
Error -102: Failed to execute the search. HRESULT: -2147024882
0x8007000E -2147024882
WU_E_OUTOFMEMORY |
Increase the available RAM to resolve this error.
Error -102: Failed to execute the search. HRESULT: -2145124338
0x8024000E -2145124338
SUS_E_XML_INVALID |
While this is not an out-of-memory error, we have seen instances of this error result from not enough available RAM during actions run in offline mode. Increasing RAM resolved the issue in those cases. However, there could be other causes for this error that have nothing to do with available memory.
How to convert HRESULT decimal values to hex
HRESULT codes will be in decimal format, but we usually need to convert them to hex in order to figure out what they mean. The easiest way to do that is with your Windows calculator. Launch calc.exe and switch to the ‘Programmer’ calculator by clicking the button in the upper left corner of the calculator window.
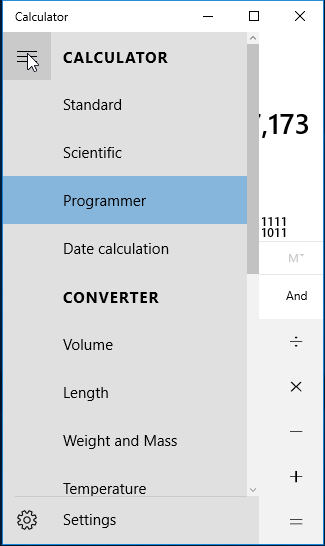
In the Programmer calculator select DEC and paste in your HRESULT value. You can then see the HEX value. In this example I’ve pasted -2147012867, and we can see the HEX value is 80072EFD.

Once you have the hex representation of the HRESULT, you can look it up here to see what it means: Windows Update Error Code List