

Installing Skype remotely isn’t much different than installing other applications remotely. Here’s how it goes:
- Obtain the Skype .msi installer from http://www.skype.com/go/getskype-msi. If you just go to skype.com and choose the “download” option, you will end up with the .exe version of the installer, not the .msi version. And while the .exe version does apparently support silent installation, since Microsoft also makes available a .msi version, I selected the .msi version for ease of operation. The reason for this is because with the .msi there is no need for me to find the proper silent installation switches that are available in the .exe version.
- Now that I’ve saved the .msi installer to my computer, I’m ready to configure the deployment. Select your target hosts in the BatchPatch grid, and then choose ‘Actions > Deploy > Create/modify deployment.’
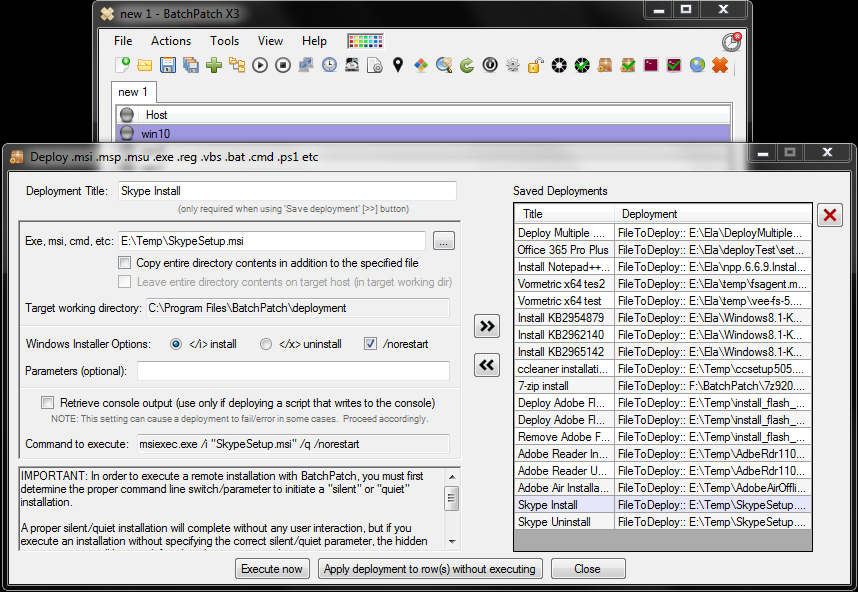
- In the Deployment window that appears, select the location of the .msi file, and check the desired Windows Installer Options. In this case I’ve selected ‘install’ and ‘norestart’ to make sure that if a restart is required by the installer, it won’t happen automatically and catch me off guard. It turns out that the Skype installer generally should not require a restart, but it’s always a good safety precaution to use the ‘norestart’ switch just in case. If the installation completes and says that it needs a restart, I can always then initiate the restart using BatchPatch. In the screenshot below you can see that I’ve setup the deployment, and it’s ready to be executed. If you want to save the deployment configuration for future use, simply click the double-arrow >> button to add the deployment to the ‘Saved Deployments’ grid.
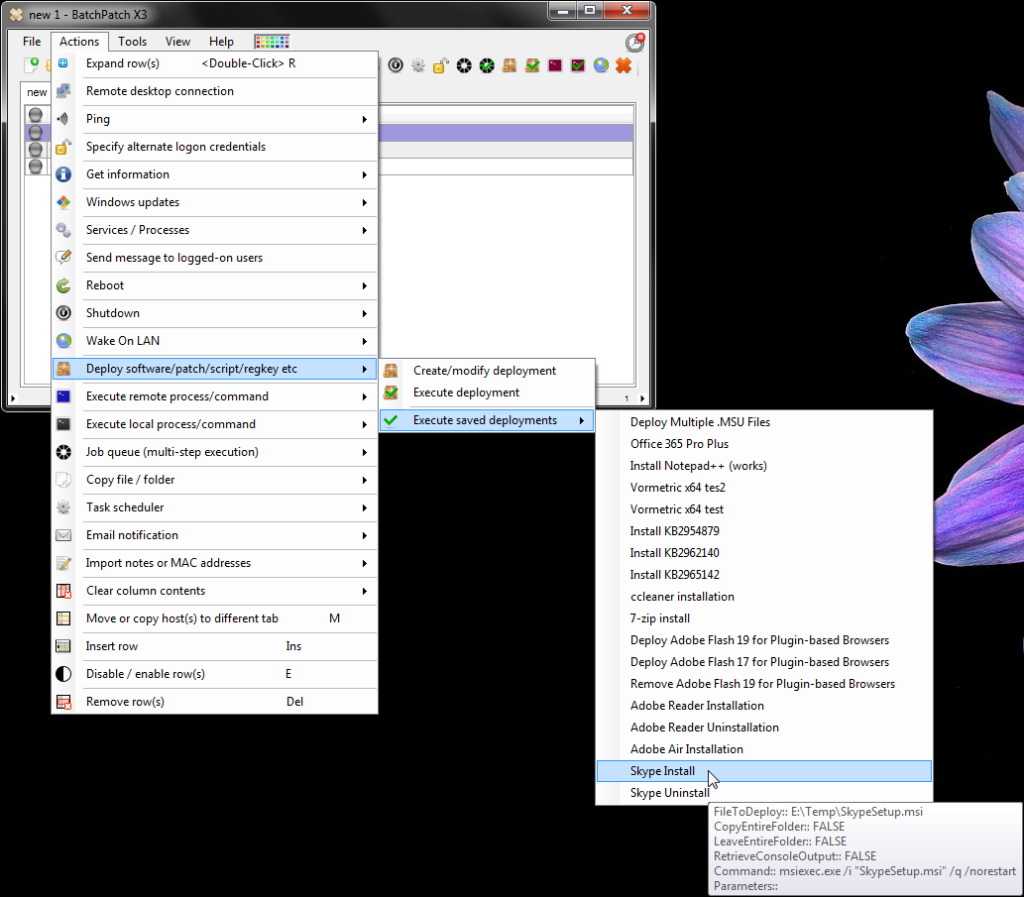
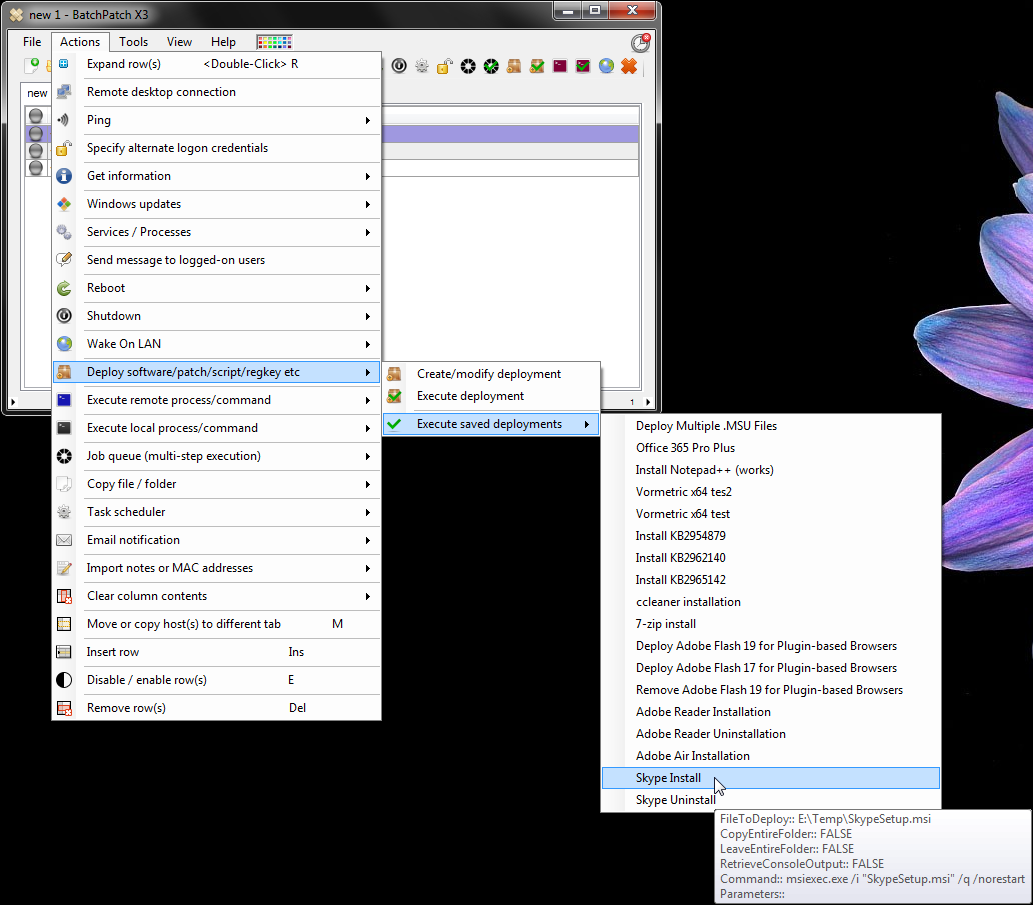
- The last step is to execute the deployment. You can do this directly from the Deployment window with the ‘Execute now’ button, or if you saved the deployment configuration, you could do this from the BatchPatch Actions menu. For the sake of this example, I’ll go ahead and execute it from the Actions menu since I did already save the configuration. I highlighted the target that I want to deploy to, and I selected ‘Actions > Deploy > Execute saved deployments > Skype Install.’
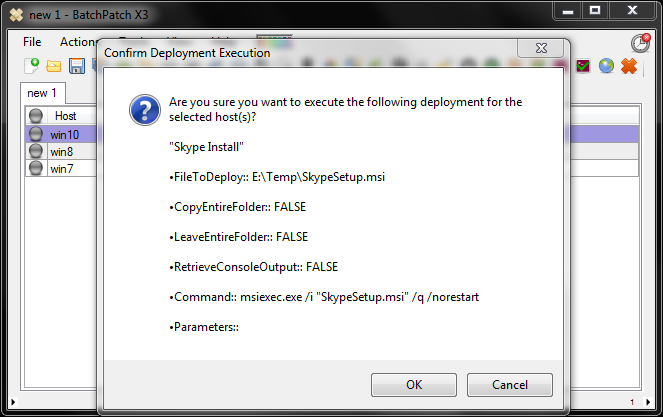
- Click OK to confirm the deployment execution.
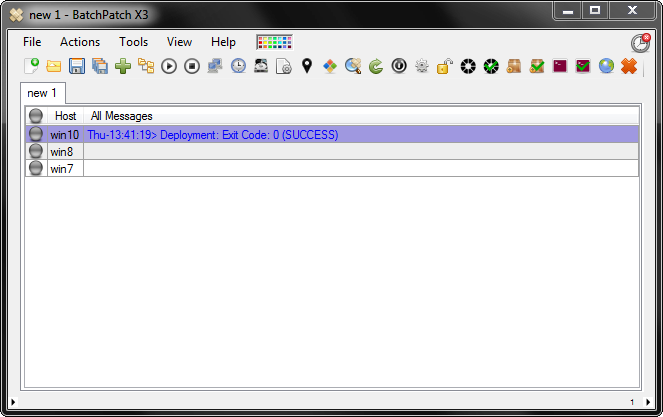
- That’s all there is to it. We can see the Exit Code: 0 (SUCCESS), which indicates that we are done!
If you need to uninstall Skype remotely, please follow the instructions at this link.