

Pretty much every systems administrator will need, at one point or another, to apply a registry update, remotely, to multiple computers. Today I’m going to show you how that can be accomplished quickly and easily using BatchPatch.
- Before we do anything please note that if you are going to be deploying a registry key/value to the HKEY_CURRENT_USER (HKCU) hive of the target computer(s), then you need to make sure that your ‘Remote Execution Context‘ is set to ‘Elevated token‘ and not ‘SYSTEM‘.
If you are deploying a registry key/value to the HKEY_LOCAL_MACHINE (HKLM) hive of the target computer(s), then your ‘Remote Execution Context‘ can be set to either ‘SYSTEM‘ or ‘Elevated token‘. More details here: ‘Remote Execution Context‘
Also note that if you deploy a key/value to HKCU, the current user is the user that you are using to run the action in BatchPatch. This is the user that launched the BatchPatch.exe, or if you have specified alternate credentials for the row in BatchPatch where this command is being executed, then the alternate credentials you specified will be the current user for the operation. In most cases this is probably not the user that you want the key to be created for. Presumably you want the key to be created in HKCU for the user of the target computer, not the user that is performing the key/value deployment in BatchPatch. For more information on deploying a registry key/value to the actual users of a computer, as opposed to the user that is executing the deployment in BatchPatch, see here.
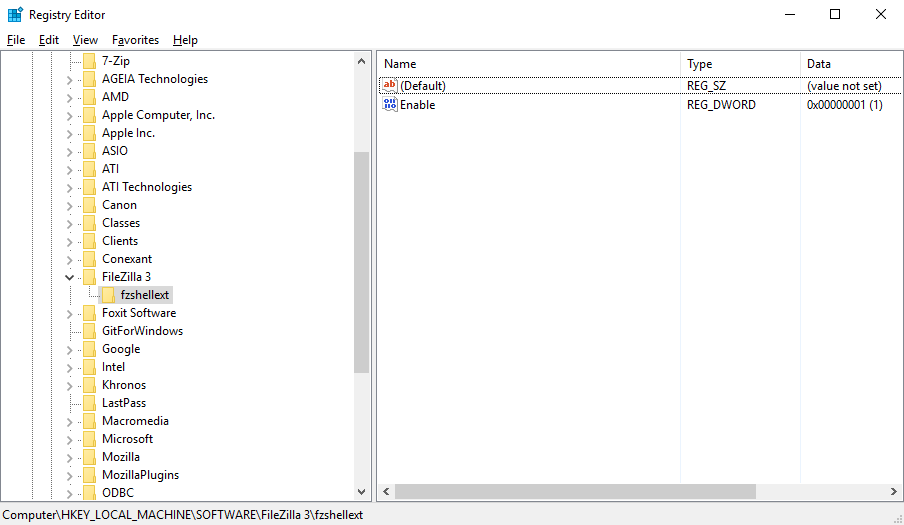
- Let’s look at the registry key that we plan to update. In the screenshot below you can see that I have the ‘Enable’ DWORD currently set to a value of 1 for HKLM\SOFTWARE\FileZilla 3\fzshellext
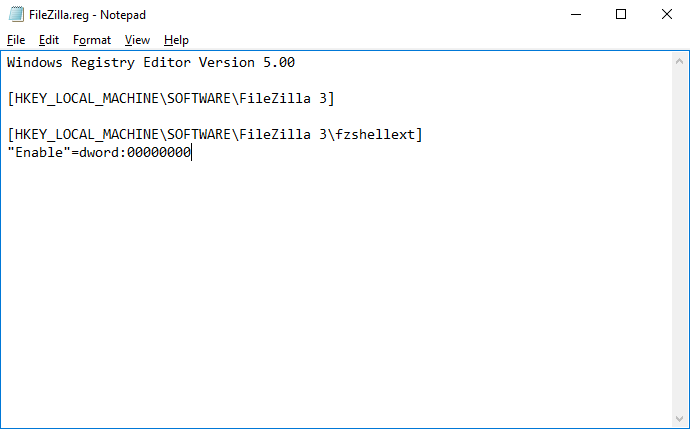
- For the sake of this example, let’s modify the value and change it from 1 to 0. Prepare a text file that looks like the one I have posted in the screenshot below. You can also create a file like this by using ‘File > Export’ in the Registry Editor window. Then simply modify the resulting file to fit your requirements. I have saved the file to my desktop as FileZilla.reg
- We can now use BatchPatch to deploy the FileZilla.reg file to our desired target computers, which will have the effect of creating and applying the specified registry key and value on computers that do not have the key/value in the first place. For computers that already have the registry key and value, it will update the value to the value that we specified in our .reg file. So in my case I already have the key/value in my registry, but I have a value of 1. Since my FileZilla.reg file has the value as 0, once I have successfully deployed the reg file using BatchPatch, the registry value on my test computer will be changed from 1 to 0.
- In BatchPatch highlight the desired target computers, and then select ‘Actions > Deploy > Create/modify’
- In the deployment window, create the deployment as I have in the screenshot. All I’ve done is used the … browse button to locate the FileZilla.reg file. No other configuration needs to be made. The ‘command to execute’ will be automatically populated by BatchPatch when the .reg file has been selected.

- At this point I can execute the deployment by clicking on the ‘Execute now’ button. I could alternatively save the deployment for later execution by using the >> button, but in this instance I have no need to do that, so I’ll just execute it immediately.
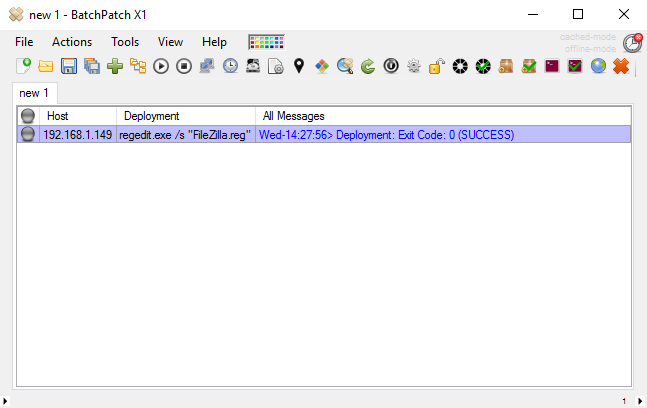
- Execution completed almost immediately, and I got a blue Exit Code 0 (SUCCESS) message.
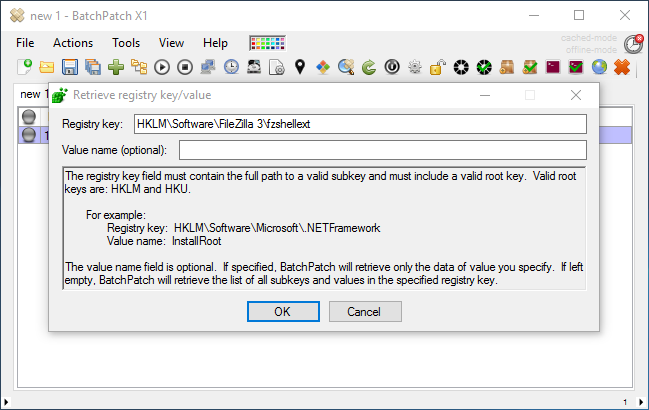
- We can confirm, if desired, that the change was successful by using ‘Actions > Get information > Get registry key/value. We simply enter the registry key that we want to view.
- We can view the output of the above command to verify that our DWORD value is now 0 instead of the previous value of 1.
