Some of our users launch a fresh instance of BatchPatch each time they use it, and they start with a brand new grid (or a set of grids) each time. They load their hosts and then begin patching. However, some of our users prefer to re-use the same grid file (.bps) over and over and over, so that each time they start patching, it’s really more like a continuation of the previous week or month. One downside to this approach is that the log data, particular in the ‘All Messages’ column, can become overwhelmingly large as it grows with each action that is executed. This is especially an issue for users who are automating virtually everything in BatchPatch. They often don’t even really want to interact with the application except to create new jobs, so at some point it makes sense to clear out the excess data that is no longer needed, but in such a way that requires no extra work from the administrator. To be clear, it’s not a lot of “work” by any means because it only takes a couple/few clicks, but for many sysadmins everything is all about automation. Today I’ll show you how to setup your scheduled tasks to execute a job queue, where the job queue’s first step is to clear column log data. The subsequent steps in the job queue can be whatever you need or want, but presumably they will involve actually patching the target computers or running scripts etc.
Create a Custom Command for Clearing Data in Desired Columns
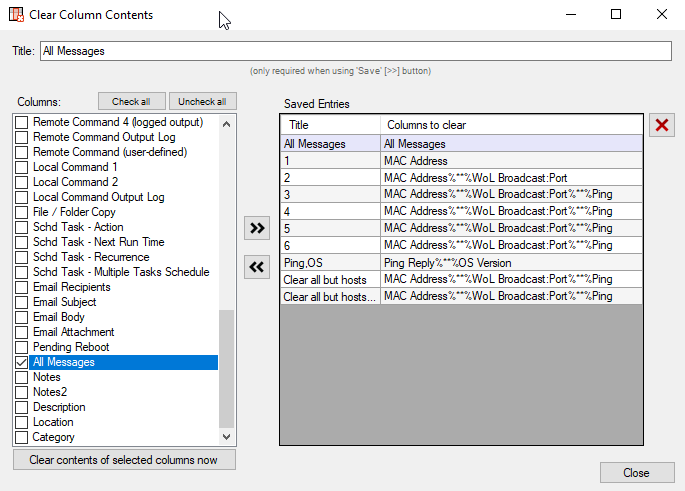
- First let’s setup the selection list for which columns will be emptied. Click on ‘Actions > Clear column contents > Create/modify selections‘. You could choose to clear all columns (except for the Hosts column), or you could just selectively clear a couple/few columns. For this example let’s just setup an entry to clear only the ‘All Messages’ column. You can see in the screenshot below that I have selected the ‘All Messages’ column, and I have saved the entry by using the double-right-arrow button.
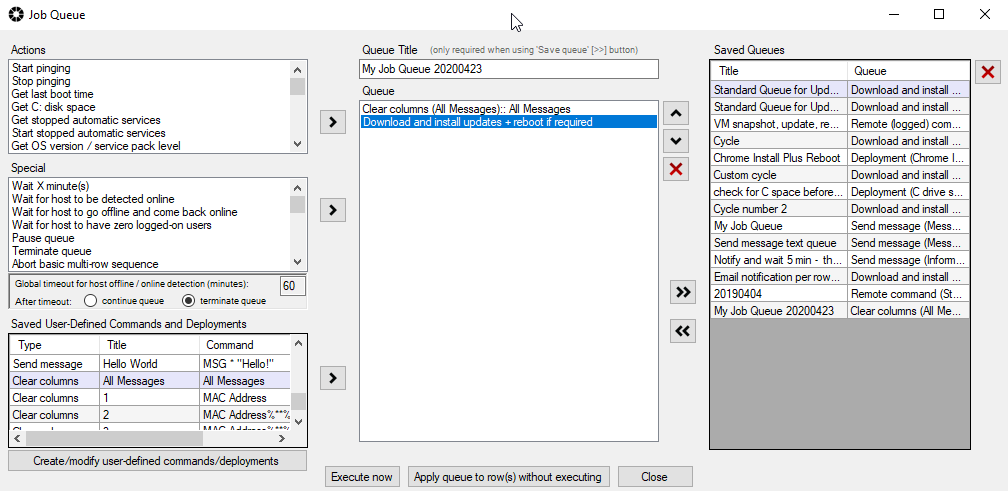
- With the entry you created above now saved, if you flip over to the Job Queue window (Actions > Job Queue > Create/modify job queue), you can see in the lower-left grid, titled ‘Saved User-Defined Commands and Deployments‘, that the entry you created a moment ago now appears.
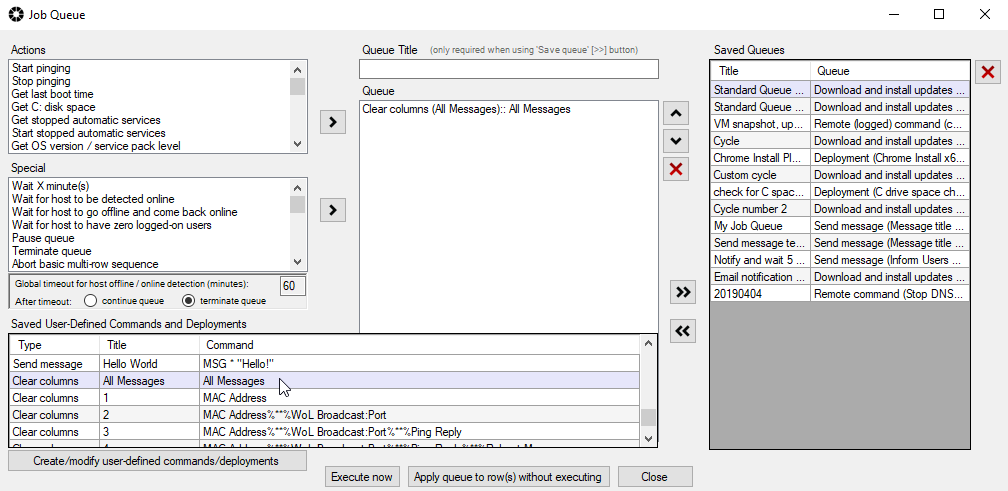
- You can add that entry as the first step in a job queue. This way when the job queue is executed, the first thing it will do is clear out the ‘All Messages’ column. Then you can have it do whatever else you need or want, such as initiating Windows Update on target hosts. Then you can save the Job Queue by using the double-right arrow.
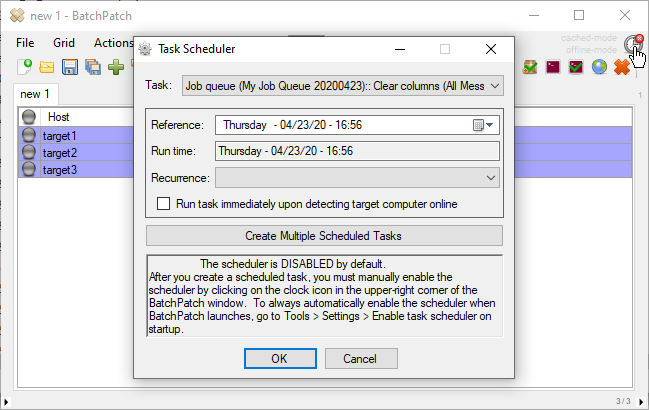
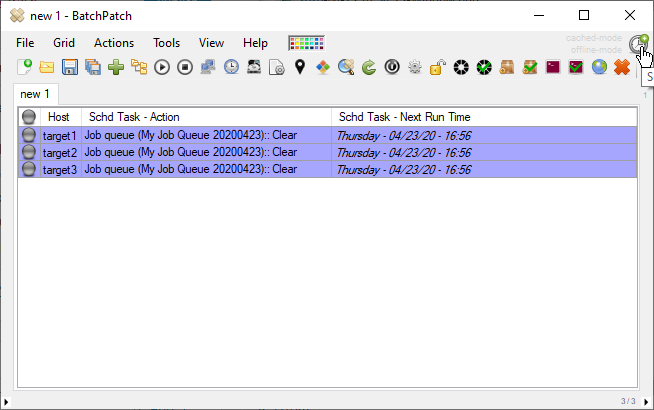
- With your job queue now created, you can setup a scheduled task for any target host that will execute the job queue. Click on ‘Actions > Task Scheduler > Create / modify scheduled task‘. In the Task Scheduler window, from the task drop-down menu, select the title of the Job Queue that you just created. Set a run date and time, and then click OK. Then make sure the scheduler is enabled by clicking the small red clock/timer icon in the upper right corner of the main BatchPatch window so that it turns from red to green.