

There are different ways to utilize email notifications in BatchPatch. For example this link illustrates how to schedule email notifications or include them inside job queues. Additionally we have a couple of other tutorials on email notifications here and here.
Today I would like to address a particular scenario for triggering email notifications that some BatchPatch users like to use. In this example I’ll demonstrate how you can configure an email notification to be sent that includes the status of the entire grid but is only sent after all of the desired actions for all of the desired hosts are fully complete. In this case we’ll make sure that every row in the grid is configured to complete its actions before the email notification is triggered. This way when you get the email, which will include an HTML representation of the grid, it will include all of the rows’ activities that have completed prior to the email being sent.
There are essentially two things that we need to do in order to make this work. First, we need to create a job queue for each row/host in the grid. The job queue will contain all of the actions for each host that we want to execute. Second, we’ll configure an advanced multi-row queue sequence to be responsible for making sure the email notification is sent immediately after all of the other rows’ job queues have completed.
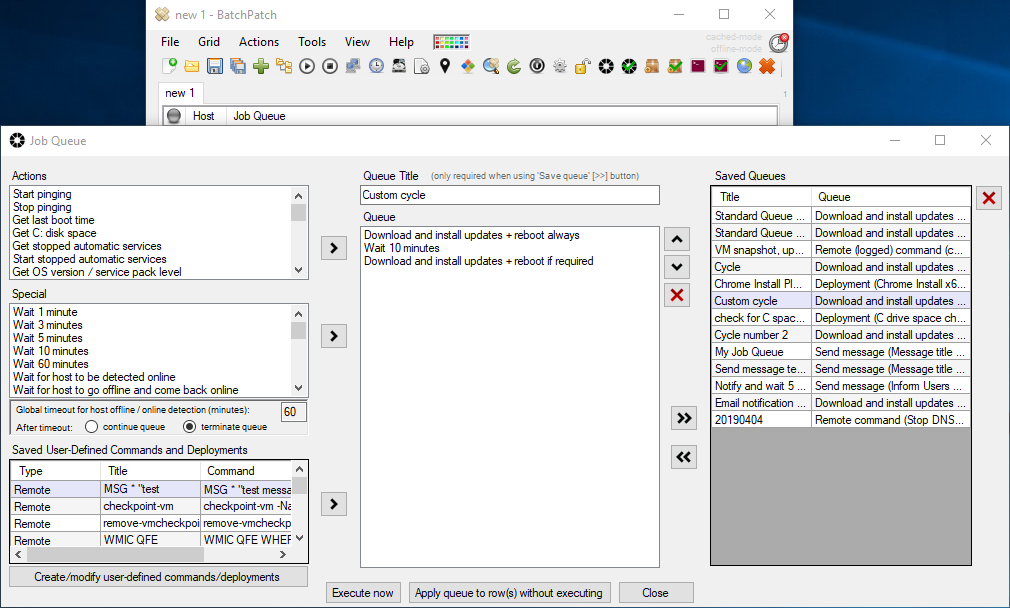
- The first thing I’ll do is select all of the hosts in the grid, and then click on ‘Actions > Job Queue > Create/modify job queue‘
- In the Job Queue window that appears I will simply create the desired queue that I want each target host to execute, and then I’ll use the ‘Apply queue to row(s)‘ button to apply the job queue to each of the selected rows in the grid *without* executing the queue (execution will come later). Note, there is no requirement to assign the same job queue to each host. In fact, each host can have its own unique job queue, if desired, but in this particular example I have applied the same job queue to each target host simply because I need/want them all to perform the same update download/installation task.

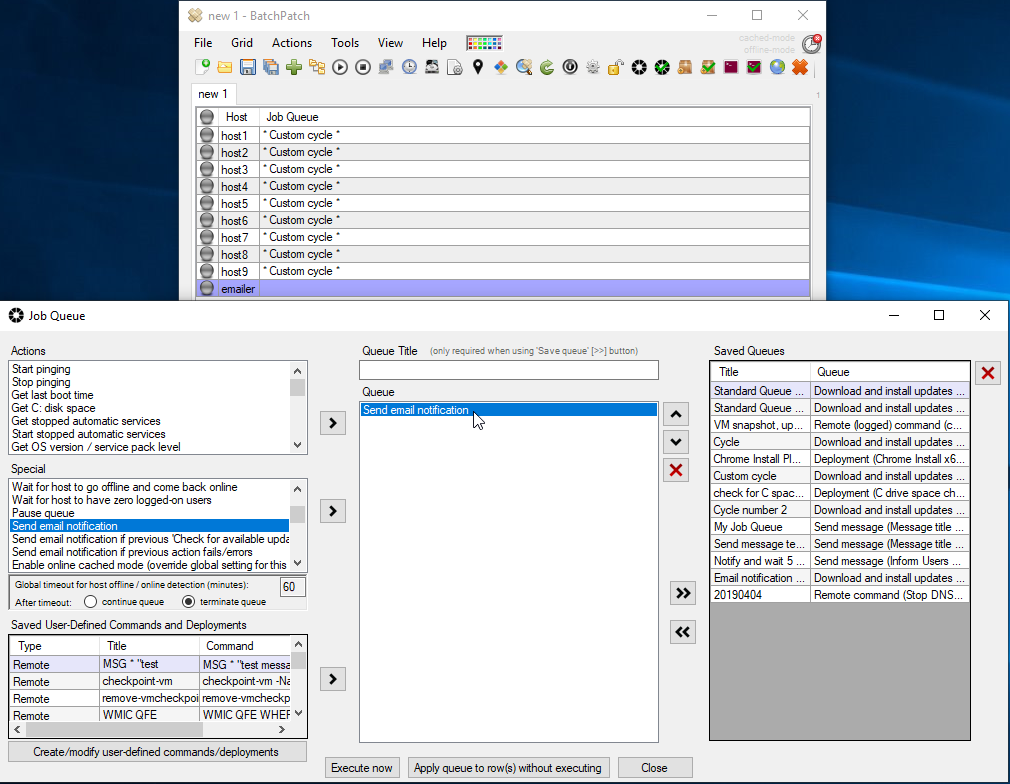
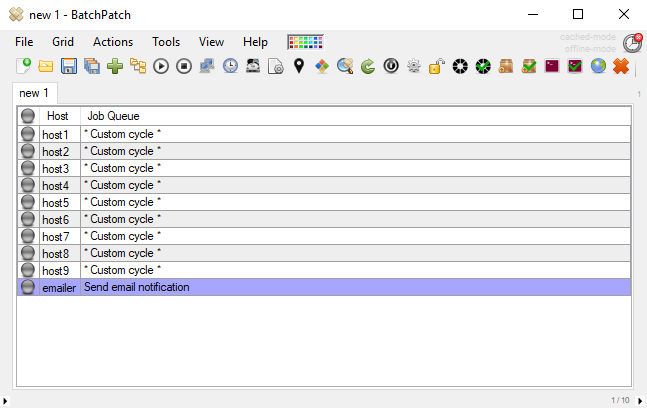
- Once the desired job queues have been configured for the selected rows, we can go ahead and setup the advanced multi-row queue sequence. What the sequence will enable us to do is tell BatchPatch to first execute the job queue for all of the target hosts that we choose, and then only after all of those rows have completed their job queues BatchPatch is instructed to send an email notification that includes a HTML representation of the entire grid. You’ll notice that I have a row in the grid called “emailer” that currently has nothing configured. This is the row that we’ll use to actually send the email. I’m going to create a job queue for this row that has only one step, which is to send an email notification.
- If you have not previously configured your email notification settings, you’ll need to do that. You can see my settings in the screenshow below. The most important component for the sake of this example is that I have set the HTML attachment content (and the body content) to $grid. This will instruct BatchPatch to include a copy of the entire grid in the email notification. Note, if you have a situation where you need some rows to send email notifications that only include the content of their rows instead of the entire grid contents, you can certainly override the global settings on a per-row basis, if desired. This way you can have the global setting configured for $grid, with particular rows configured for $row, if needed. See ‘Actions > Email notifications > Override‘ if you need to have individual rows configured differently from the global configuration. For this tutorial we have the global setting set to $grid so that our email notification includes the entire grid. If we needed to keep the global setting as $row then we would just override the email notification row’s setting to be $grid.

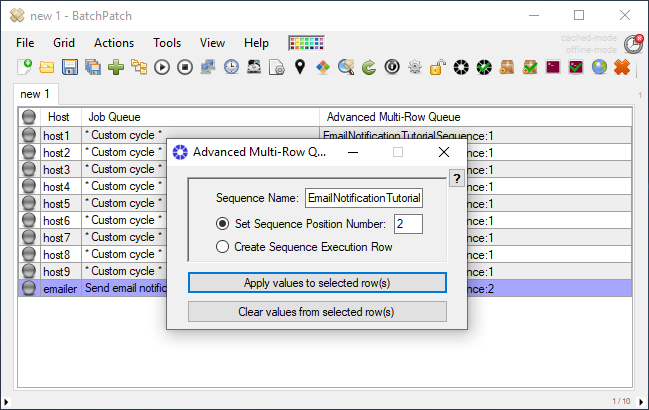
- Now we can configure the advanced multi-row queue sequence. Select ‘Actions > Job Queue > Create/modify advanced multi-row queue sequence‘. We use the window that appears to set the ‘Sequence Name’ and ‘Sequence Position Number’ for each row. In this case we want all of the hosts to execute their job queues at the same time in position number 1. When all of position number 1 rows complete, position number 2, the email notification row, will be executed. Select all hosts in the grid and set them to sequence position number 1. Choose a name for the sequence because all of the rows that will participate in the sequence must have the same sequence name. Set the email notification row to position number 2 with the same sequence name as used for the hosts in position number 1.
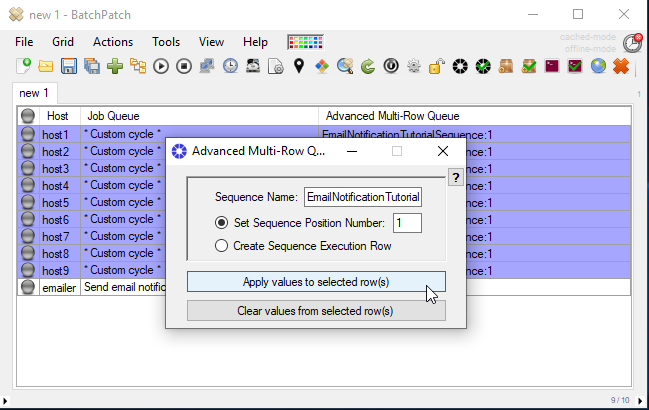

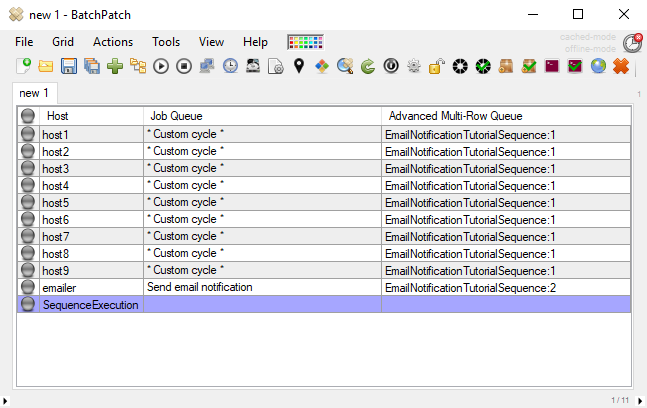
- At this point we are nearly done. All of the hosts are set for position 1, and the email notification row is set for position 2. The last thing that we need to do before we can execute the sequence is create a sequence execution row. Add another row to the grid.
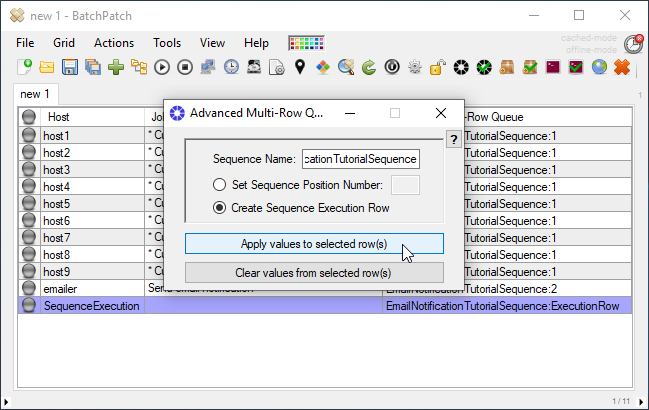
- In the advanced multi-row queue sequence, set that new row to be the execution row as illustrated in the screenshot below. Make sure to use the same exact sequence name as before.
- The last thing to do is simply execute the sequence. You can execute it manually or you can create a scheduled task to launch it on a particular time/day. To execute it manually, highlight the SequenceExecution row that you created in the previous step, and then select ‘Actions > Job Queue > Execute advanced multi-row queue sequence‘. Alternatively, setup a scheduled task on that same SequenceExecution row by selecting the row and choosing ‘Actions > Task Scheduler / Create/modify scheduled task‘. More on scheduled tasks is available here.