

Many environments will be ready to use BatchPatch without any special or additional configuration required, but some might require a few tweaks in order for everything to work properly. If it’s the first time you’ve used BatchPatch, check out the ‘Getting Started‘ guide to learn how to configure your computers and network for BatchPatch.
Once you have everything configured properly, it’s shockingly easy to download and install updates on a large group of computers, en masse. It doesn’t matter if you’re using your own local WSUS server or if you’re using Windows Update or Microsoft Update. BatchPatch can work with all three. If you’re using a local WSUS, then your target computers are already going to be configured by Group Policy to point to the WSUS. When this is the case, BatchPatch should be configured under ‘Tools > Settings > Windows Update > Server Selection’ to use ‘Default/Managed’ like in the screenshot below.
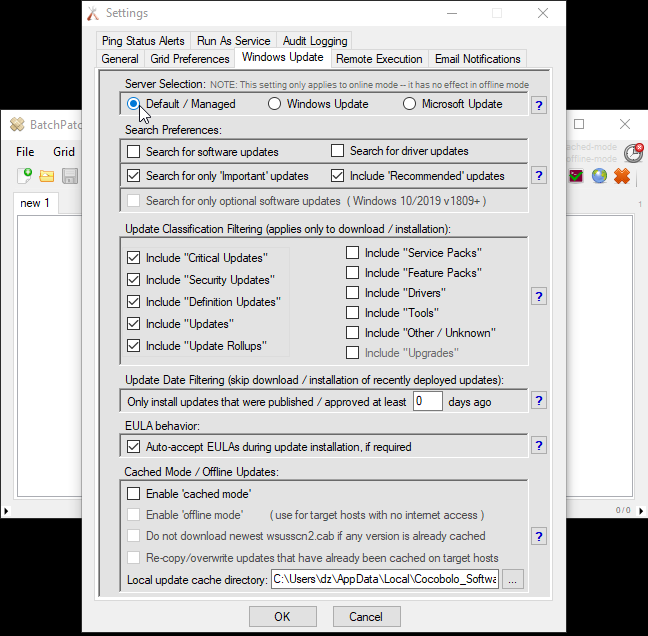
If you want to override the GPO and use Windows Update or Microsoft Update instead, then just select the desired option. For ‘Search Preferences’ we recommend that WSUS users select ‘Search for software updates’ AND ‘Search for driver updates’, and then tick every box under ‘Update Classification Filtering’ (except for “Upgrades”). This allows BatchPatch to find and download/install every possible update, which means that so long as an update is approved in your WSUS, BatchPatch will be able to find/download/install it. For people who are *not* using WSUS, we generally recommend selecing ‘Important’ AND ‘Recommended’ in the ‘Search Preferences’. Then tick every box on the left side of the ‘Update Classification Filtering’ settings. This will effectively enable BatchPatch to find/download/install the updates that Microsoft thinks you should have.
After your settings have been configured, the process is very straightforward to apply updates to numerous computers all at one time.
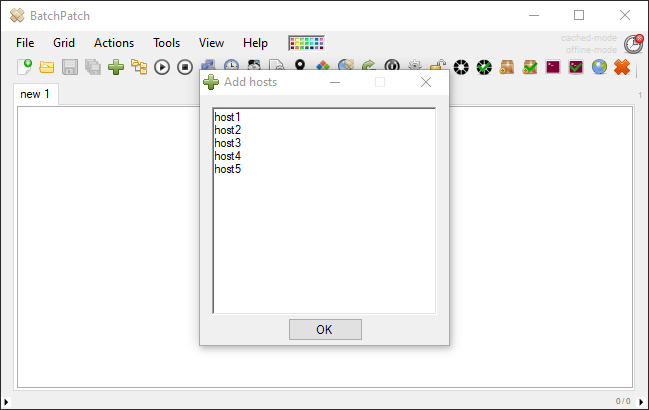
- Load the desired target hosts into your BatchPatch grid:Click on ‘Grid > Add hosts’ (or use one of the other options in that menu for importing hosts into the grid), and then add the desired hosts.
- Start the download and/or install process:Highlight the desired hosts, then select ‘Actions > Windows updates > Download and install updates + reboot if required’ to begin the download and installation process. If you want to first check to see which updates are available and would be downloaded/installed, use the ‘Check for available updates’ option or the ‘Generate consolidated report of available updates’ option.

- Monitor to completion:Once the process has begun you can pretty much sit back and watch everything happen. You’ll be able to see the status of download and installation for each target computer in the grid. As each target computer completes its update installation, BatchPatch will initiate a reboot (unless none of the installed updates require a reboot to complete) and automatically start pinging the target. You’ll be able to see the ‘LED’ status orb icon for each row (left-most column) change color as the host goes offline and comes back online, giving a very clear picture of the state of each host.