When configuring BatchPatch to work in your environment, you might have to modify your Windows Firewall rules on target computers to enable BatchPatch to work properly. As explained in this posting, BatchPatch will require inbound allowances on all target computer firewalls for File and Printer Sharing and Windows Management Instrumentation in order for BatchPatch to be able to connect to and execute actions on target computers.
In many or perhaps most network environments these allowances will already have been granted long ago because without them it’s very difficult for IT administrators to accomplish the tasks that they regularly need to accomplish. In many/most environments the necessary rules for BatchPatch to work are the same rules that are already in place for general network and system administration, so you might not need to make any changes. In fact, if you regularly ping computers on your network and/or copy files to and from them by connecting to \\targetComputer\C$ in Explorer, then these allowances likely already exist.
In the case where you don’t already have these allowances configured but you’re considering using BatchPatch, you might be wondering how to make the necessary firewall configuration changes so that *ONLY* the computer that is running BatchPatch can take advantage of them. That is, you might want to limit the IP address scope in any firewall rules that you create so that those firewall rules only apply to a particular IP address. The effect of doing this would be that after the rules are created in all target computers’ Windows Firewalls, BatchPatch will only be able to connect to those target computers if the computer running BatchPatch has a particular IP address (or is within a certain IP address range, depending on how you configure the scope).
Applying a particular IP scope to inbound rules in Windows Firewall is simple. First, make sure you have made allowances for File and Printer Sharing and Windows Management Instrumentation as described on this page. A quick review of that process is below in the first step of the tutorial. Note, you can perform this process on an individual target computer or you can make the changes via Group Policy to apply to a large group of computers on a domain. The concept is the same in both scenarios, but please note that in this tutorial my screenshots and specific instructions are based on making these changes on just a single machine, so if you’re making the changes in Group Policy there might be slight differences as compared to my notes and screenshots below:
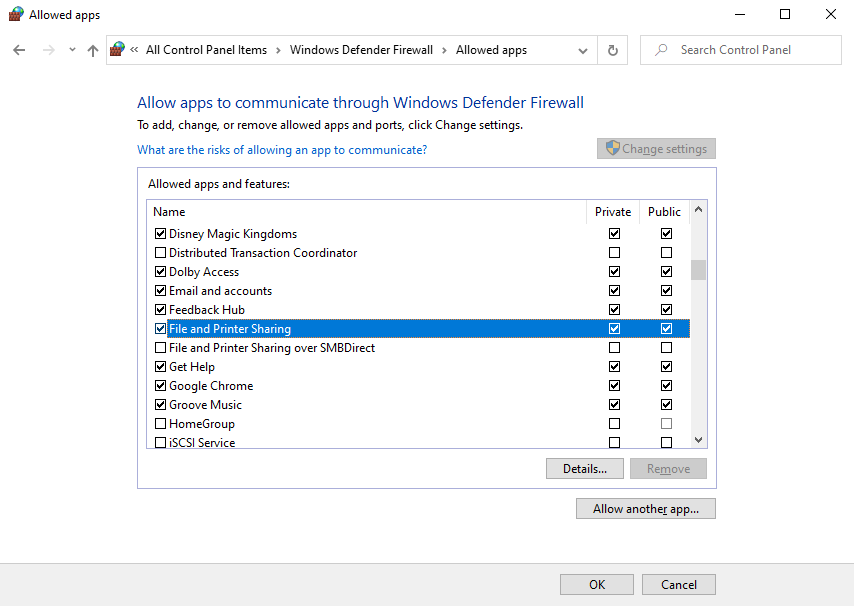
- Go to Control Panel > Windows Defender Firewall > Allow an app or feature through Windows Defender Firewall and then tick the checkboxes next to File and Printer Sharing and Windows Management Instrumentation for the firewall profile(s) that you want to modify (private/public/domain)

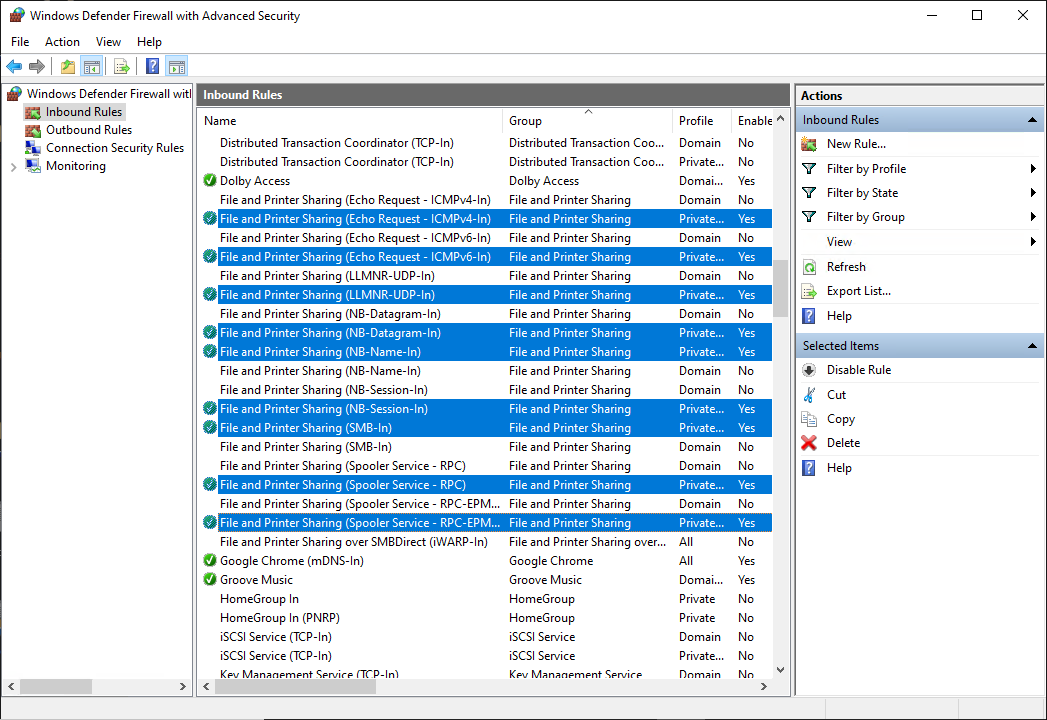
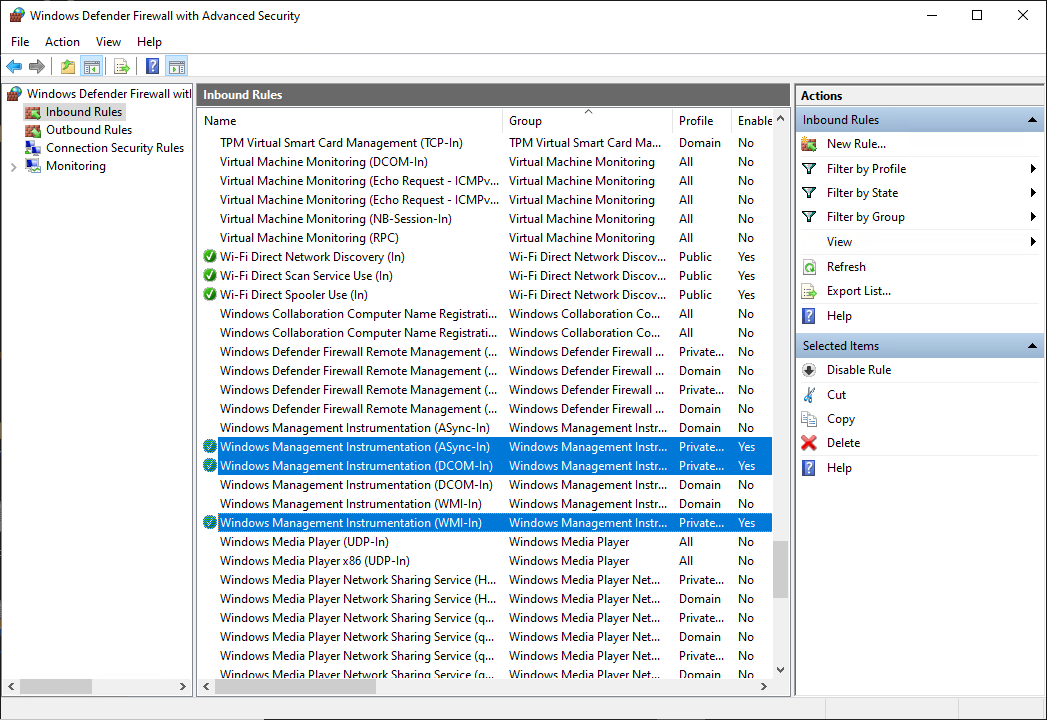
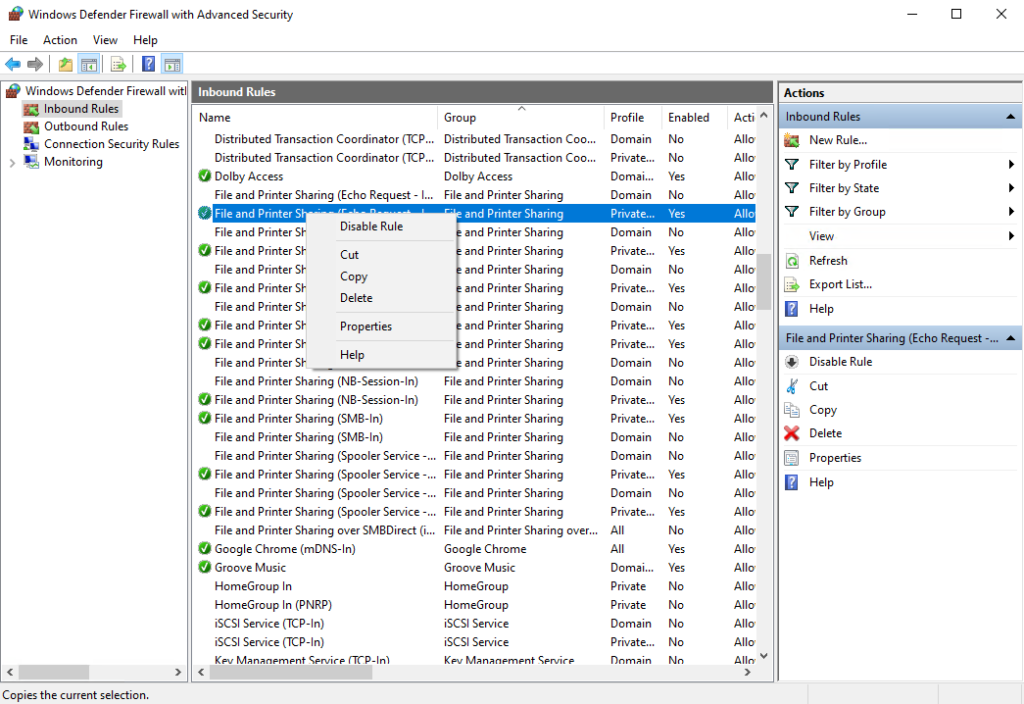
- Once the initial rules have been created, then you can modify the scope of those rules to limit which IP addresses can utilize them. Go to Control Panel > Windows Defender Firewall > Advanced settings to launch the interface for Windows Defender Firewall with Advanced Security. Click on Inbound Rules on the left-pane of this interface. In the screenshots below you can see that I’ve highlighted all of the individual inbound rules that I will be modifying.


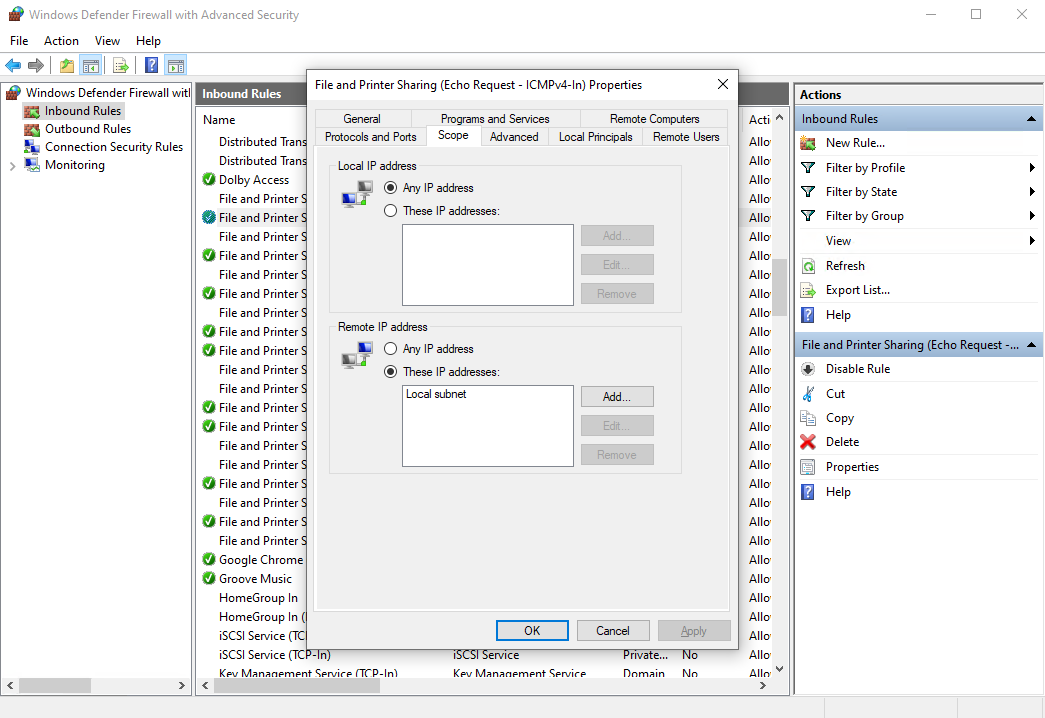
- At this point you are going to need to modify every individual inbound rule for File and Printer Sharing and Windows Management Instrumentation for the firewall profile(s) that you are using (private/public/domain). In my case I’m using the private firewall profile, so I’m only modifying the entries for the private profile. However, for your environment you might need to modify the domain profile. Unfortunately this process needs to be completed on each inbound rule one at a time. It’s not possible to perform the action in bulk on all of them at the same time. So go ahead and start at the top and highlight the first rule and then right-click on it and select Properties. In the Properties window, go to the Scope tab.

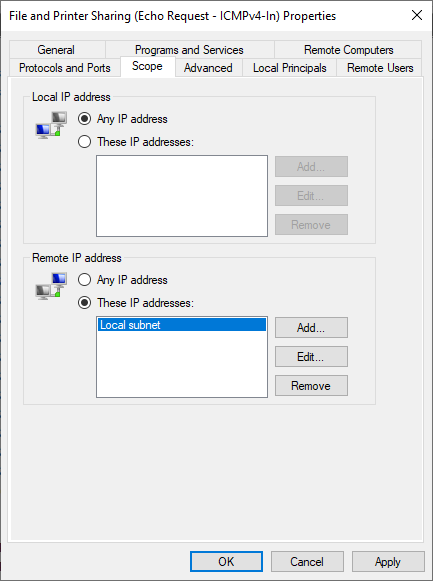
- In the Remote IP address section at the bottom of the window, highlight where it says Local subnet, and then click Edit. Select the radio button for This IP address or subnet, and then enter the IP address of the computer that you will be using to run the BatchPatch console. In my lab here it’s 192.168.1.37, so that’s what I’ve entered.
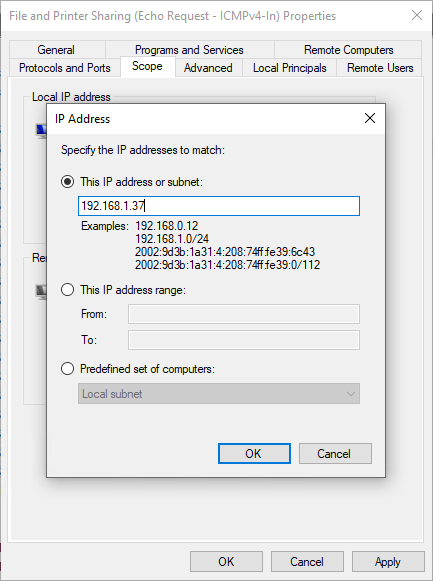
- Repeat the IP scope modification on all of the applicable inbound rules. When complete, File and Printer Sharing and Windows Management Instrumentation will be accessible on the target computer(s) from *ONLY* the IP address that you specified.