Running batch files on target computers is actually a very easy process using BatchPatch. You can execute the same .bat or .cmd file on numerous remote computers simultaneously with just a few clicks. Perhaps the only confusing aspect of this process is that we won’t use the ‘Remote process / command’ action in BatchPatch to perform this task. It may seem like the intuitive choice to use ‘Remote process / command’, but instead it’s actually much simpler to use the BatchPatch ‘Deployment’ feature to accomplish our goal here. We tend to think of deployments as being specific to installing or deploying a package on target computers, but it’s actually the simplest way to run batch files remotely too. This is because a BatchPatch deployment works by having BatchPatch first copy the desired file or files to the target computer(s), and then once the file or files have been copied, BatchPatch executes the deployment, which in the case of a .bat of .cmd means that BatchPatch will run the batch file using cmd.exe on each of the desired target computers.
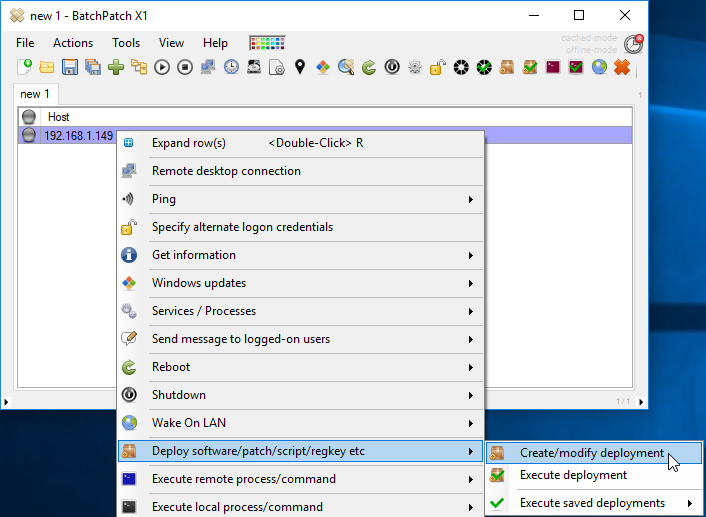
- In your BatchPatch grid highlight the rows for the desired target computers (this can be any number of rows/hosts), then click ‘Actions > Deploy > Create / modify deployment’
- In the ‘Deploy’ window that appears click the triple-dot (…) button to select the batch file to deploy. The file extension of your batch file should be .cmd or .bat
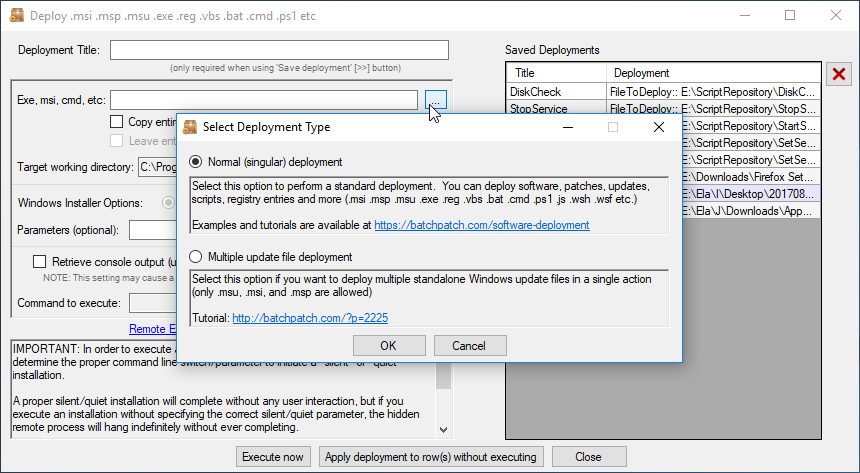
- We are going to be deploying a single batch file, so we select the ‘Normal (singular) deployment’ radio button option and then click OK to browse to the location of our batch file. Note, the ‘Multiple update file deployment’ option is only allowed for .msu, .msi, and .msp package deployments.
- In the ‘Deploy’ screen you’ll see that the filepath of the .cmd or .bat file is now displayed in the corresponding field. For the sake of this example the only text inside my .cmd file is an ‘IPCONFIG’ command, so I’m going to tick the box to ‘Retrieve console output.’ However, note that the ‘Retrieve console output’ checkbox is not compatible with all deployments, and in some cases ticking this box will cause the deployment to fail outright.
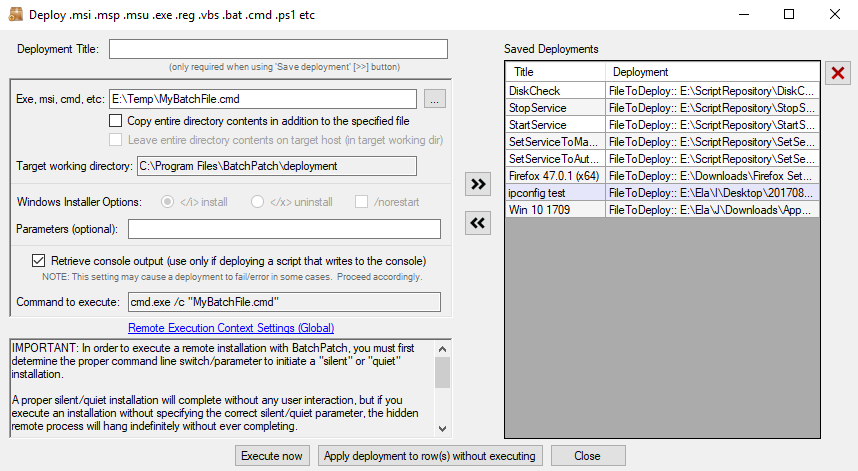
- At this point the deployment configuration is complete. It’s really *that* simple. I’m going to click ‘Execute now’ to execute the deployment for the selected row(s) in the grid, but you may optionally save the deployment for future execution by using the double-right-arrow button, or you may apply the deployment to the selected rows without actually executing it by clicking on the ‘Apply deployment…’ button.
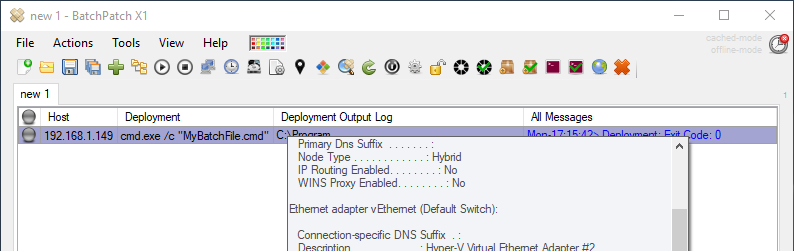
- Since my batch file contained just a single simple command it executed almost instantly. We see the ‘Deployment: Exit Code: 0’ in blue, and the output of the IPCONFIG command can be viewed in the ‘Deployment Output Log’ column. That’s all there is to it.