You can use BatchPatch to deploy virtually any type of file or package to target computers. As Windows systems administrators, we commonly have to work with .msi and .msu files, and occasionally we need to deal .msp files too. If you have a .msi, .msu, or .msp file that you need to install on numerous computers, consider using BatchPatch to perform the task. Instead of manually logging on to each target computer, you can quickly and painlessly create the deployment in BatchPatch for distribution to any number of remote computers.
Creating a BatchPatch Deployment
The process for creating a deployment for any of the aforementioned file types (.msi, .msu, .msp) is essentially the same.
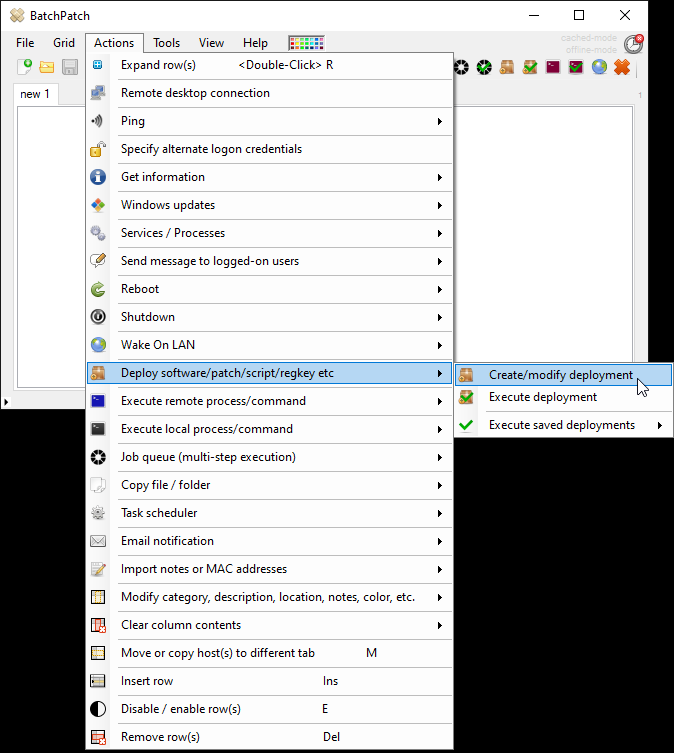
- In BatchPatch click on ‘Actions > Deploy software/patch/script/regkey etc > Create/modify deployment‘
- In the Deployment window that appears, give the deployment a title, and then in the ‘Exe, msi, cmd, etc:‘ field, browse to the file you want to deploy, or manually type the path into the field. In this example you can see that I am deploying E:\temp\Special.msi. Note, if the package that you are deploying is not a standalone package but rather is one of numerous files required for the installation, then put all of the files into the same directory, and then also tick the box to ‘Copy entire directory‘. Generally, for .msi, .msu, and .msp files, they will be standalone, but if you are using ‘Copy entire directory‘ just make sure that *only* the files that are required for the deployment are included inside the directory that will be copied. This is because any/all files in that directory will be copied to each target computer where the deployment is executed, so you’ll want to ensure that only the needed files are copied, otherwise the deployment will take longer to execute, and you could even potentially end up with a disk space issue on target computers if you have very large unneeded files in the directory that is being copied.
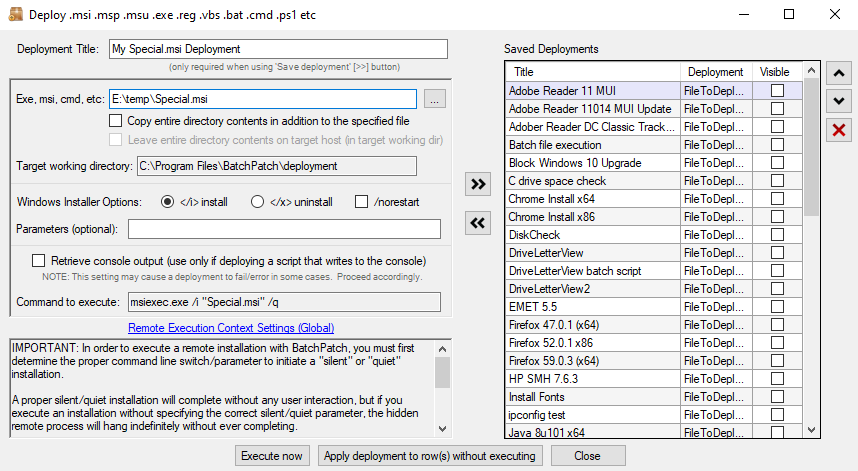
- You can save the deployment by simply clicking on the double-right-arrow button. Once saved, you’ll see it appear in the list of ‘Saved Deployments’ on the right-hand side of the Deployment window. You have a couple of options for actually executing your deployment.
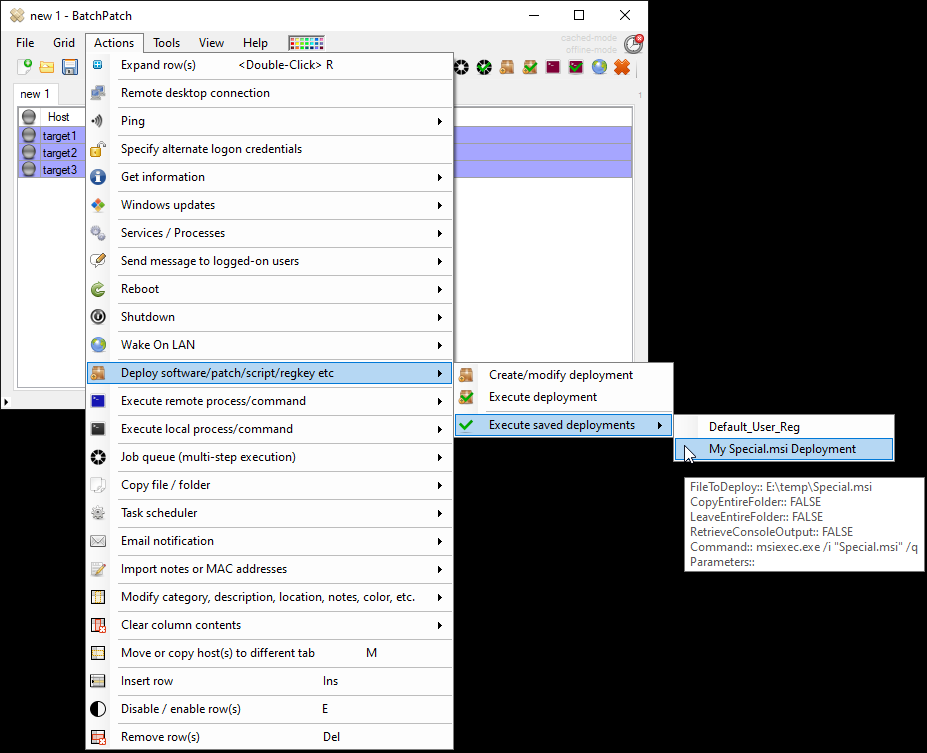
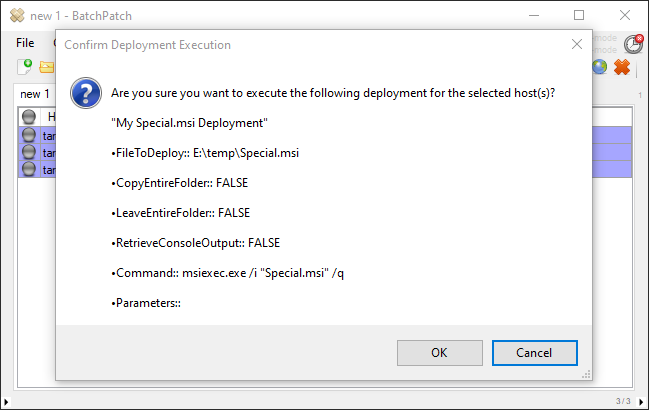
- If you click the ‘Execute now‘ button inside of the Deployment window, BatchPatch will immediately launch the deployment for any rows that are currently selected/highlighted in the grid. However, if you are not ready to execute yet, you can just close the Deployment window until you’re ready. Then when you’re ready, go ahead and select/highlight the desired target computers in your BatchPatch grid, and then click on ‘Actions > Deploy software/patch/script/regkey etc > Execute saved deployments > My Special.msi deployment‘