BatchPatch Tips and Shortcuts
By Scott
|
Published: January 15, 2015
- Diplaying cell contents: The quickest and simplest way to view the content of any particular cell in a BatchPatch grid is to middle-click on the cell. The middle-click button is the same as the scroll-wheel on most mouses. If you didn’t already know, the wheel is also a button that can be clicked/pushed just like a regular left or right mouse button. Middle-click a cell to quickly view its contents.
- Moving the cell contents tooltip/window: After you display the cell contents with middle-click, sometimes you might want or need to move the tooltip that is displayed to a new location. You can do this by right-clicking anywhere on that tooltip/window. Then just drag it to the desired location.
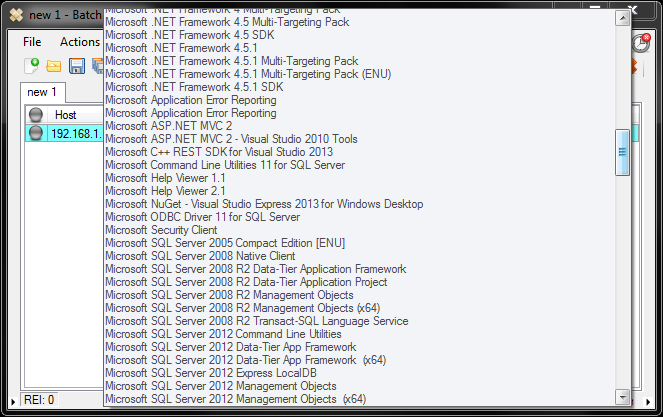
- Expanding row contents: You can double-click on any row in the grid to display the entire row’s contents in an HTML formatted window. If you want to view the contents of more than one row at a time, then simply highlight the rows and press the ‘R’ key on your keyboard. Alternatively you may right-click on the selected rows and then click the option to ‘Expand row(s)’

- Moving rows up/down in the grid: You might not have realized that you can move individual rows or groups of rows up and down in the grid without sorting the entire grid. Highlight the rows you want to move and then hold down the CTRL key and press the + or – key to move the rows up or down.
- Adding/removing buttons on the ToolStrip/ToolBar: Select ‘Tools > Customize visible toolstrip buttons’, and then check or uncheck the items you want to add or remove. If you ever want or need to reset the ToolStrip back to its default configuration, you can do that by selecting ‘Tools > Reset toolstrip to default configuration.’
- Re-arranging icons/buttons on the ToolStrip/ToolBar: Hold down the ALT key, and then select the button you want move with left-click. Drag it to a new location on the ToolStrip and it will stay there. If you ever want or need to reset the ToolStrip back to its default configuration, you can do that by selecting ‘Tools > Reset toolstrip to default configuration.’
- Toggling the grid border style: Pressing CTRL-B will toggle through the 4 possible grid border style options. You can have no cell borders, horizontal borders only, vertical borders only, or both horizontal and vertical borders, which is the default configuration.
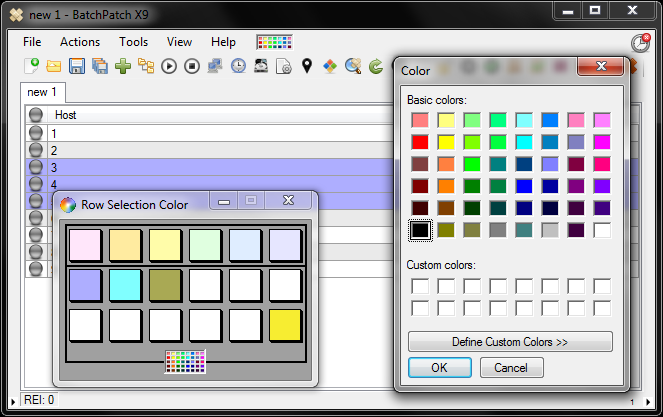
- Modifying the row selection color: If you don’t like the default yellow row selection color, make it any color you want. Select ‘Tools > Row selection color’ or simply click on the color palette icon in the menu strip. You’ll be presented with a new window where you can either select one of the out-of-box colors or set your own color by clicking on the color palette.
- Changing the intensity of the alternating row background color: There is a tiny little arrow icon in the lower-left corner of the BatchPatch window. Clicking this icon reveals a slider that lets you change the intensity of the gray row background color for alternating rows in the grid. You can disable it altogether by dragging the slider to the lowest possible position.
- Transparency: Yes, it’s true that BatchPatch supports transparency, if you so desire. This is one of those features that we included for fun, simply because we could (not because we think it’s useful). 🙂 In the lower-right corner of the BatchPatch window there is a tiny arrow icon. If you click on this icon a slider will appear. Lower the slider if you want to make the BatchPatch window transparent.
- LED images: The column that appears farthest to the left in the BatchPatch grid contains ‘LED’ images to indicate online/offline status of computers in the grid. While these LED images will change color when a row is rebooted or pinged, did you know that you can also control these images independently of what actions are executed for a given row? For example, if you load a list of hosts into a grid, you can simply left-click on the LED image row header to start (or stop) an online/offline check for all hosts in the grid. Furthermore, if you middle-click the LED image row header, all LED images in the grid will be reset to gray. Middle-clicking the LED image of a specific row will disable that particular row from being included in the online/offline status check. Shift-middle-clicking a specific row’s LED image will turn that image blue, which can be used to indicate ‘completion’ if you desire.
- Importing hosts: Did you know that when importing computer names or IP addresses into the BatchPatch grid, you can simultaneously import MAC addresses and/or general notes? For example, when you select ‘File > Add Hosts’ you aren’t limited to just adding a list of computer names (EDIT 20150602: new/additional import options are available and explained here: Importing Hosts and Other Information Into a BatchPatch Grid) . If you want to add a MAC address with each computer, you can do so by formatting your list as follows:
host1#1C6F65D56413

host2#2D:5E:43:F2:21:24
If you want to populate the ‘Notes’ column for a given host, then you can use the following syntax:
host4|notes for host4

host5|notes for host5
If you want to populate both MAC and Notes for your hosts, then use this syntax:
host1#1C6F65D56413

host2#2D:5E:43:F2:21:24

host3#1B3A65B54322|notes for host3

host4|notes for host4
Note, you can also create a text file using the above syntax, and then simply drag and drop the .txt file onto the BatchPatch window, or use ‘File > Open’ from within BatchPatch to browse to the .txt file.
This entry was posted in Blog, General, Tutorials and tagged shortcuts, tips. Bookmark the
permalink. Both comments and trackbacks are currently closed.

