When it comes to performing Windows updates on an entire network of computers, there are a number of things that frequently need to be addressed, depending on the size of the environment, the number of actual target systems, the service-level agreements in place, the length and frequency of the maintenance windows, and so on. When we first started working on BatchPatch one of our goals was to try to address the needs of technology administrators in a tight package that would enable scaling from small to large environments without requiring a hefty infrastructure just to run the patching tools, and without being difficult or clunky to operate. It seems like one of the common problems that sysadmins regularly face when it comes to software management tools is that if they want more features and functionality or if they have to manage a larger environment, then the software options out there for them tend to be extremely expensive or very difficult to install or challenging to learn to operate or just plain clunky and unappealing to use. And sometimes the management systems might even require numerous servers of their own, which only adds to the expense.
In BatchPatch we feel we’ve done a good job at balancing all of the elements in a package that is very small and efficient, inexpensive, and very feature-packed. There are features in BatchPatch that “just work” that you simply will not find anywhere else. And many of the features that do find somewhere else were directly lifted from BatchPatch anyway. However, we believe even with that being the case, the value offering that BatchPatch provides simply cannot be matched. In the large majority of cases BatchPatch pays for itself in time saved usually in just the first or second use.
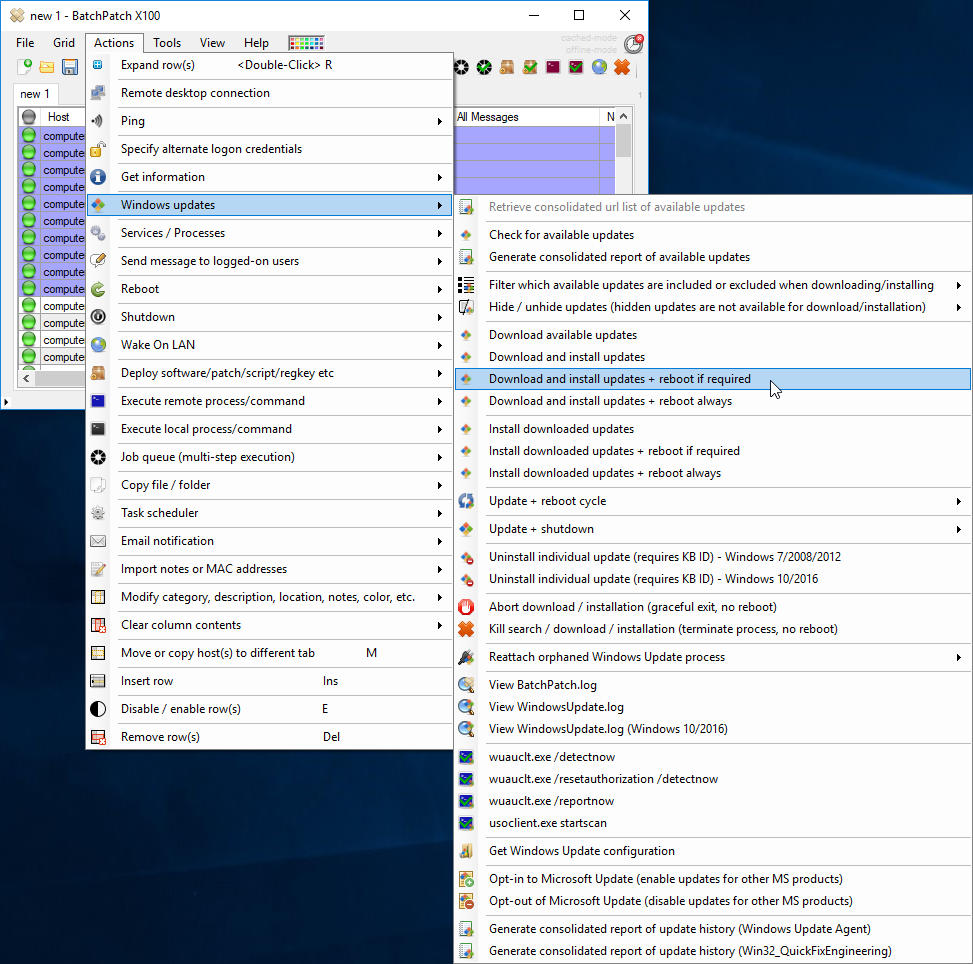
Today let’s review, at a basic level, how to use BatchPatch to accomplish your Windows update and general patch management tasks. The main BatchPatch interface is a grid, similar to a spreadsheet, that allows you to simply populate it with a list of target servers (or workstations, laptops, etc). There is no complex or time consuming process for adding new hosts, and you don’t have to wait around to deploy a persistent agent to targets. You can simply type the name or IP of computer, and then you’ll see it appears in the grid instantly. Alternatively you can query your Active Directory OUs and groups as another method to populate the grid, and of course you can always drag and drop (or use ‘File > Open’ or ‘File > Import’) to get an existing list of computers into the grid from a text file, CSV file, or a similar delimited file. Once you have hosts in the grid, you can simply highlight/select the desired ones, and then choose an option to execute from the ‘Actions’ menu or the ‘right-click’ menu. So in the screenshot below you can see that with the selected hosts I am about to choose ‘Download and install updates + reboot if required.’ All of the selected hosts will begin processing updates right away, and BatchPatch will monitor their statuses during the entire process, showing the completion percentage of the download and then the completion percentage of the install. Then finally when the update installation has completed, BatchPatch will initiate and monitor the reboot process until the computer is back online. It’s just as simple as that to execute virtually all of the different available actions/options in BatchPatch.