If you want to have BatchPatch automatically synchronize a grid with certain Active Directory organizational units (OUs) and groups at a scheduled time, you can do this now using the Task Scheduler in BatchPatch.
The idea here is that instead of manually adding and/or removing computers from your BatchPatch grid, you can link a grid with any number of Active Directory OUs and groups. Then if you add or remove computers from the Active Directory OUs or groups that are linked to a grid, you can update the grid with the AD changes by simply synchronizing the grid with the linkes OUs and groups. We have a tutorial that demonstrates the basic synchronization functionality here, but today I’m going to show you how to synchronize the grid with a scheduled task instead of kicking it off manually.
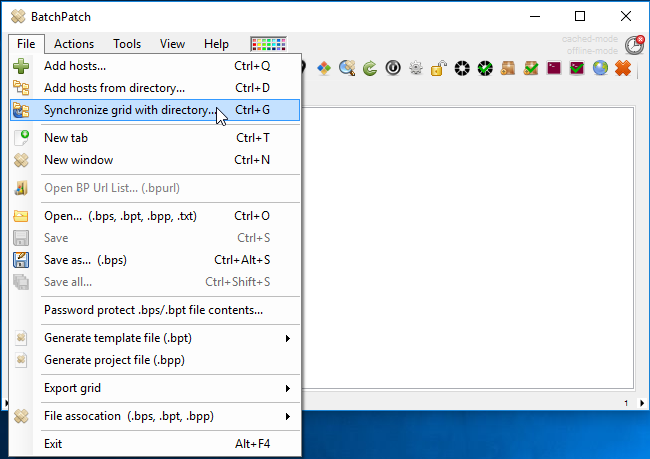
- The first thing you need to do is link your grid to the desired OUs and/or groups in Active Directory. To do this select ‘File > Synchronize grid with directory‘

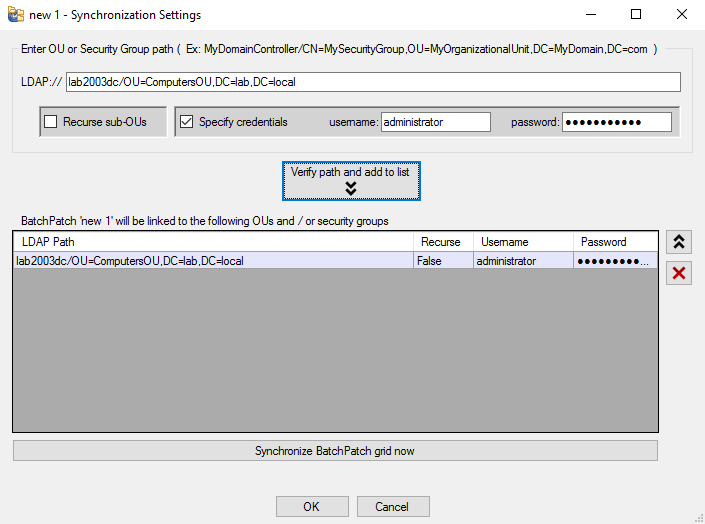
- In the window that appears enter a single LDAP path to a security group or an organizational unit.
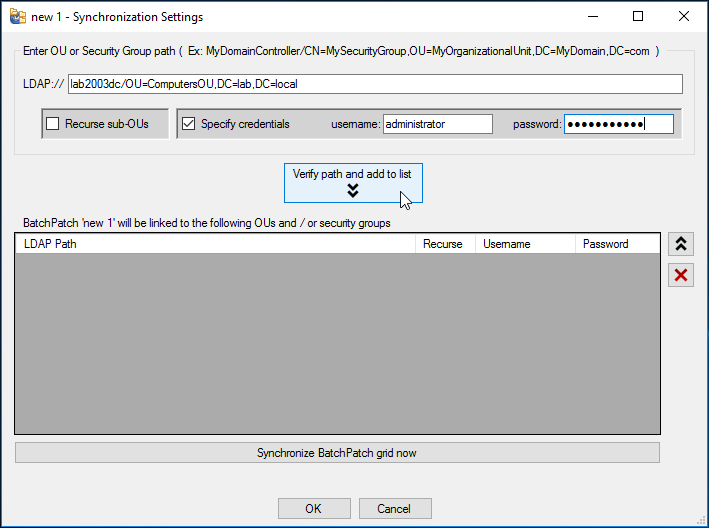
- If the logon account that you are using to run BatchPatch is not on the domain of the OU/group that you are adding or simply does not have the required permissions to view the directory, then you’ll need to specify credentials, which you can see I’ve done in the screenshot above. You also have the option to check the ‘Recurse sub-OUs‘ box. This means that the search for computers will include not only the computers in the specified LDAP path but will also contain computers in any sub-OUs in that same path. After you have entered the desired LDAP path, click the button to ‘Verify path and add to list.’ BatchPatch will attempt to connect to your Active Directory at the specified LDAP path. If successful it will list the computers in the specified OU or security group.
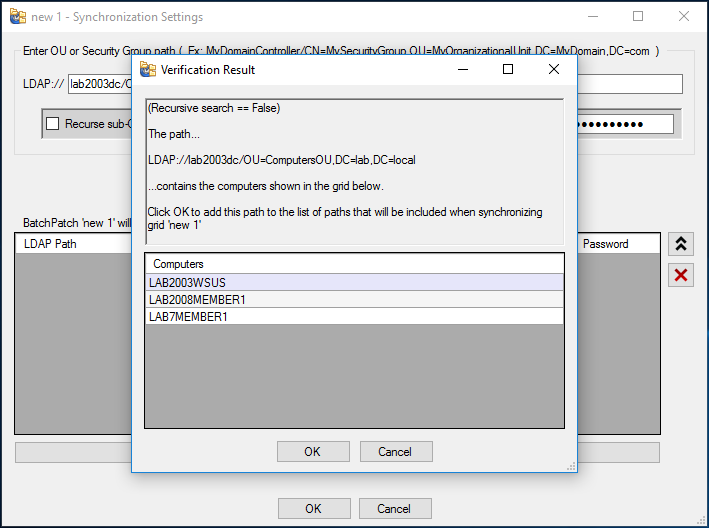
- The computers contained in the specified OU or group will be listed. This simply helps you verify that you have entered the correct path information to the desired security group or OU. Click OK to include this LDAP path. You’ll see that the path will be added to the list below.
- You may link a single BatchPatch grid to any number of OUs and/or security groups. In the screenshot below you can see that I have my grid linked to two different OUs.
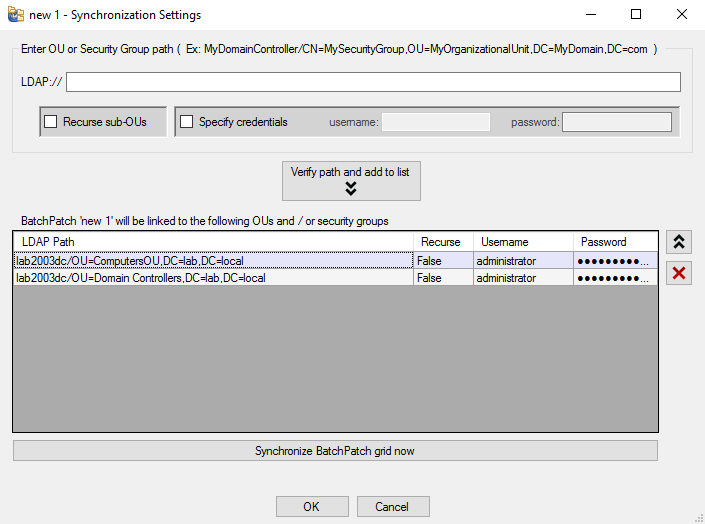
- At this point if you want to complete a manual synchronization you could simply click the button ‘Synchronize BatchPatch grid now.’ Doing so would initiate a search for all computers in the specified OUs and security groups. You would then be prompted to add those computers to the grid, or if any computers were found in the grid that were not found in the OUs and groups, you would be provided the option to remove those computers from the grid too.
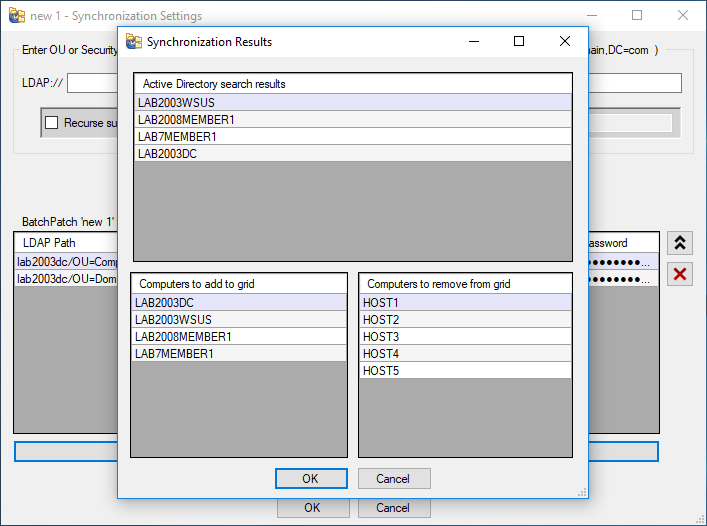
- However, for the sake of this tutorial we are not going to complete the synchronization right now. Instead, cancel the Synchronization Results window and instead just click OK on the Synchronization Settings window. Now your LDAP paths are linked to the grid, which means you can initiate the synchronization via scheduled task.
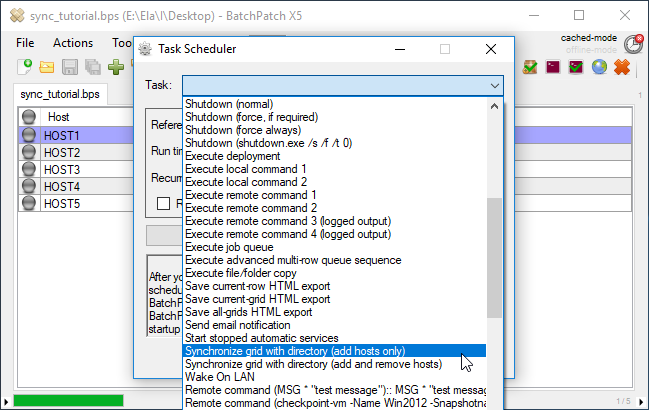
- At this point I’m going to select any row in the grid. You could even create a “dummy” row that is expressly for the purpose of synchronizing your grid to AD. To synchronize the entire grid you only need to create a scheduled task for a single row. With the desired row selected, click ‘Actions > Task scheduler > Create/modify scheduled task’.
- In the Task Scheduler window that appears choose a synchronization task from the Task drop-down menu. Choose either ‘Synchronize grid with directory (add hosts only)‘ or ‘Synchronize grid with directory (add and remove hosts)‘. Then set a task time/day, and click OK. Make sure to enable the task scheduler by clicking the small clock icon in the upper right corner of the BatchPatch window. Green is enabled. Red is disabled. If the scheduler is disabled, no scheduled tasks will be executed.
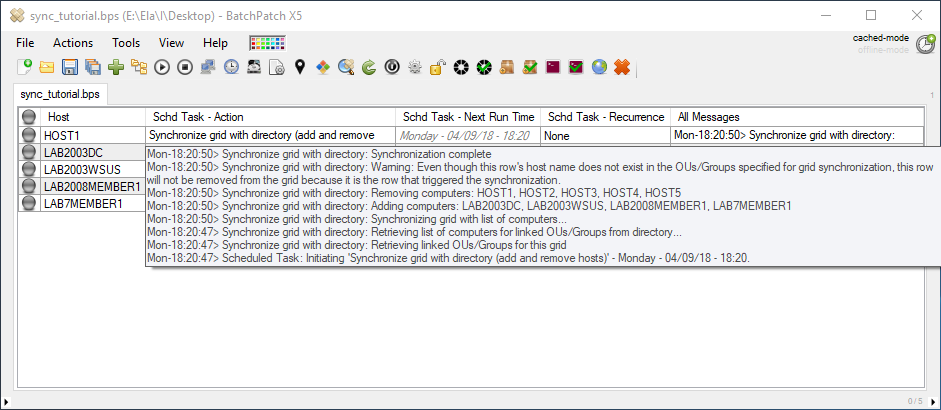
- I have selected the ‘add and remove hosts’ option so that when the grid synchronization completes, not only will hosts that exist in the OUs/groups be added to the grid if they are not already in the grid, but also any hosts that appear in the grid that do not exist in the linked OUs/groups will be removed from the BatchPatch grid. Note, the row that initiates the synchronization will not be removed from the grid even if it does not exist in the linked OUs/groups. Also note, if BatchPatch fails to connect to one or more of the linked OUs/groups, no host removal will occur. In that case only host addition will occur. BatchPatch errs on he side of caution in this case to prevent erroneous removal because if a linked OU or group cannot be searched for whatever reason, BatchPatch does not know if that OU or group would contain hosts that might otherwise be removed from the grid, so BatchPatch simply leaves them as-is and does not remove them from the grid.
When the task is executed the hosts that exist in the OUs and groups that do not already exist in the grid will be added to the grid. The hosts that exist in the grid that do not exist in the OUs and groups will be removed from the grid, with the exception of the host/row that executed the scheduled task, as mentioned above.