I thought I’d spend a few minutes today to demonstrate how to install the Adobe Flash plugin to numerous computers, simultaneously, in just a few clicks.
- Obtain the installation media. In this example we’re going to use the .msi installer file that Adobe makes available. I recently tried to use the .exe that they publish, but at least at the time of this writing it doesn’t seem to support a quiet/silent command line installation, despite their documentation saying that it does. Adobe has a specific distribution license agreement that you are likely required to agree to before you may distribute Adobe Flash in your environment. The following link has more information about that, and of course it’s your responsibility to make sure you are properly licensed before proceeding with a deployment: Adobe Flash Player Distribution.
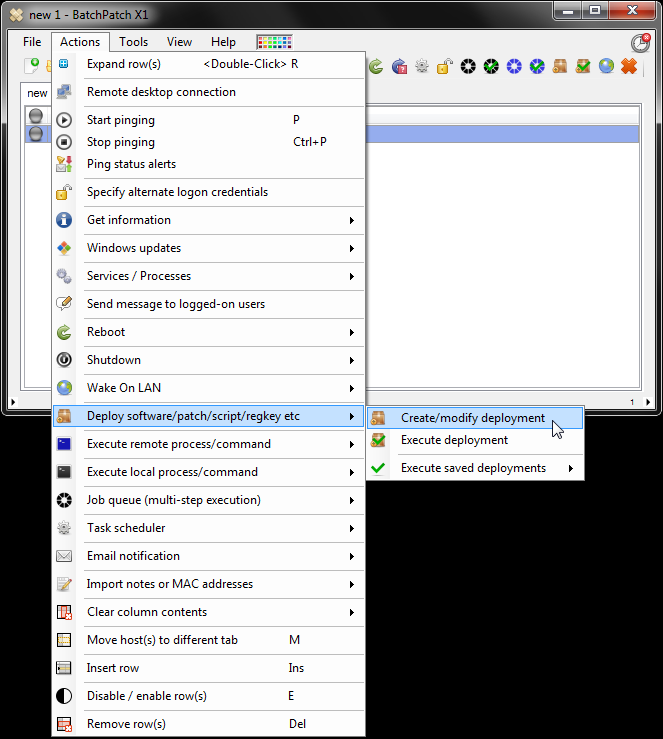
- Once you have obtained the .msi installer file, the process for deploying it to your computers is very straightforward. Add your hosts to the BatchPatch grid, highlight them, and then select Actions > Deploy software/patch/script/regkey etc > Create/modify deployment

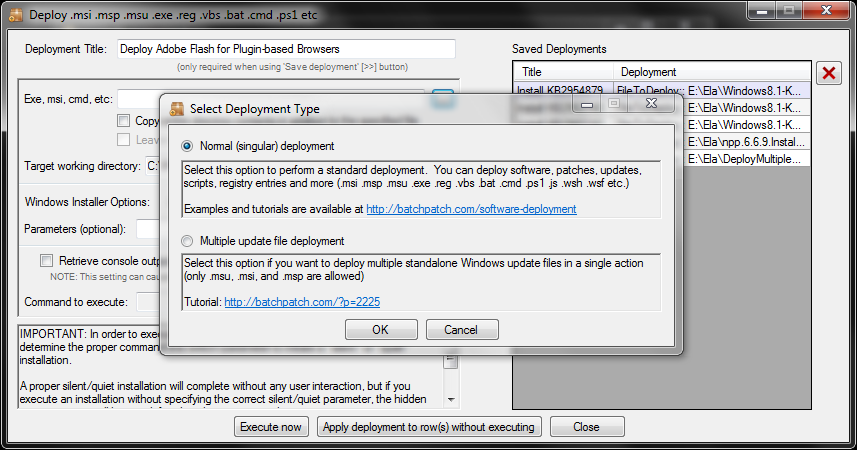
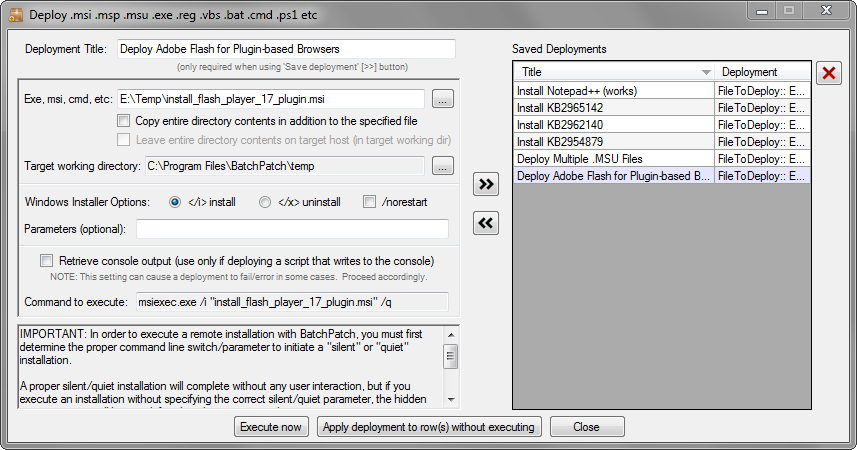
- In the deployment window, click on the […] browse button to browse for the .msi file that you obtained from Adobe. You’ll be prompted to select a Normal (singular) deployment or a Multiple update file deployment. Choose the ‘Normal (singular)’ option, and then browse to the location of your ‘install_flash_player_17_plugin.msi’ file.

- You’re now ready to execute the deployment. Your deployment window should look something like mine does in the screenshot below. You can simply click “Execute now” to deploy the .msi file to all the highlighted computers in your grid. You may optionally first save the deployment by clicking the >> button. This would enable you to easily execute the deployment at a later date/time, if you so desired.

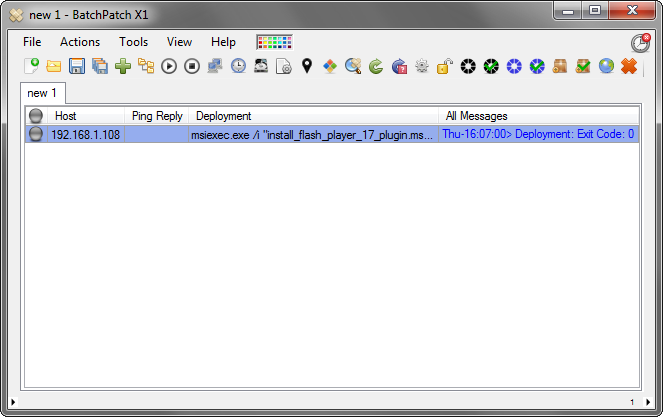
- When execution of the deployment is complete you should see Deployment: Exit Code: 0 appear in the All Messages column. That’s all there is to it! Pretty simple, right?


