It looks like the team working on Java has made it easier, finally, to perform offline installations of their software. The tutorial below takes advantage of the Java offline installer to deploy Java 8 Update 101 using BatchPatch. Note, we have an older tutorial on our site posted for deploying Java version 7 to multiple computers. However, it looks like now with the offline installer you should just be able to follow this new tutorial below, even if you are deploying an older version of Java.
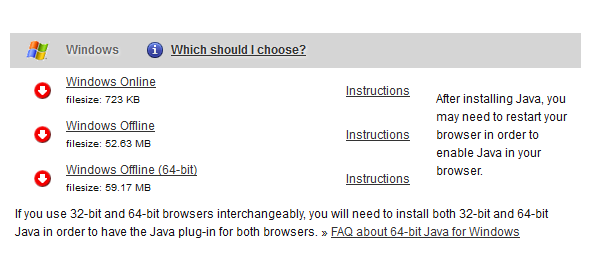
- Download the offline Java installer for Windows. At the time of this writing, the Java offline installer for Windows is available from here: https://www.java.com/en/download/manual.jsp. Make sure to get the correct version for your target OS (x64 vs x86). For this tutorial I have downloaded the file titled Windows Offline (64-bit) from their site.
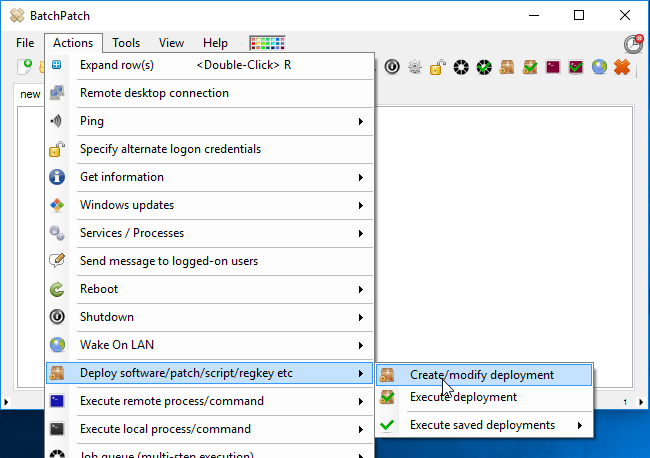
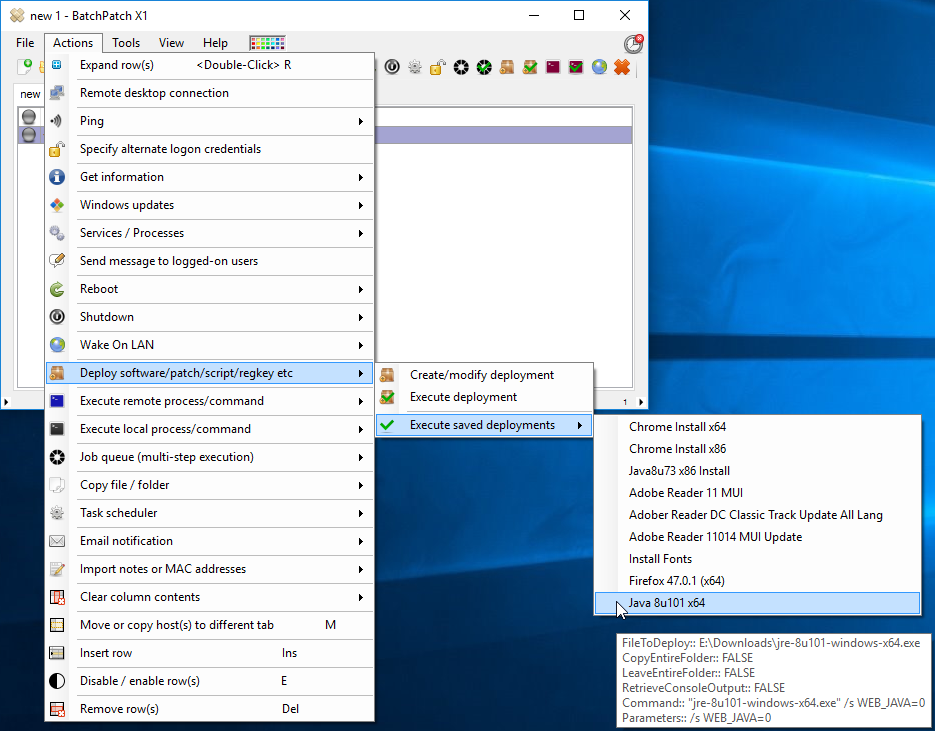
- In BatchPatch, create the deployment. Go to ‘Actions > Deploy > Create/modify deployment’
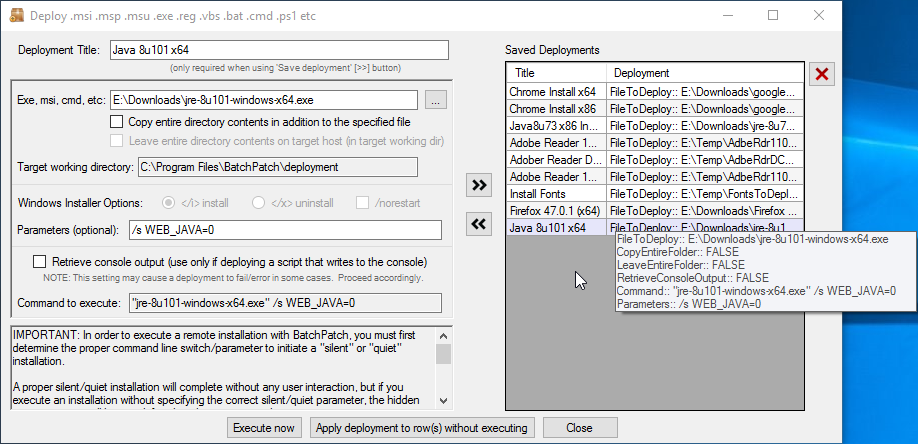
- In the deployment window, I’ve given a title to the deployment, and I have selected the jre-8u101-windows-x64.exe that I downloaded a moment ago. Additionally, I have added the following command line parameters
/s WEB_JAVA=0
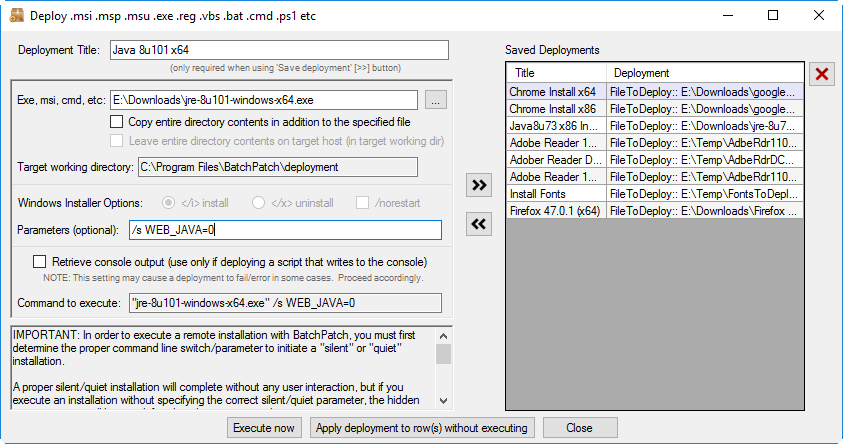
The /s tells the installer to work silently, without user interaction. This is always necessary when using BatchPatch to perform the installation. If the installer on the target computer requires user interaction, then the deployment will appear to hang indefinitely without ever completing. So, in order to perform a remote installation, we always use the silent installation parameter for the installer package. In this case that parameter is /s. The second parameter that we’re using is WEB_JAVA=0, which tells the installer to configure the Java installation to NOT be available to web browsers.
Unless you have a very strong reason to enable Java in your web browsers, it is highly recommended to disable it for the sake of protecting your computers. Java enabled in the browser has been a major vector for delivering malware in the past decade, so it’s much safer to keep it disabled.
You can see all of the available command line installer options here: https://www.java.com/en/download/help/silent_install.xml - Before proceeding to install Java, one important thing to keep in mind is that the Java installer typically needs web browsers to be closed on the target computers. Failing to close any web browsers before installing or uninstalling Java could cause the process to hang or not complete or it might simply require a reboot in order to complete the process. Consider killing all browser sessions with Actions > Services/Processes > Kill specific running process by name to kill firefox.exe, chrome.exe, and iexplore.exe on target computers.
- At this point we’re pretty much ready to execute the deployment. If you already have your target computers added to the grid, you can simply highlight them and choose the option to ‘Execute now.’ In my case, I haven’t yet added any hosts to the grid. So instead I’m going to save the deployment using the double-arrow button >>. When you save a deployment it appears in the ‘Saved Deployments’ grid.
- I have now added my target host to the grid. I will execute the deployment by selecting my target host(s), and then choosing ‘Actions > Deploy > Execute saved deployments > Java 8u101 x64’
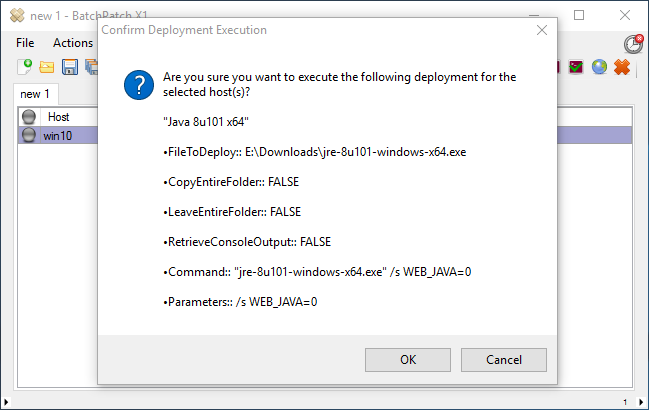
- Click OK on the deployment confirmation dialog.
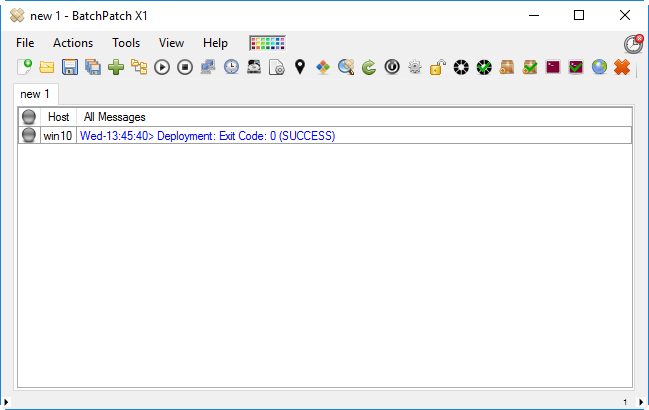
- About a minute later the deployment completes with Exit Code: 0 (SUCCESS).
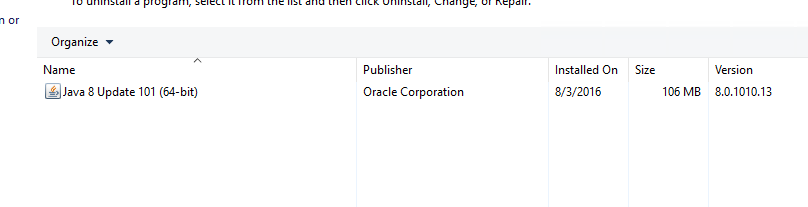
I am able to see on my target computer that the Java installation now appears in the add/remove programs wizard: