You need to install a single .MSU update on many computers, but you don’t want to log on to each computer to initiate a manual installation, and you don’t want to deal with writing a script. I know how you feel. I’ve been there many times. The good news is that with BatchPatch you can take care of the entire process with just a few clicks and a couple of minutes. Here’s how it works…
In the example below we will remotely install update KB2965142 using a standalone .msu file obtained from Microsoft.
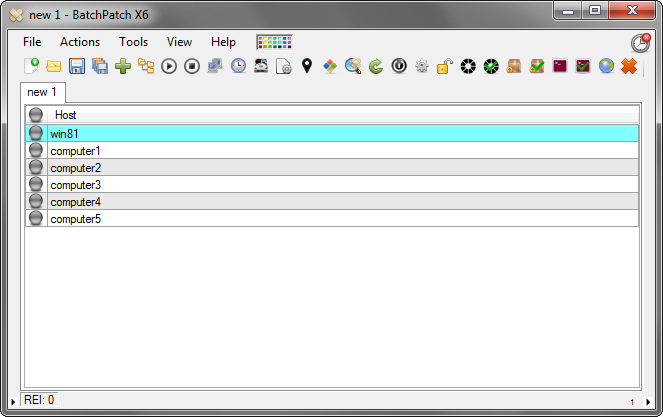
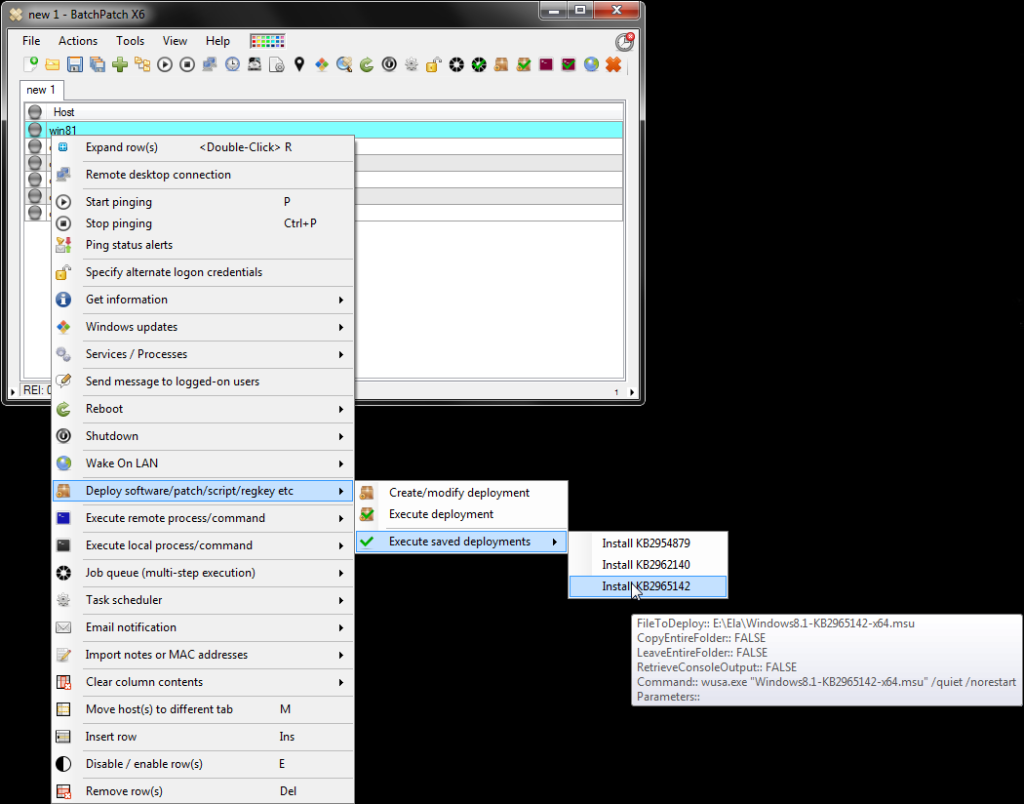
- In the BatchPatch grid, highlight the computers that you will be deploying the update to. In the screenshot below you’ll see that I’m only deploying the update to a single target computer. However, if you are working with many target computers you can simply highlight all of them instead of just one. All other steps are identical.
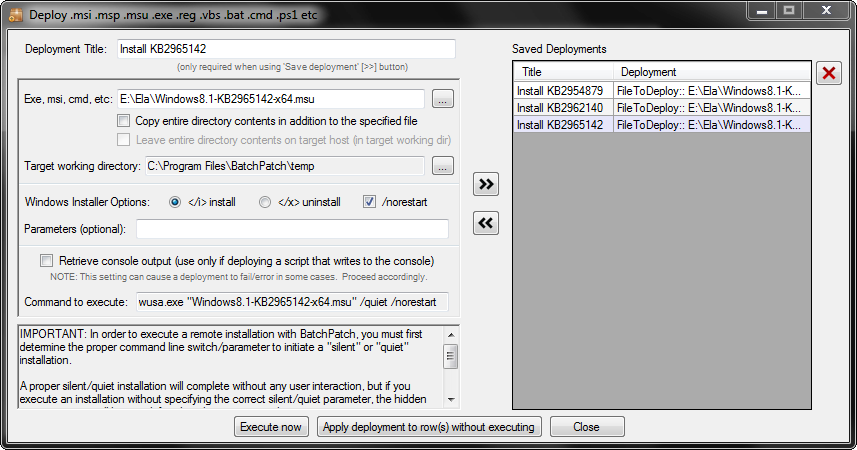
- With the host(s) selected, let’s now create the deployment by clicking ‘Actions > Deploy > Create/modify deployment.’ In the deployment window we’ll select the .msu file from our computer, and then we’ll select the ‘ install’ radio button as well as the ‘/norestart’ checkbox since I don’t want the target computer to restart on its own. We can optionally also give this deployment a title so that it can be saved for later use. In this example I’ve used the title ‘Install KB2965142.’ To save it simply click the >> button, which will add it to the list of ‘Saved Deployments.’
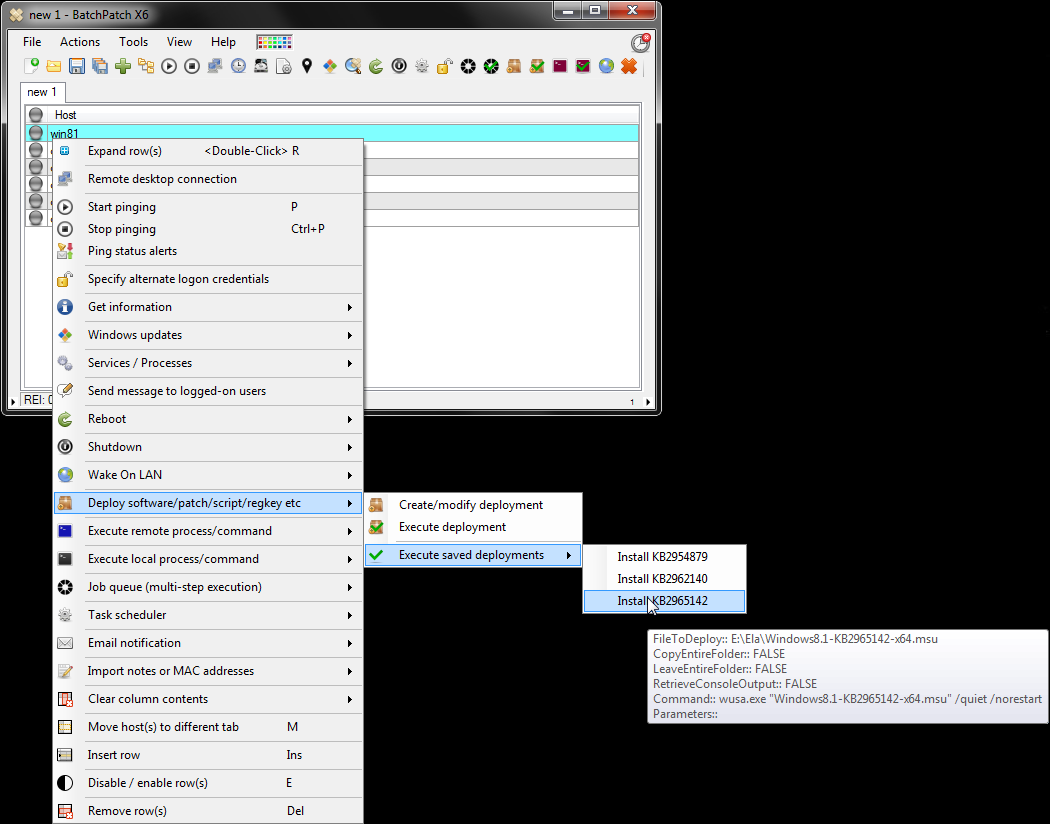
- Once the deployment is created we can either execute it immediately for the highlighted rows by clicking the “Execute now” button, or we can close the deployment window and execute it later directly from the Actions menu. In this case let’s close the window so that you can see how it works when you save a deployment before executing it. After closing the deployment window, simply highlight the hosts, right click or use the actions menu, and select ‘Deploy > Execute saved deployment > Install KB2965142.’ We can see that as soon as the ‘Install KB2965142’ is selected, a tooltip appears showing us that particular saved deployment’s configuration. The configuration is, of course, the same configuration that we applied in the previous step before we saved the deployment.
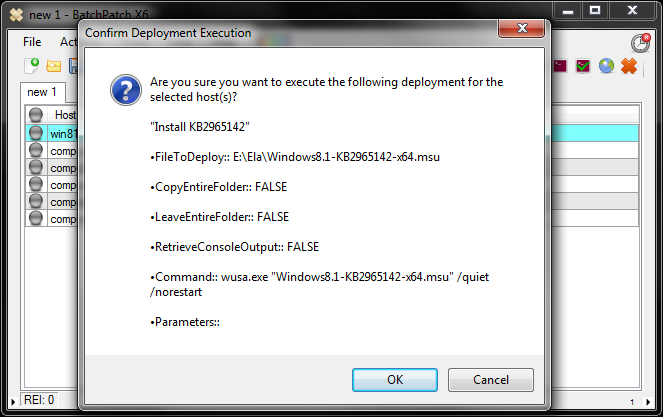
- We are now presented with a confirmation dialog, which gives us another opportunity to verify the configuration of the deployment that we are about to execute. Click ‘OK’ to begin execution.
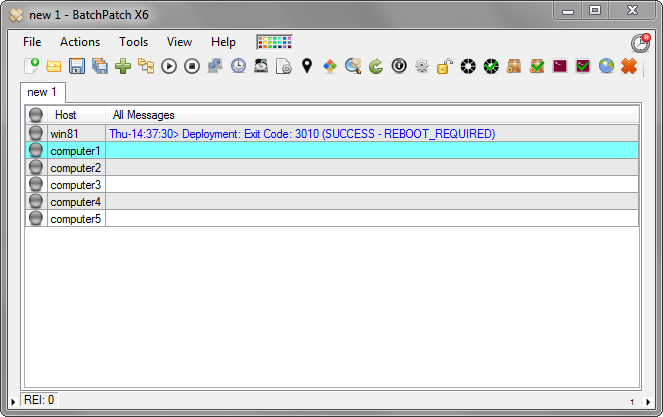
- When the installation completes we get exit code 3010, which indicates that the installation was successful but a reboot is required to complete it. We can use BatchPatch to initiate the reboot at our convenience.