I think the ‘Row Template Configurator’ falls into the category of features that most people probably are not even aware of but would use if they knew it existed. This feature was published just a couple months ago. If you haven’t yet checked it out, now might be a good time to familiarize yourself with it.
The idea is simple… each grid can have its own Row Template. You can add anything to a row template that you would add to a normal row in BatchPatch. And once something exists in the template, then when you add a new row to the grid, the new row will receive all of the values that are applied to the template row. This is particular useful for those admins who have their BatchPatch grids configured to synchronize with Active Directory. When the sync operation is performed, new rows get automatically added to the grid. If you have configured a row template for the grid, then when those new rows are added during the sync you can have them automatically include a scheduled task or job queue or deployment etc.
Here’s how it works:
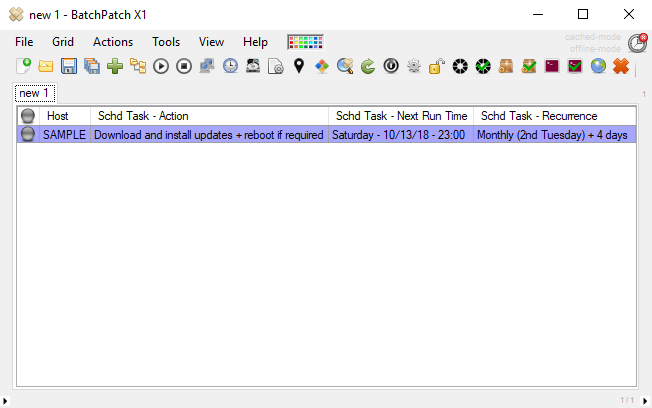
- Each grid has its own template, so to start please create a new row in the grid and add whatever you want to that row such as a job queue or scheduled task or remote command etc. In the screenshot below you can see that I have created a row and applied a recurring scheduled task to ‘Download and install updates + reboot if required’
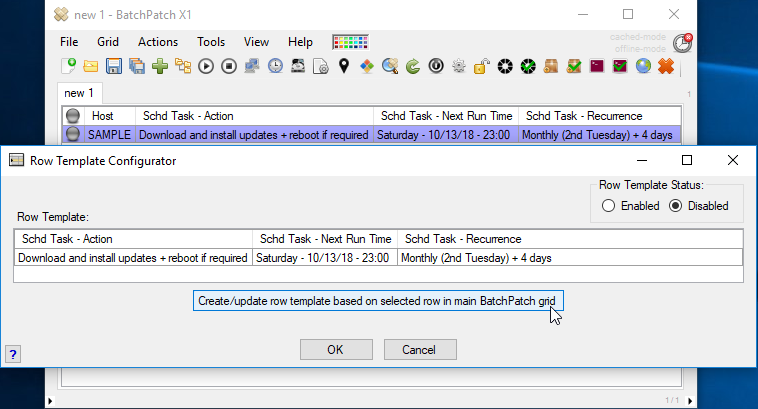
- Once you have your row configured with the desired values, it’s time to use it to create the grid’s row template. In BatchPatch click on ‘Grid > Row Template Configurator’. In the ‘Row Template Configurator’ window that appears click on the button ‘Create/update row template…’. In the screenshot below I’ve done exactly that. You can see that the ‘Row Template Configurator’ form now shows a copy of the row contents from the previous step. The Host column is excluded, of course, because the host name will never be part of the template since each row will have its own host name already.
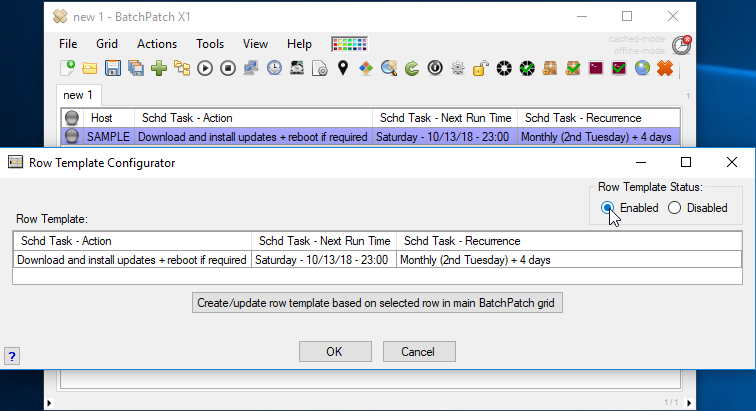
- Now that I have created the row template, if I want to activate it I need to set the ‘Row Template Status’ radio button in the upper right corner to ‘Enabled’. If it is left ‘Disabled’ then even though the row template will have been created for the grid, it won’t be active. New hosts added to the grid will not receive the template values until/unless you first enable it. In the screenshot below you can see that I have selected the radio button labeled ‘Enabled’. Click OK after enabling the template.
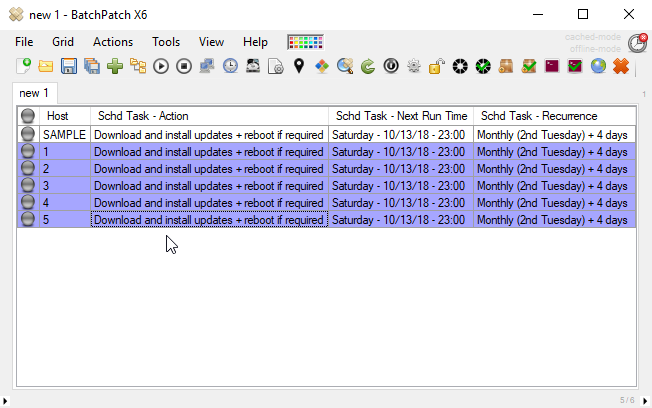
- OK, now that we’ve created the row template all we have to do is add some new rows to the grid. Notice that the new rows automatically receive the values that were included in the template. I just added 5 new hosts to the grid, and they all look the same as the original SAMPLE row. Note, the SAMPLE row does not need to be left in the grid. I’ve left it there only for the sake of illustration.