In a previous posting I demonstrated how to install Adobe Flash on numerous computers, simultaneously. In this posting I will demonstrate how to remove (uninstall) Adobe Flash from numerous computers, simultaneously.
- Obtain the installation media. In this example we’re going to use the .msi installer file for Flash player version 19 for plugin-based browsers that Adobe makes available because it seems to be the simplest to use. Adobe has a specific distribution license agreement, so you should review that before you proceed with deploying Adobe Flash in your environment to make sure that you are complying with their rules. The following link has more information about that: Adobe Flash Player Distribution.
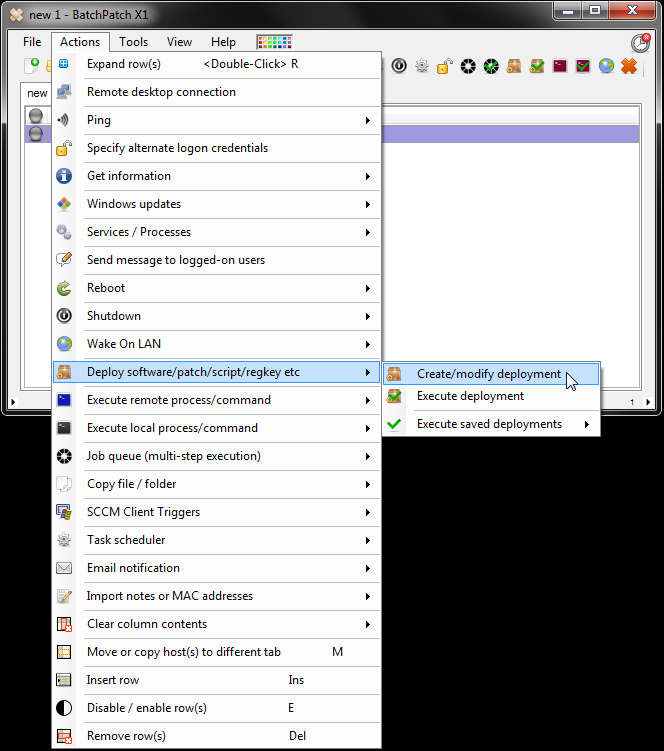
- Once you have saved the installation media to your computer, you’re ready to proceed. I’ve put the ‘install_flash_player_19_plugin.msi’ file in my E:\temp directory on the computer that is running BatchPatch. Add the desired host(s) to the grid, and then select ‘Actions > Deploy > Create/modify deployment.’
- In the Deployment window that appears, browse to the .msi file to select it. Then select the radio button option for ‘uninstall.’ Optionally give the deployment a title so that you can save it for future use. That’s all there is to the setup/configuration. Pretty simple, right?
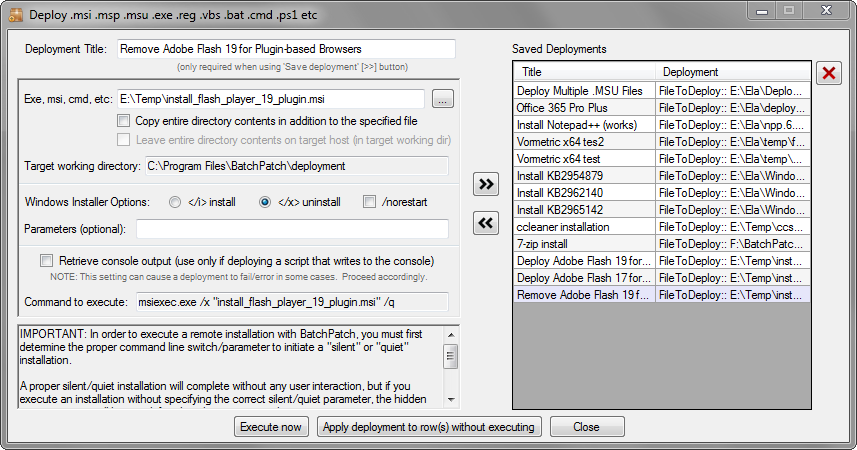
- To perform the actual removal/uninstallation task, you may select ‘Execute now’ to immediately initiate the removal for all highlighted hosts in the grid. Or if you prefer, give the Deployment a title, and then save it using the ‘>>‘ button, and then close the Deployment window so that you may execute the uninstallation later. For the sake of demonstration, I’ll show you what it looks like when we save it and execute it later.
- After saving the deployment and closing the Deployment window, I’m now left with my normal grid view. I select the host(s), and choose ‘Actions > Deploy > Execute saved deployments > Remove Adobe Flash 19 for Plugin-based Browsers,’ because that’s the title I gave it in the previous step. When I mouse over the saved deployment, BatchPatch displays the deployment’s configuration in a tooltip, so that I can quickly confirm that I’m selecting the desired one.
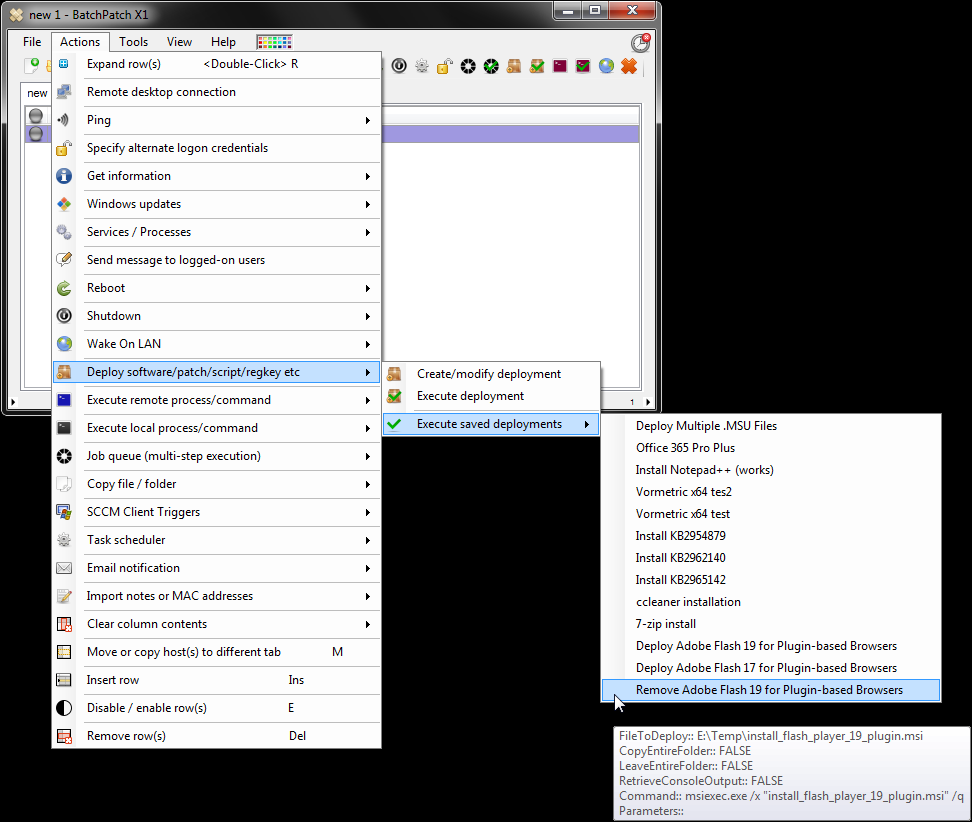
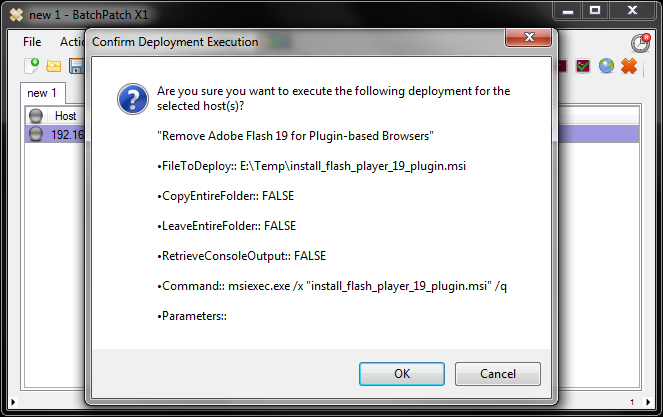
- When I click ‘OK’ I am prompted with a confirmation dialog that also displays the configuration of the deployment to be executed. The key part of the configuration (see the screenshot below) is the command:
msiexec.exe /x "install_flash_player_19_plugin.msi" /q
The /x is the removal parameter for .msi packages.
- I click OK to proceed with the uninstallation of Adobe Flash Player from the selected computers.
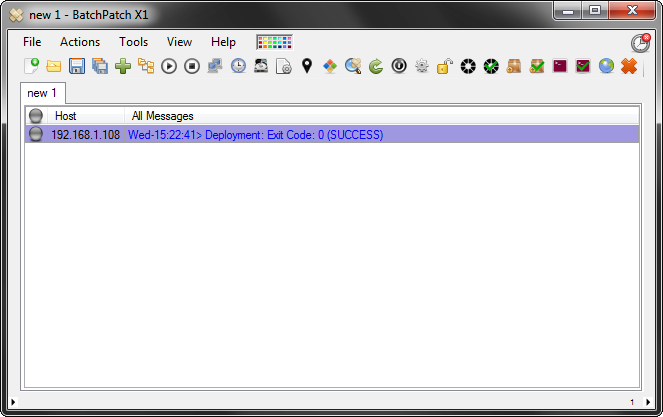
- After waiting a few seconds, the deployment is complete, and the Adobe Flash Player has been removed from the selected computer(s). We see Exit Code: 0 (SUCCESS), and we know that it’s done. We can also then confirm on the target computer that the Flash Player is gone.